- Timeline Items can be easily added to your dashboard.
1) Add Item Button in Timeline
- Click the “Add Item” button located in the top left to add a new item to your Timeline.
- Click and drag on the Timeline to give your Timeline Item a start and end date.
2) Create Timeline Items with ‘Right-Click’ Menu
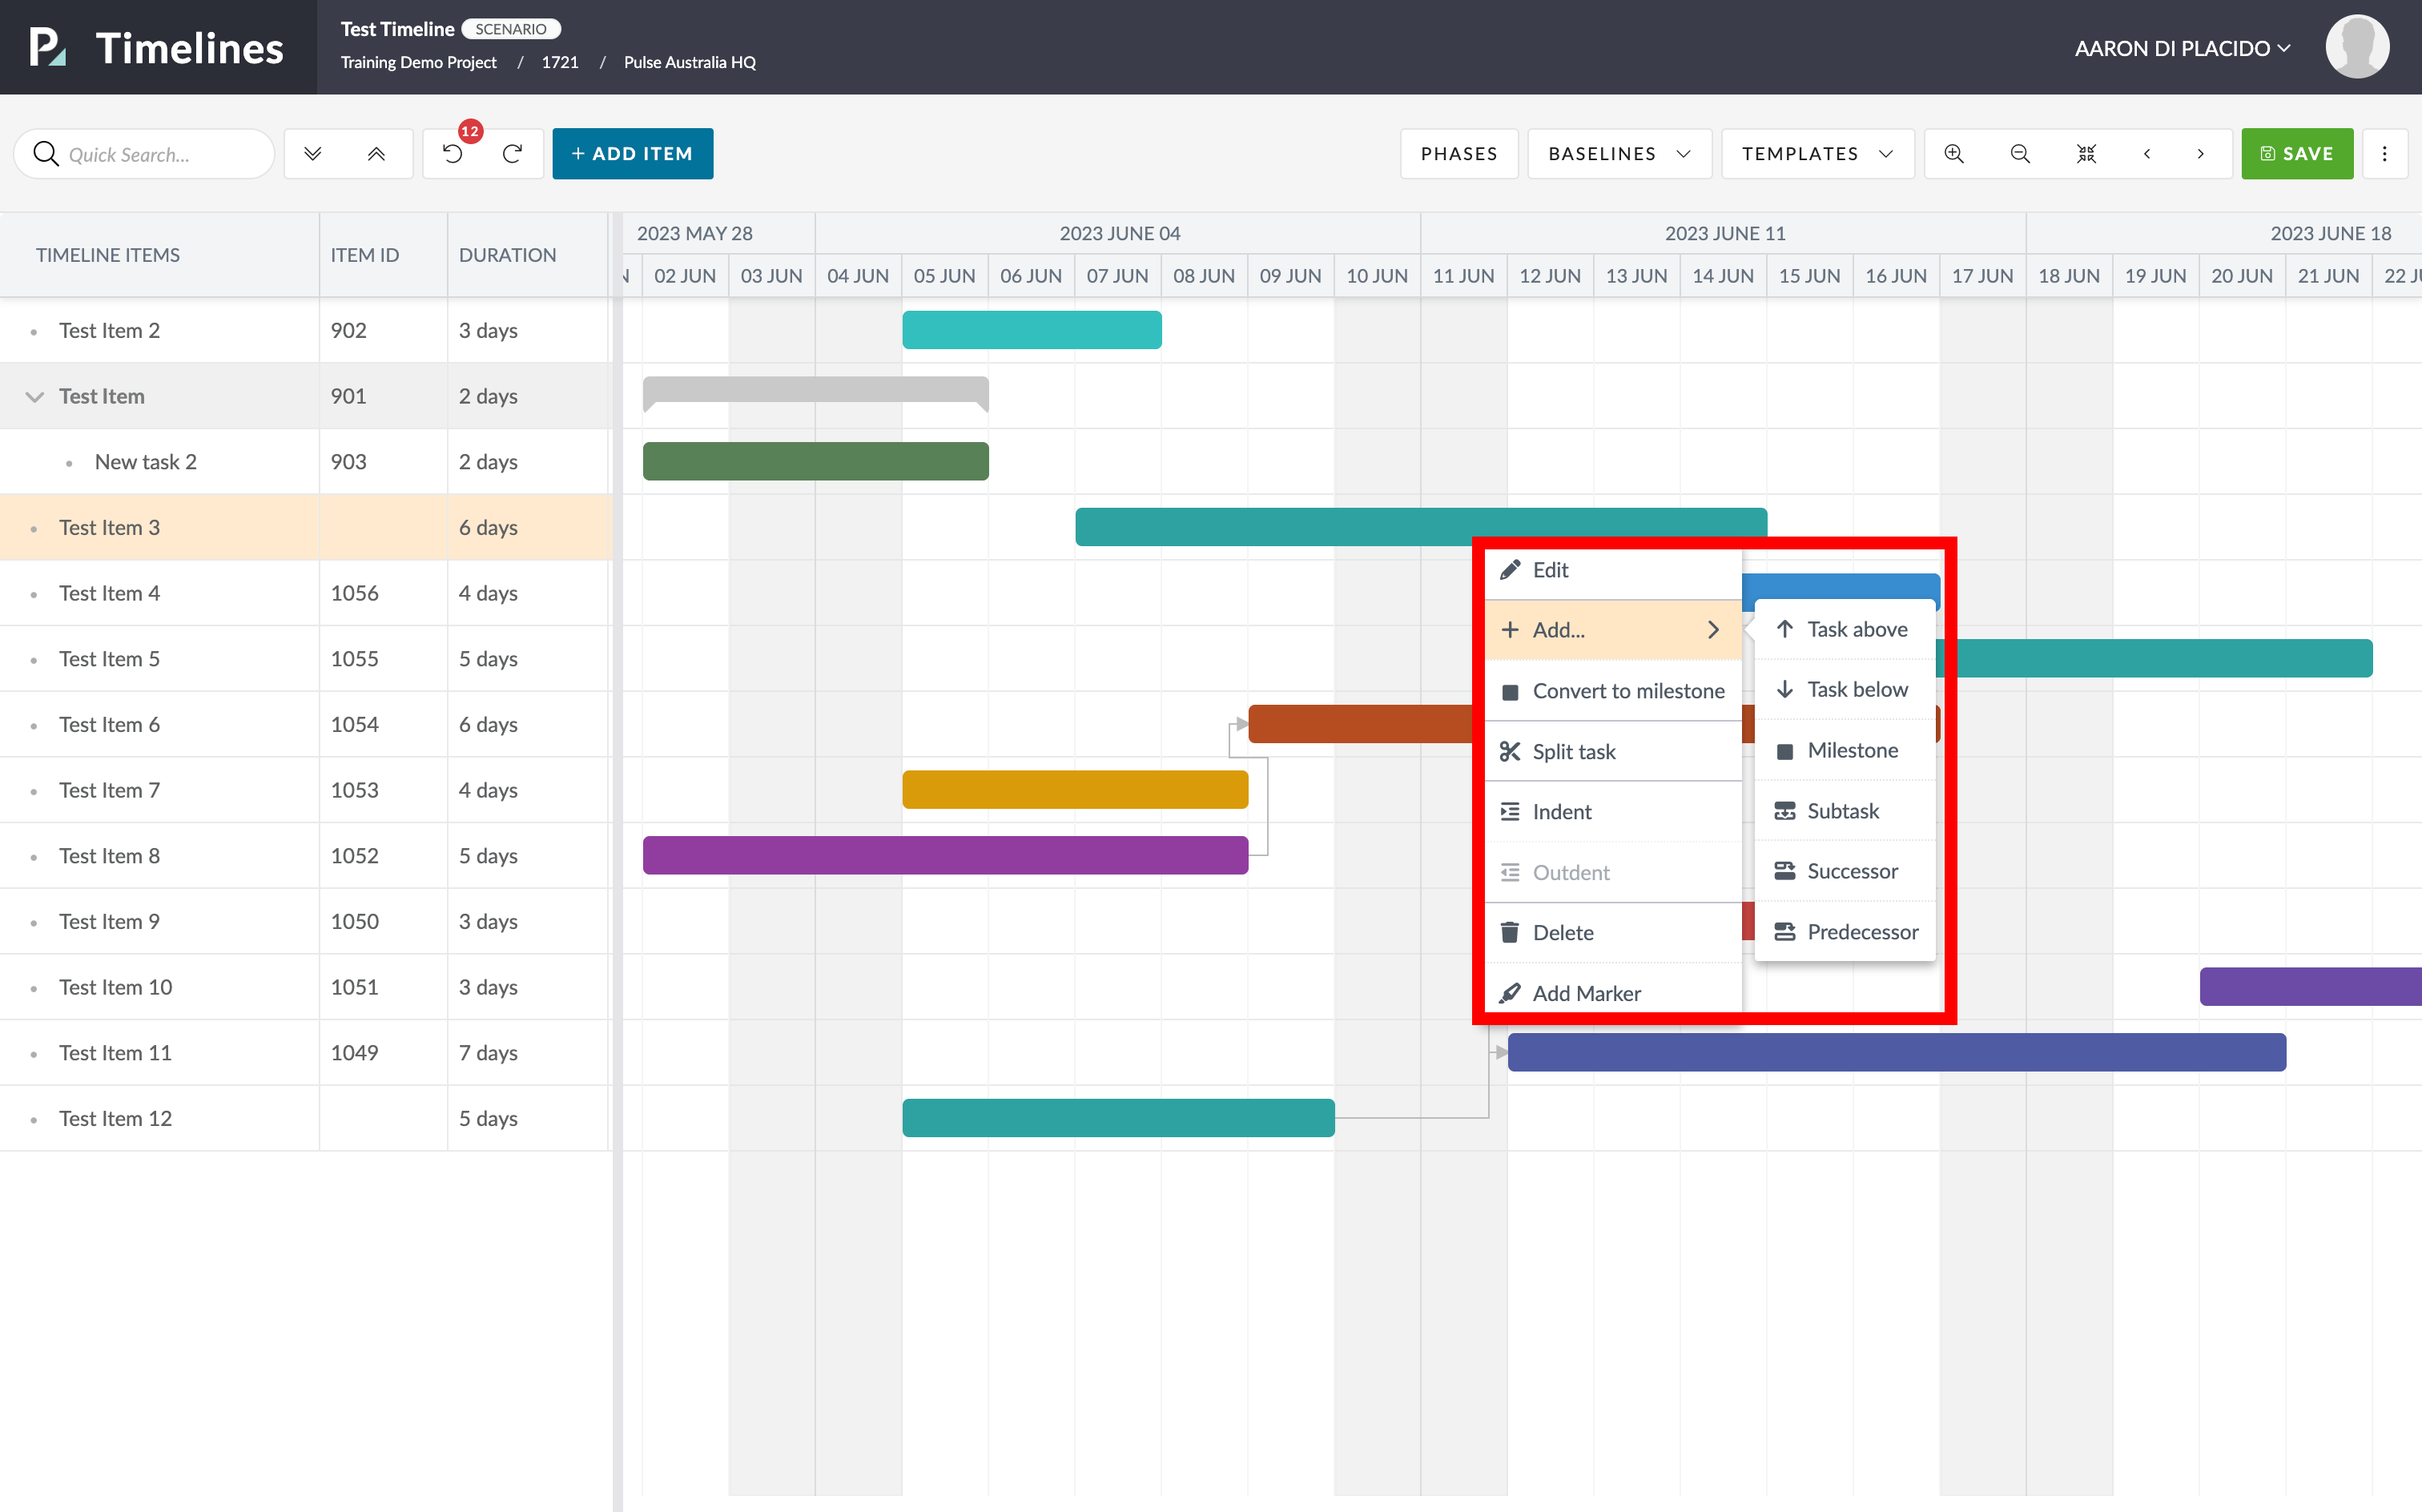
Right-clicking on your item will give you the following menu options.
- Edit
- Spilt Task
- Ident
- Delete
- Add Marker
- Task above creates an item directly above the item you right-clicked on.
- Task below creates an item directly below the item you right-clicked on.
- Milestone creates a Milestone item directly below the item you right-clicked on.
- Subtask converts the item you right-clicked on into a “Parent Item” and creates a “Child–Item” beneath it.
- Successor creates a linked “Successor” item at the bottom of the current group of items.
- Predecessor creates a linked “Predecessor” task above the item you right-clicked on.