The ‘Timelines Grid View’ is a hub that assists you in managing your Timeline without having to directly access the Timeline.
Using the Timelines Grid.
The Timeline Grid is where all of your Timelines are stored and can be accessed. The Timeline Grid has these 8 columns:
- The name of each Timeline.
- The type of Timeline.
- Who the author of the Timeline is.
- The date the first Timeline item begins.
- The date the last Timeline Item ends.
- The Timeline Item count.
- The date the Timeline was last modified.
- View and Control options buttons.
If you are looking to reorder and prioritise specific columns in your Timeline Grid, hover over the column heading, click and then drag the column into place
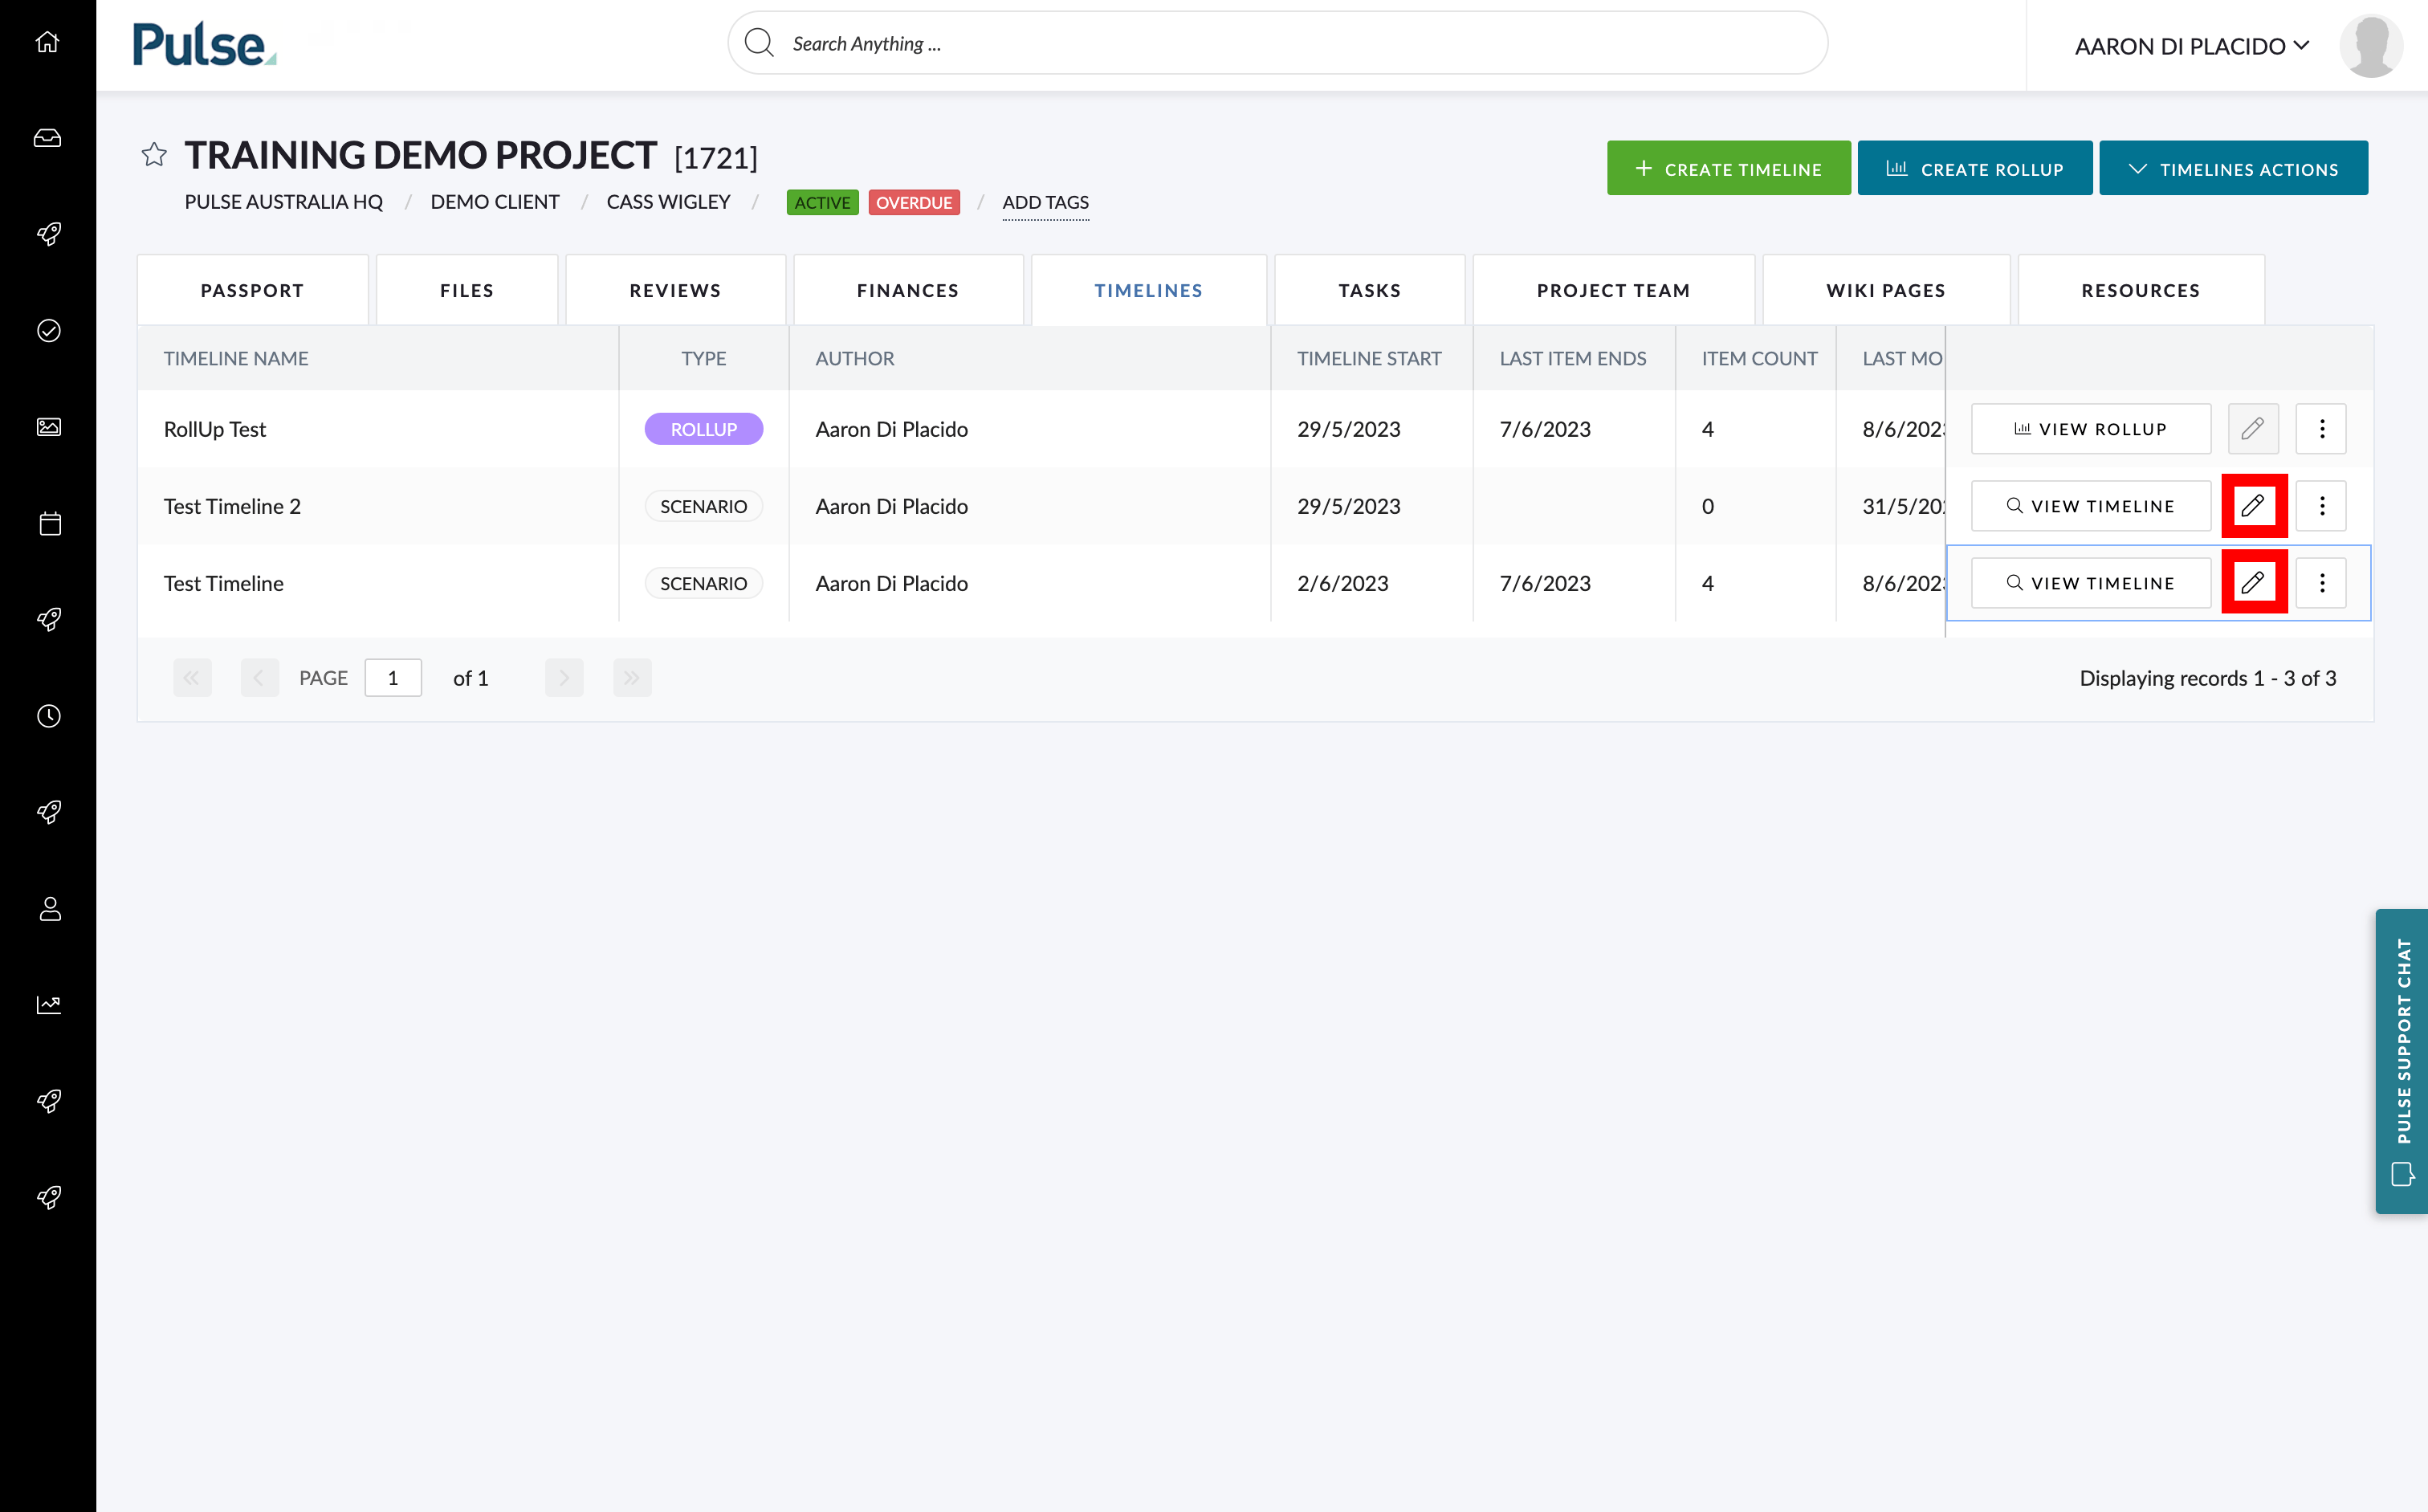
Editing a Timeline
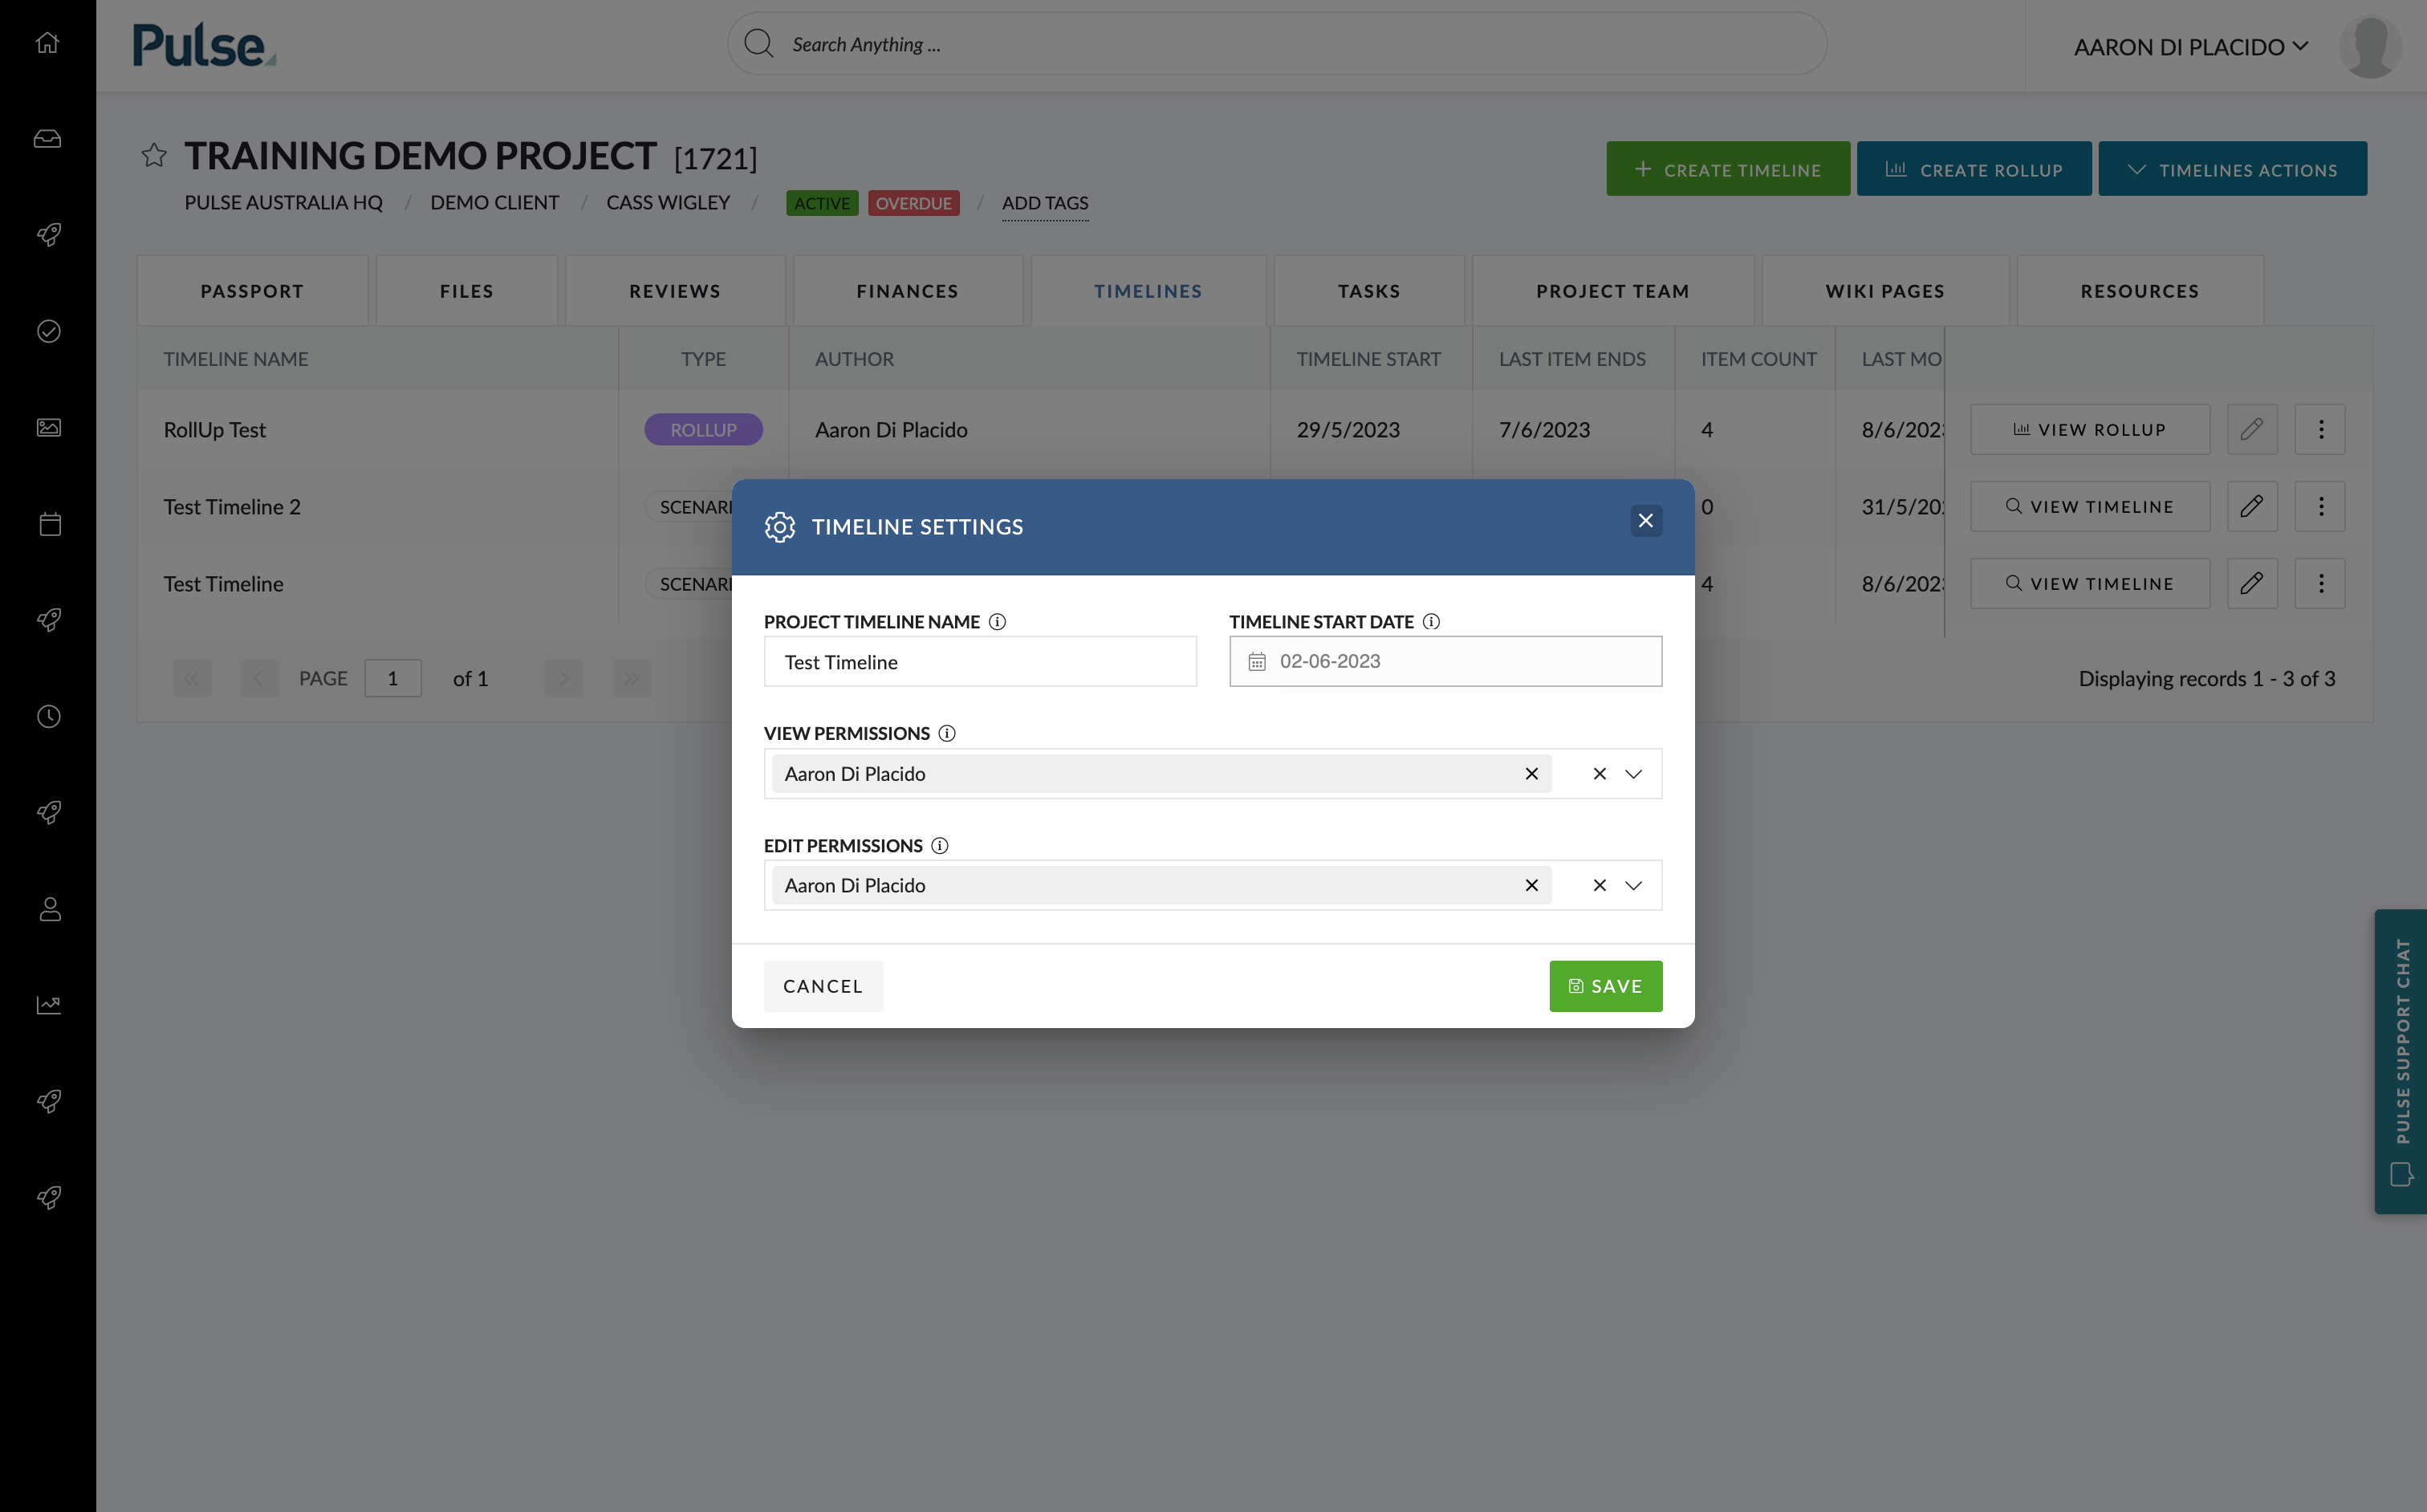
To edit a selected Timeline from the Timeline Grid click on the ‘pencil button’ on the far right column of your selected Timeline.
Once clicked, this will open a pop-up where you can directly edit the following:
- Project Timeline Name
- User Permissions
- Viewing Permissions
Click the “Save” button to finalise any changes made.
Creating a Public Link
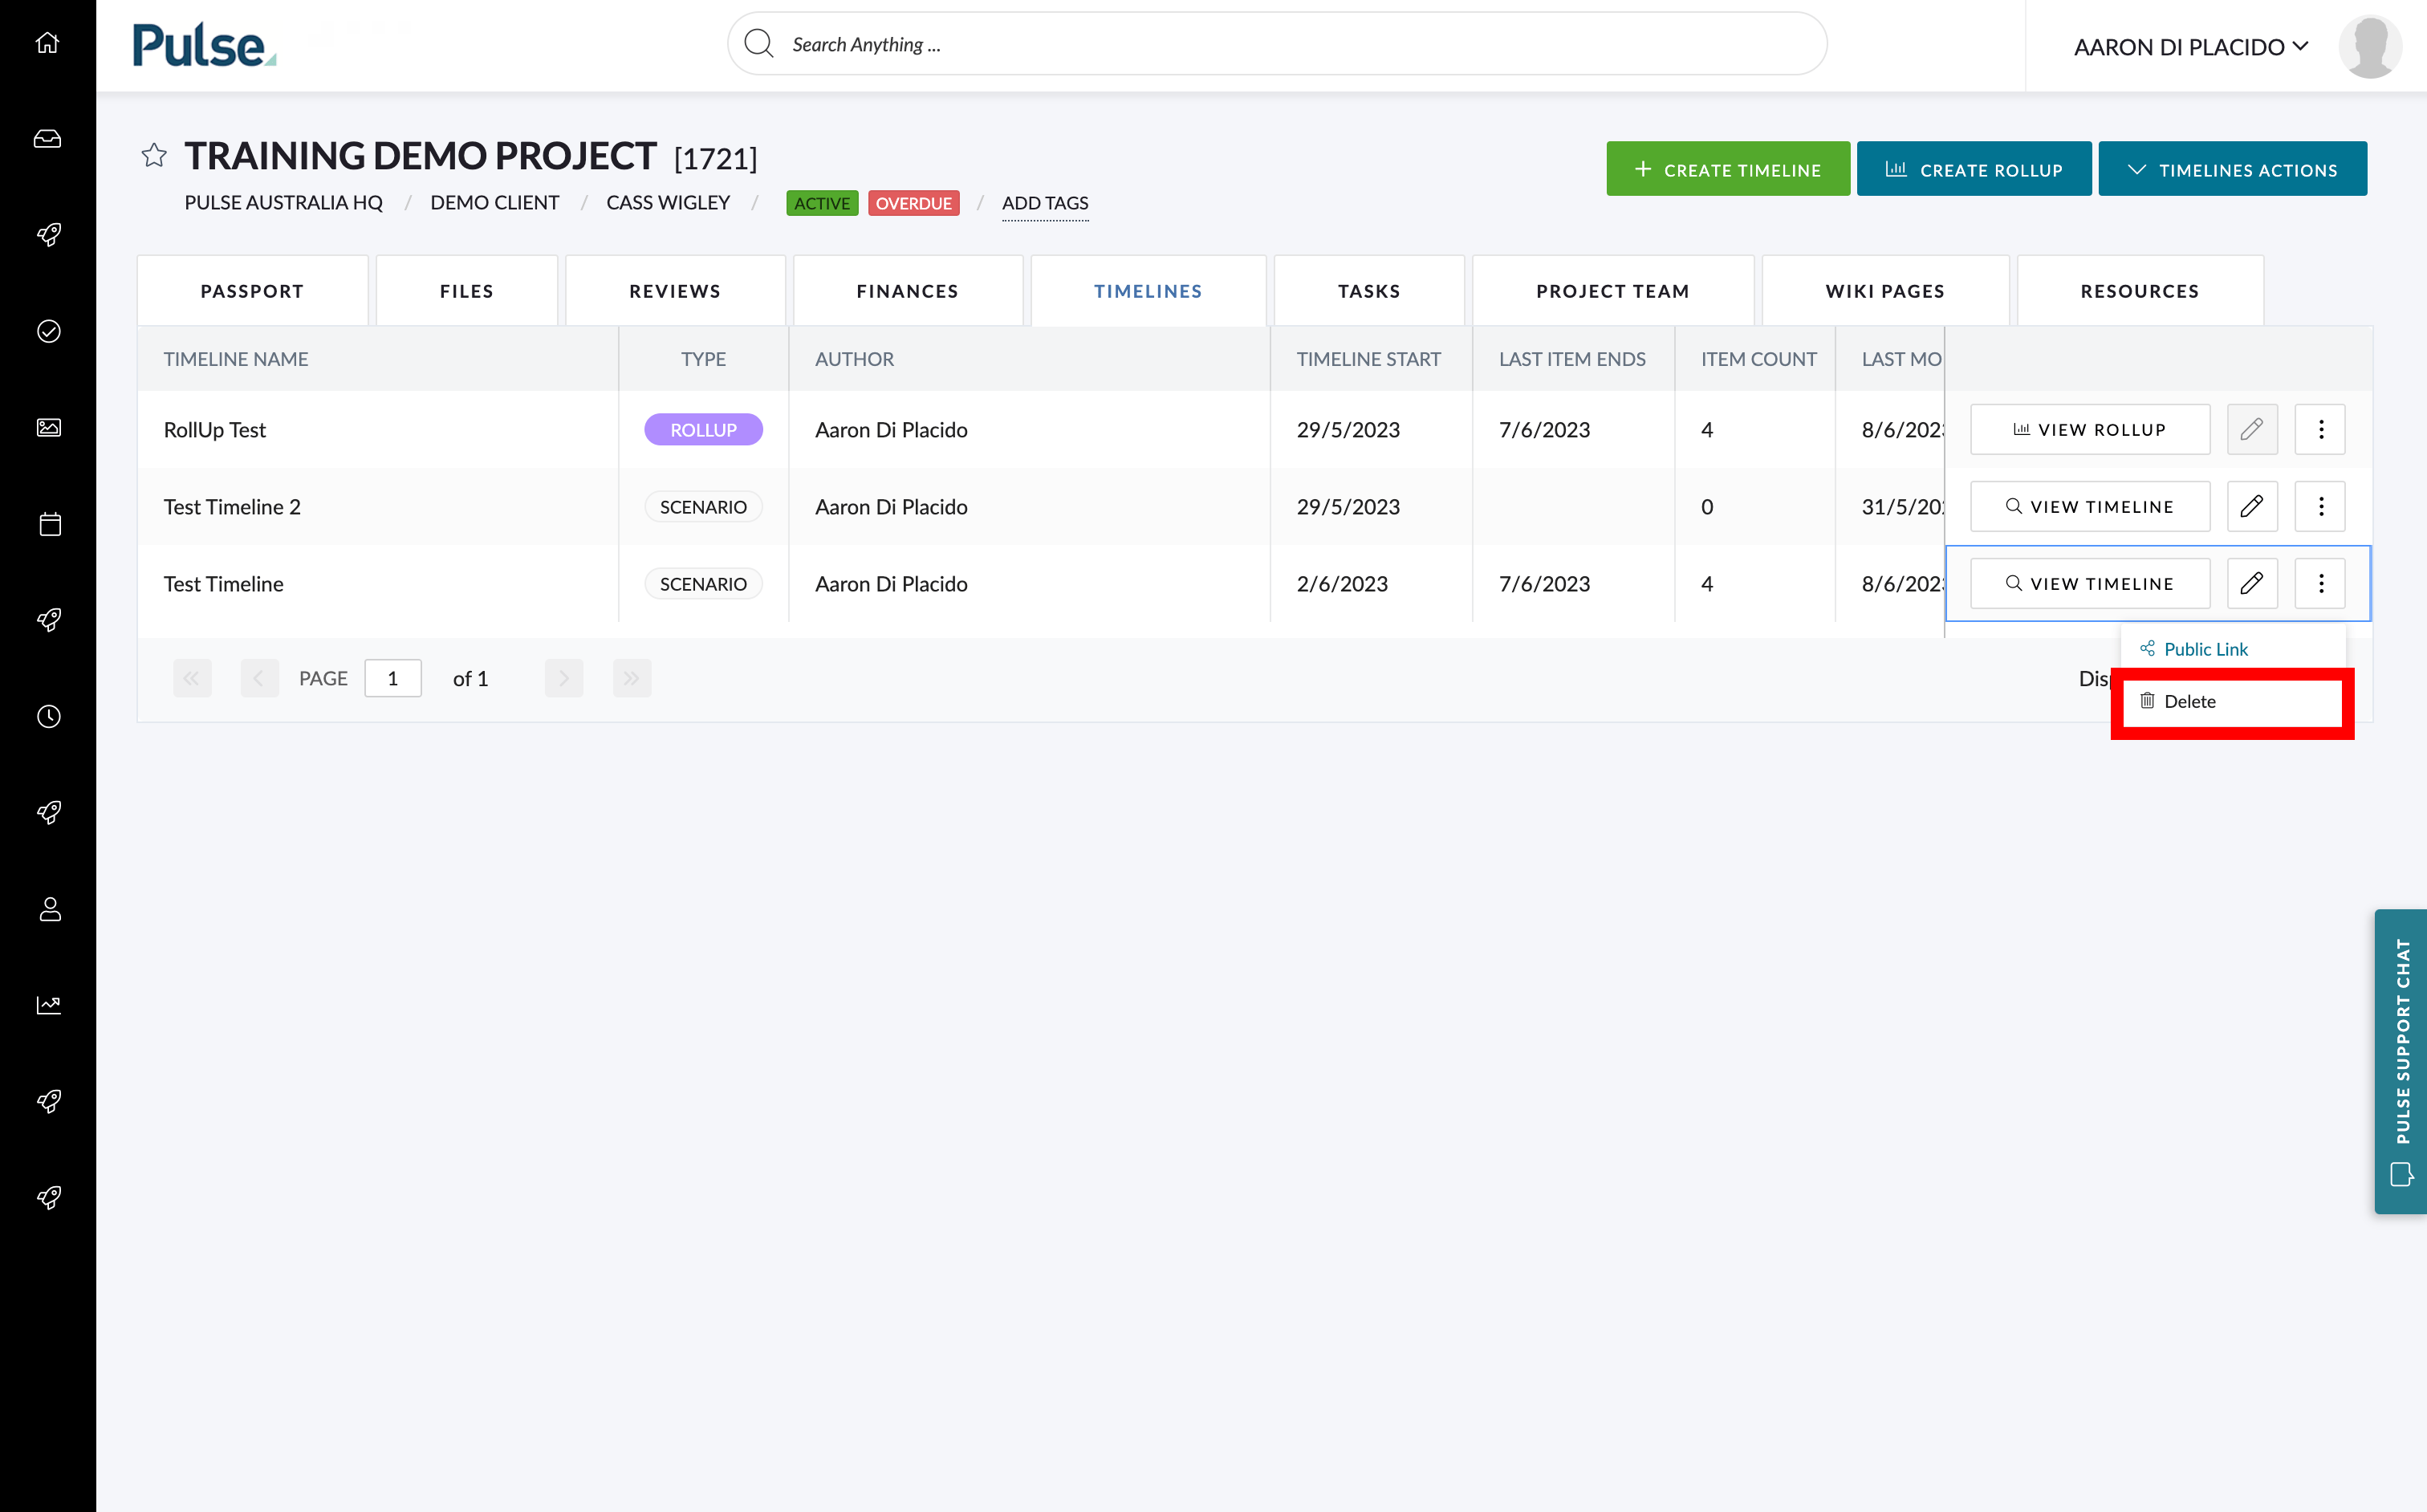
To create a public link from the Timeline Table, click on the elipsis button in the far right column of your selected Timeline.
Select from the drop down option “Public Link”
A pop-up modal will appear where you can copy a public link to be shared along with a dropdown to specify when the link will expire.

Deleting a Timeline
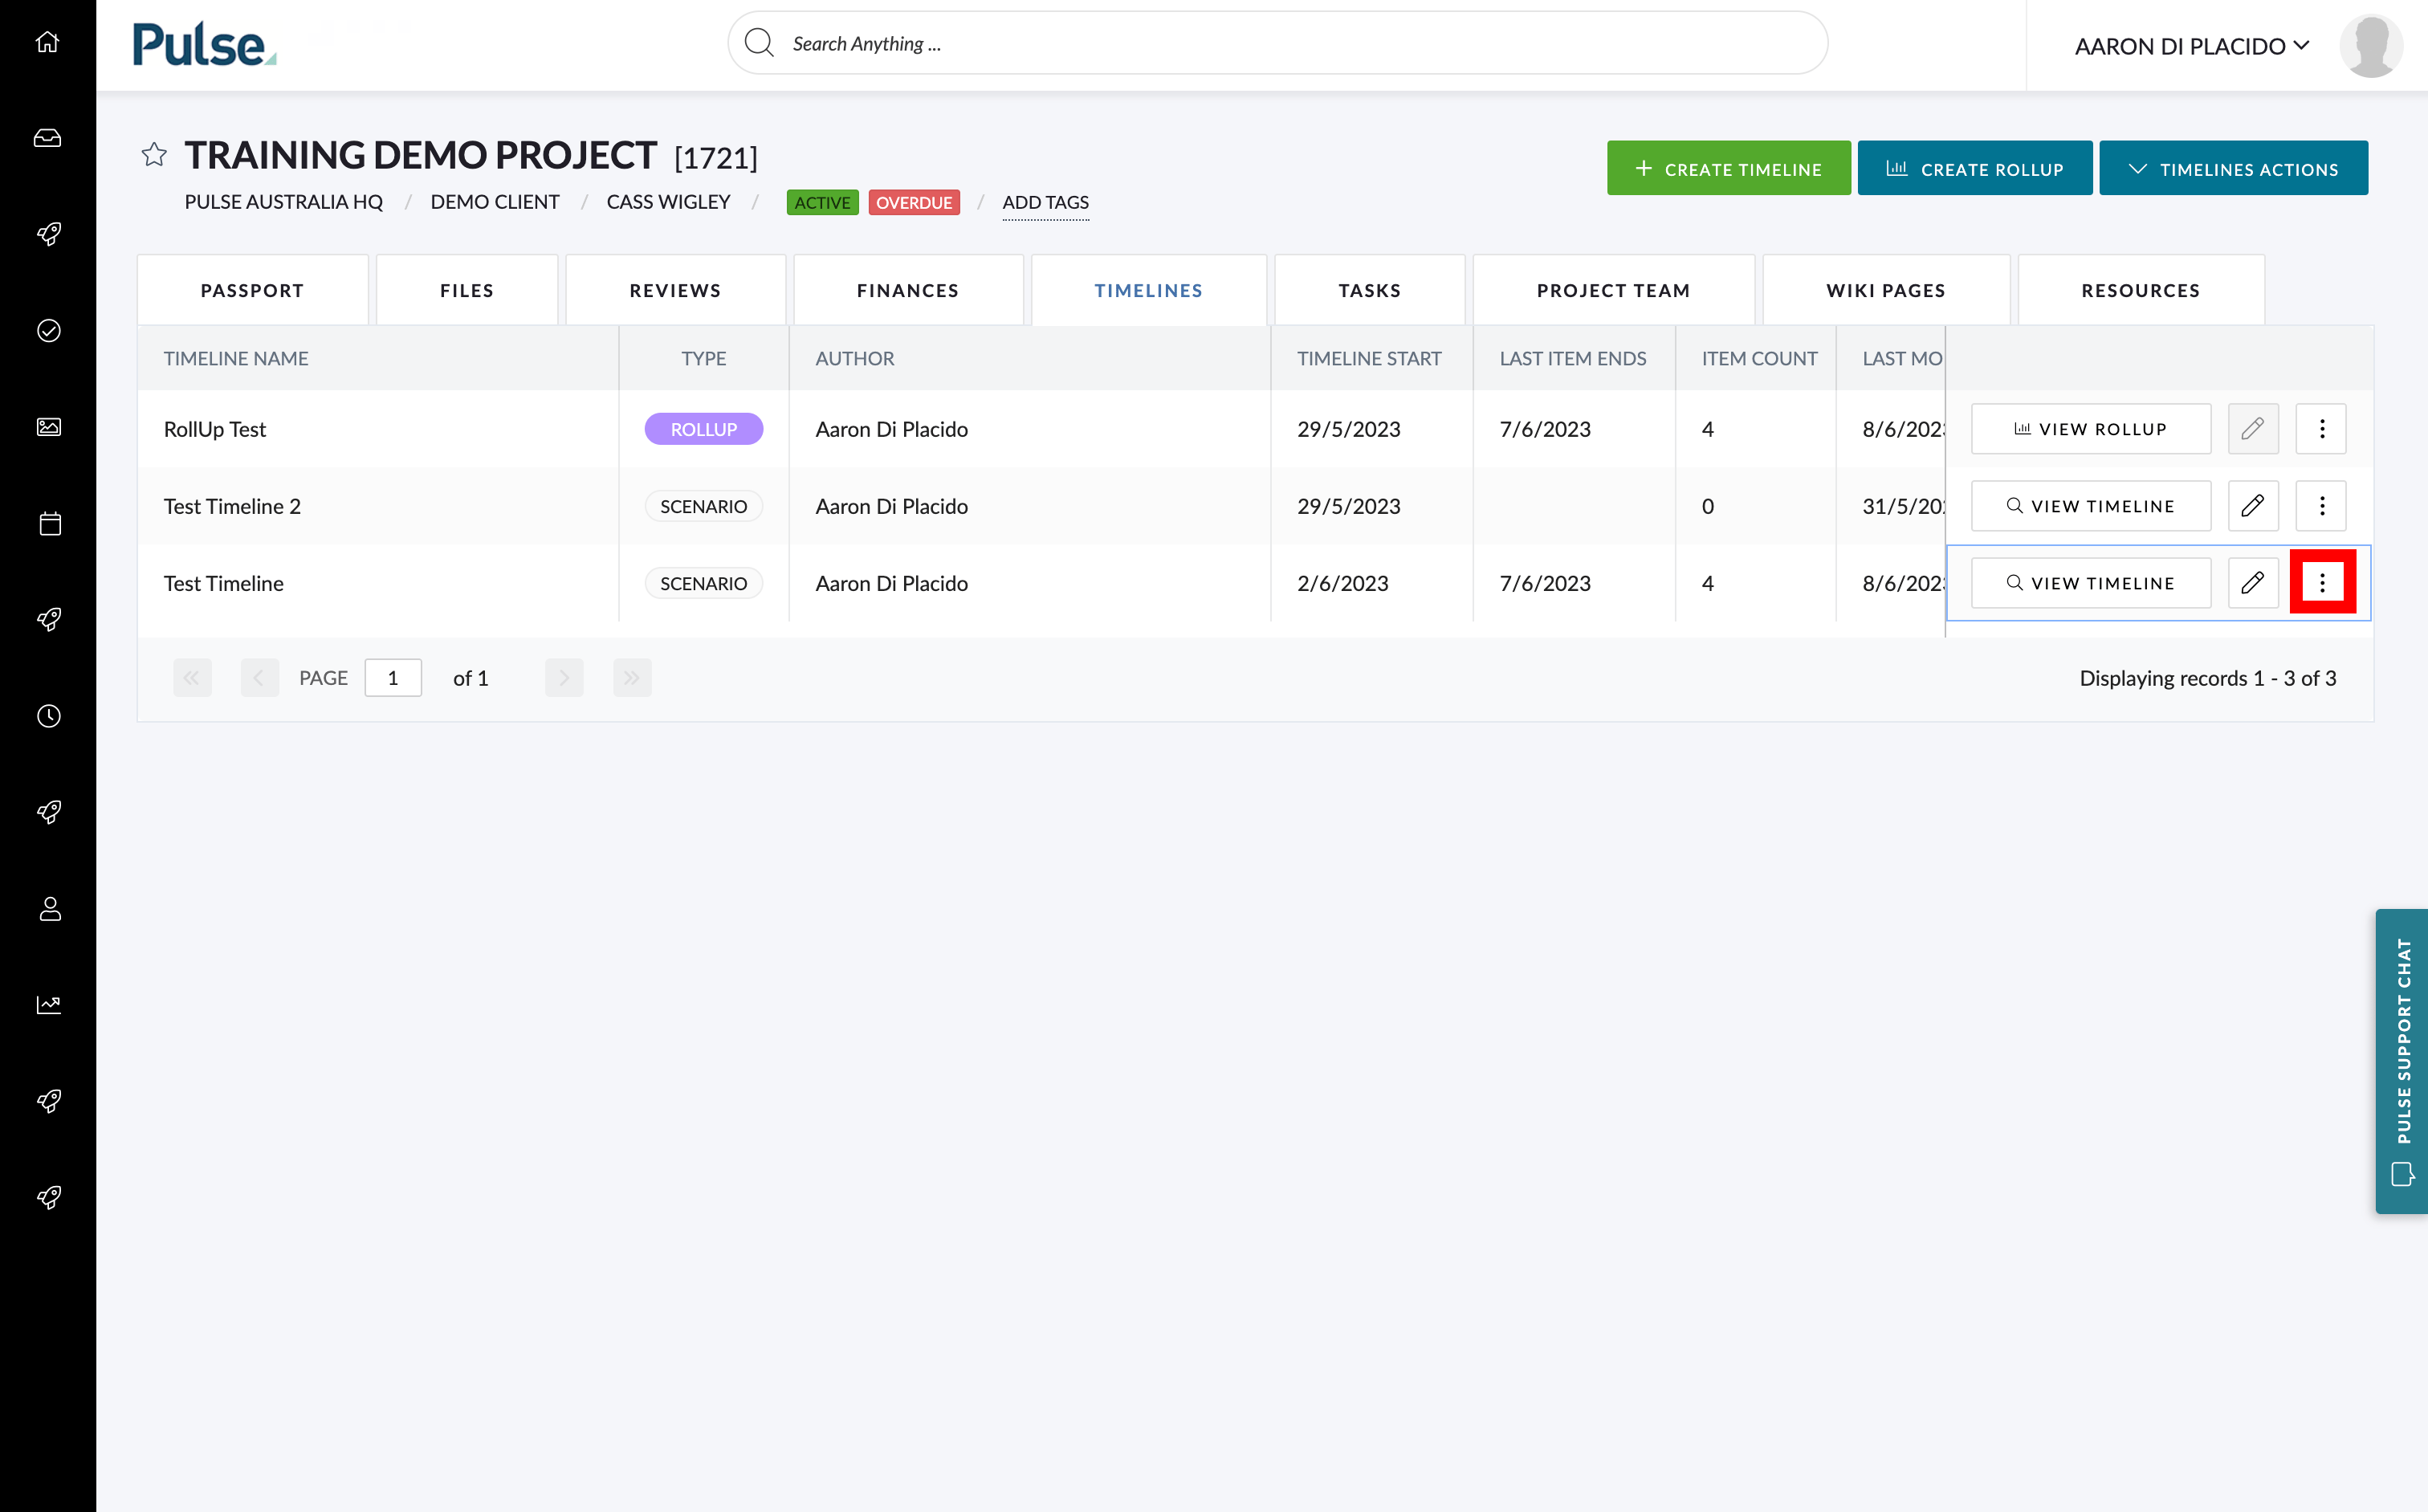
To delete a selected Timeline from the Timeline Table, click on the elipsis in the far right column.
Select from the drop down option.
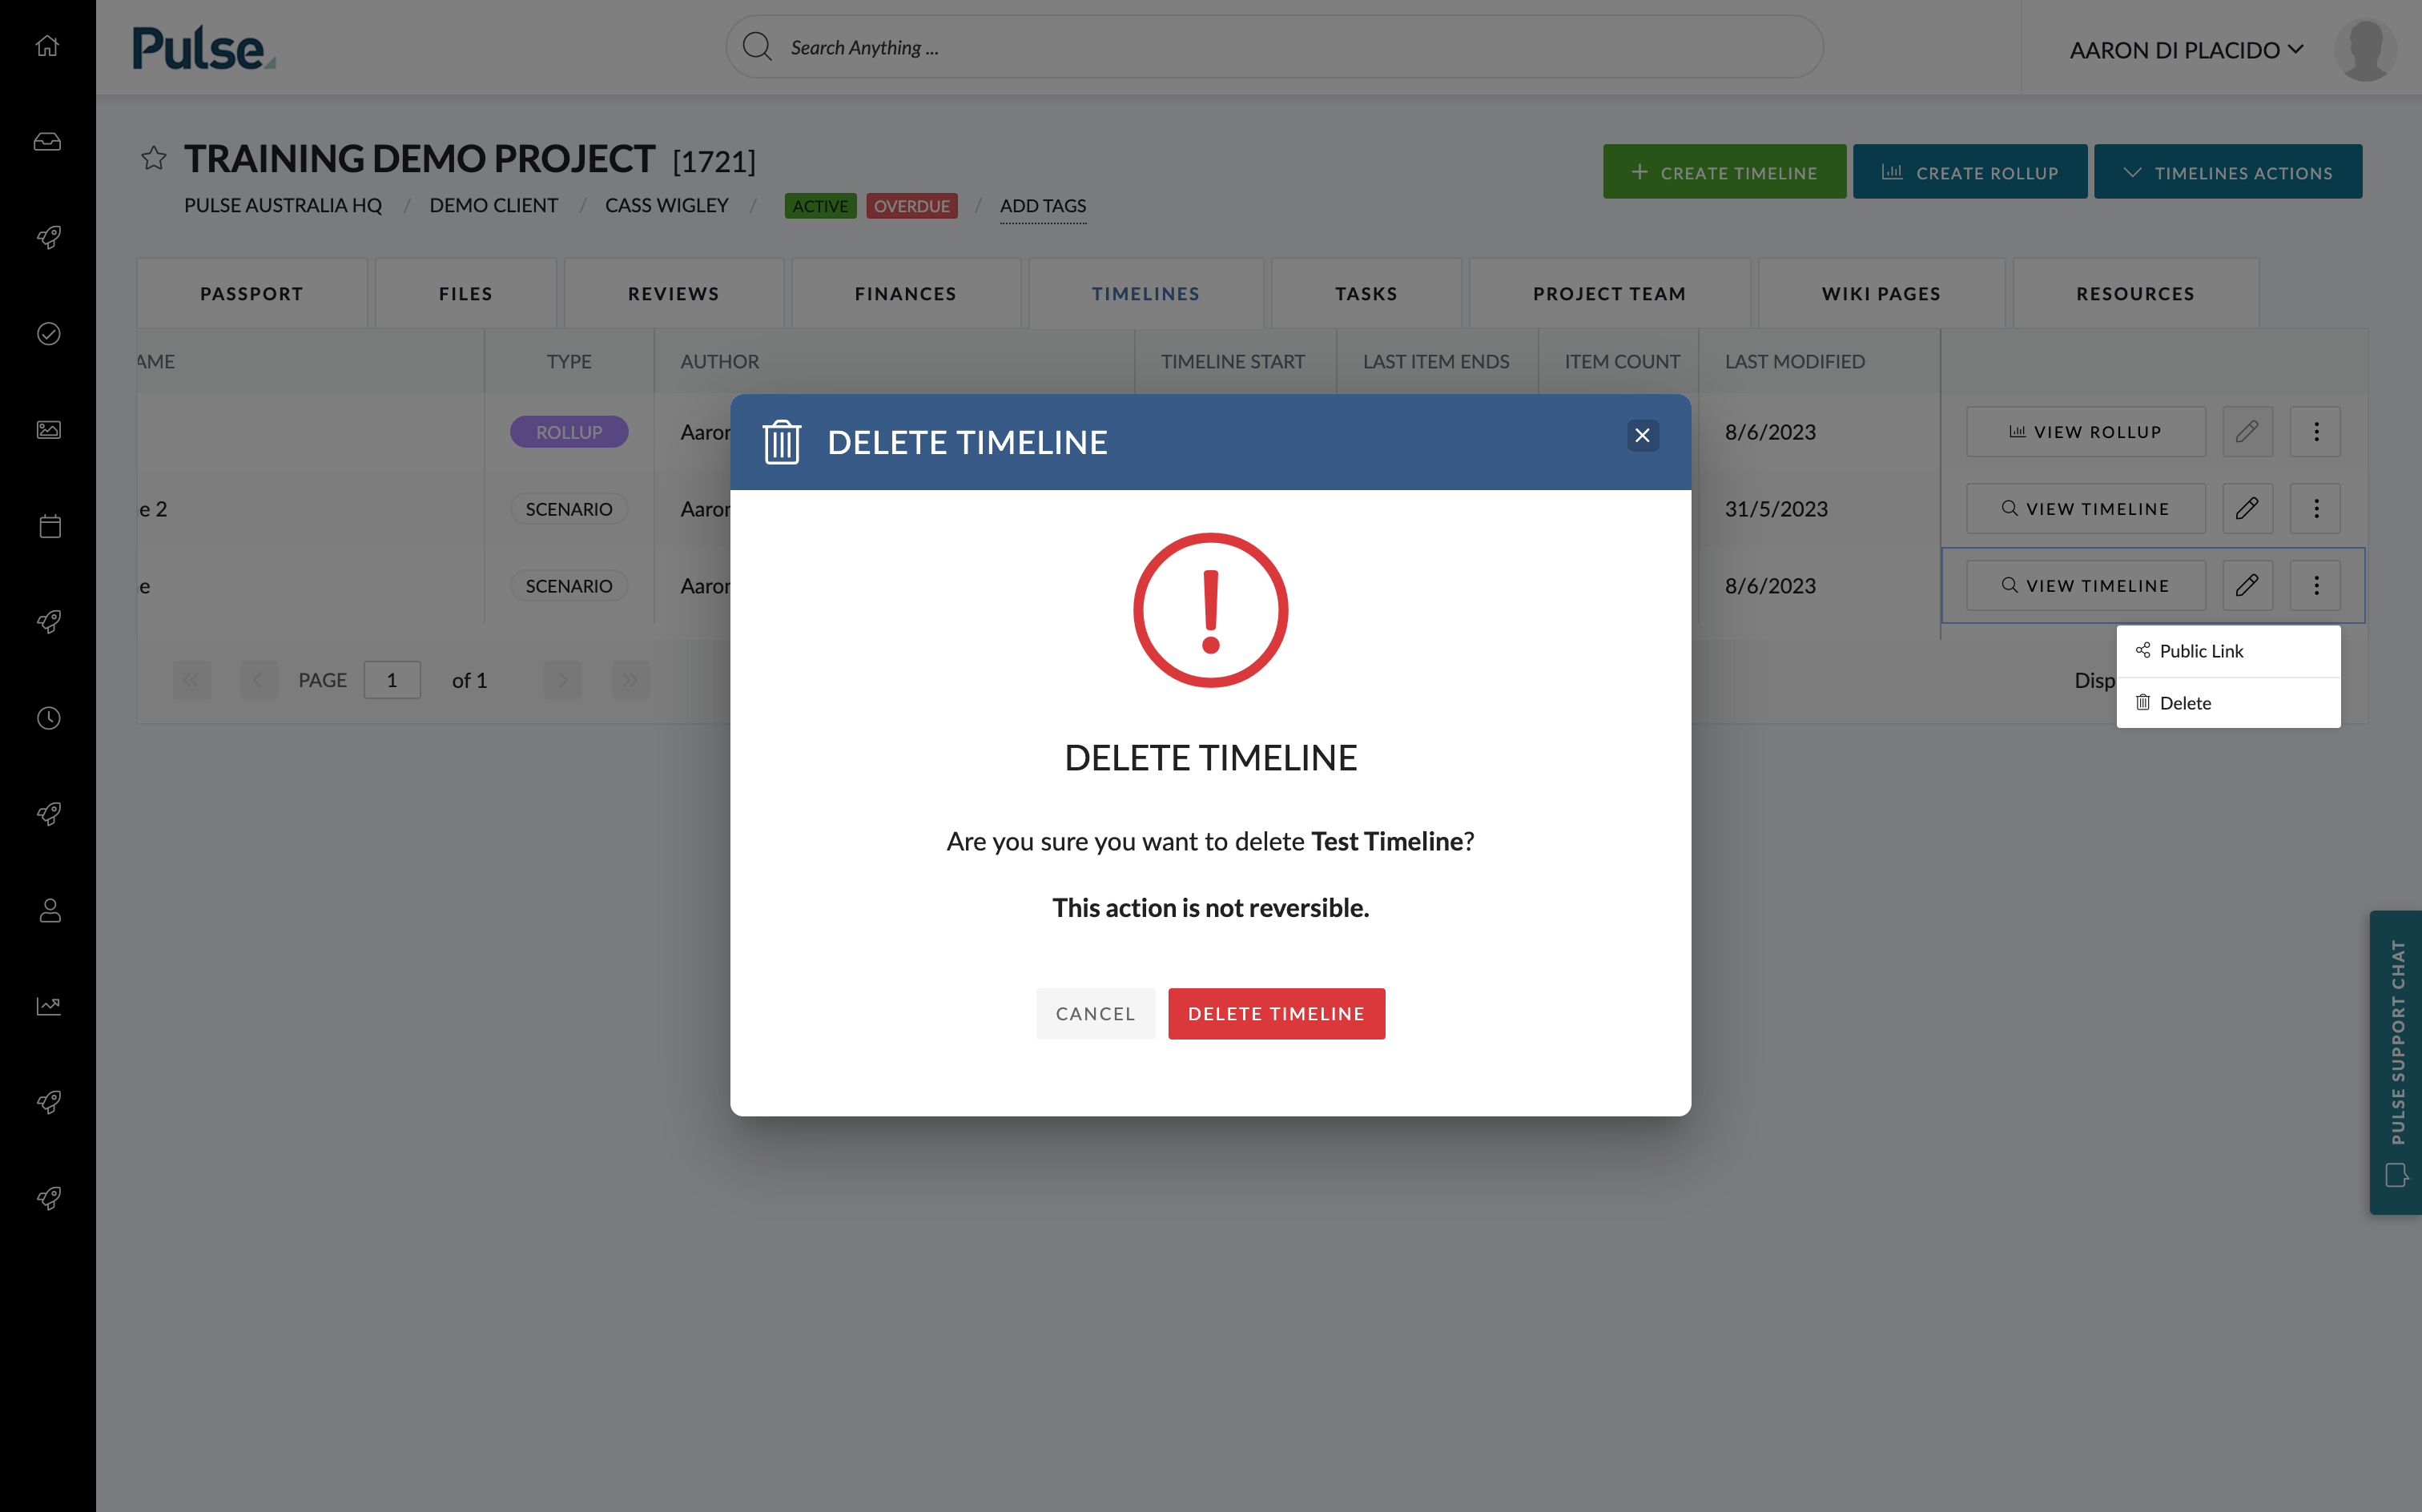
A pop-up will appear confirming you would like to delete your timeline. Click “Delete Timeline”.
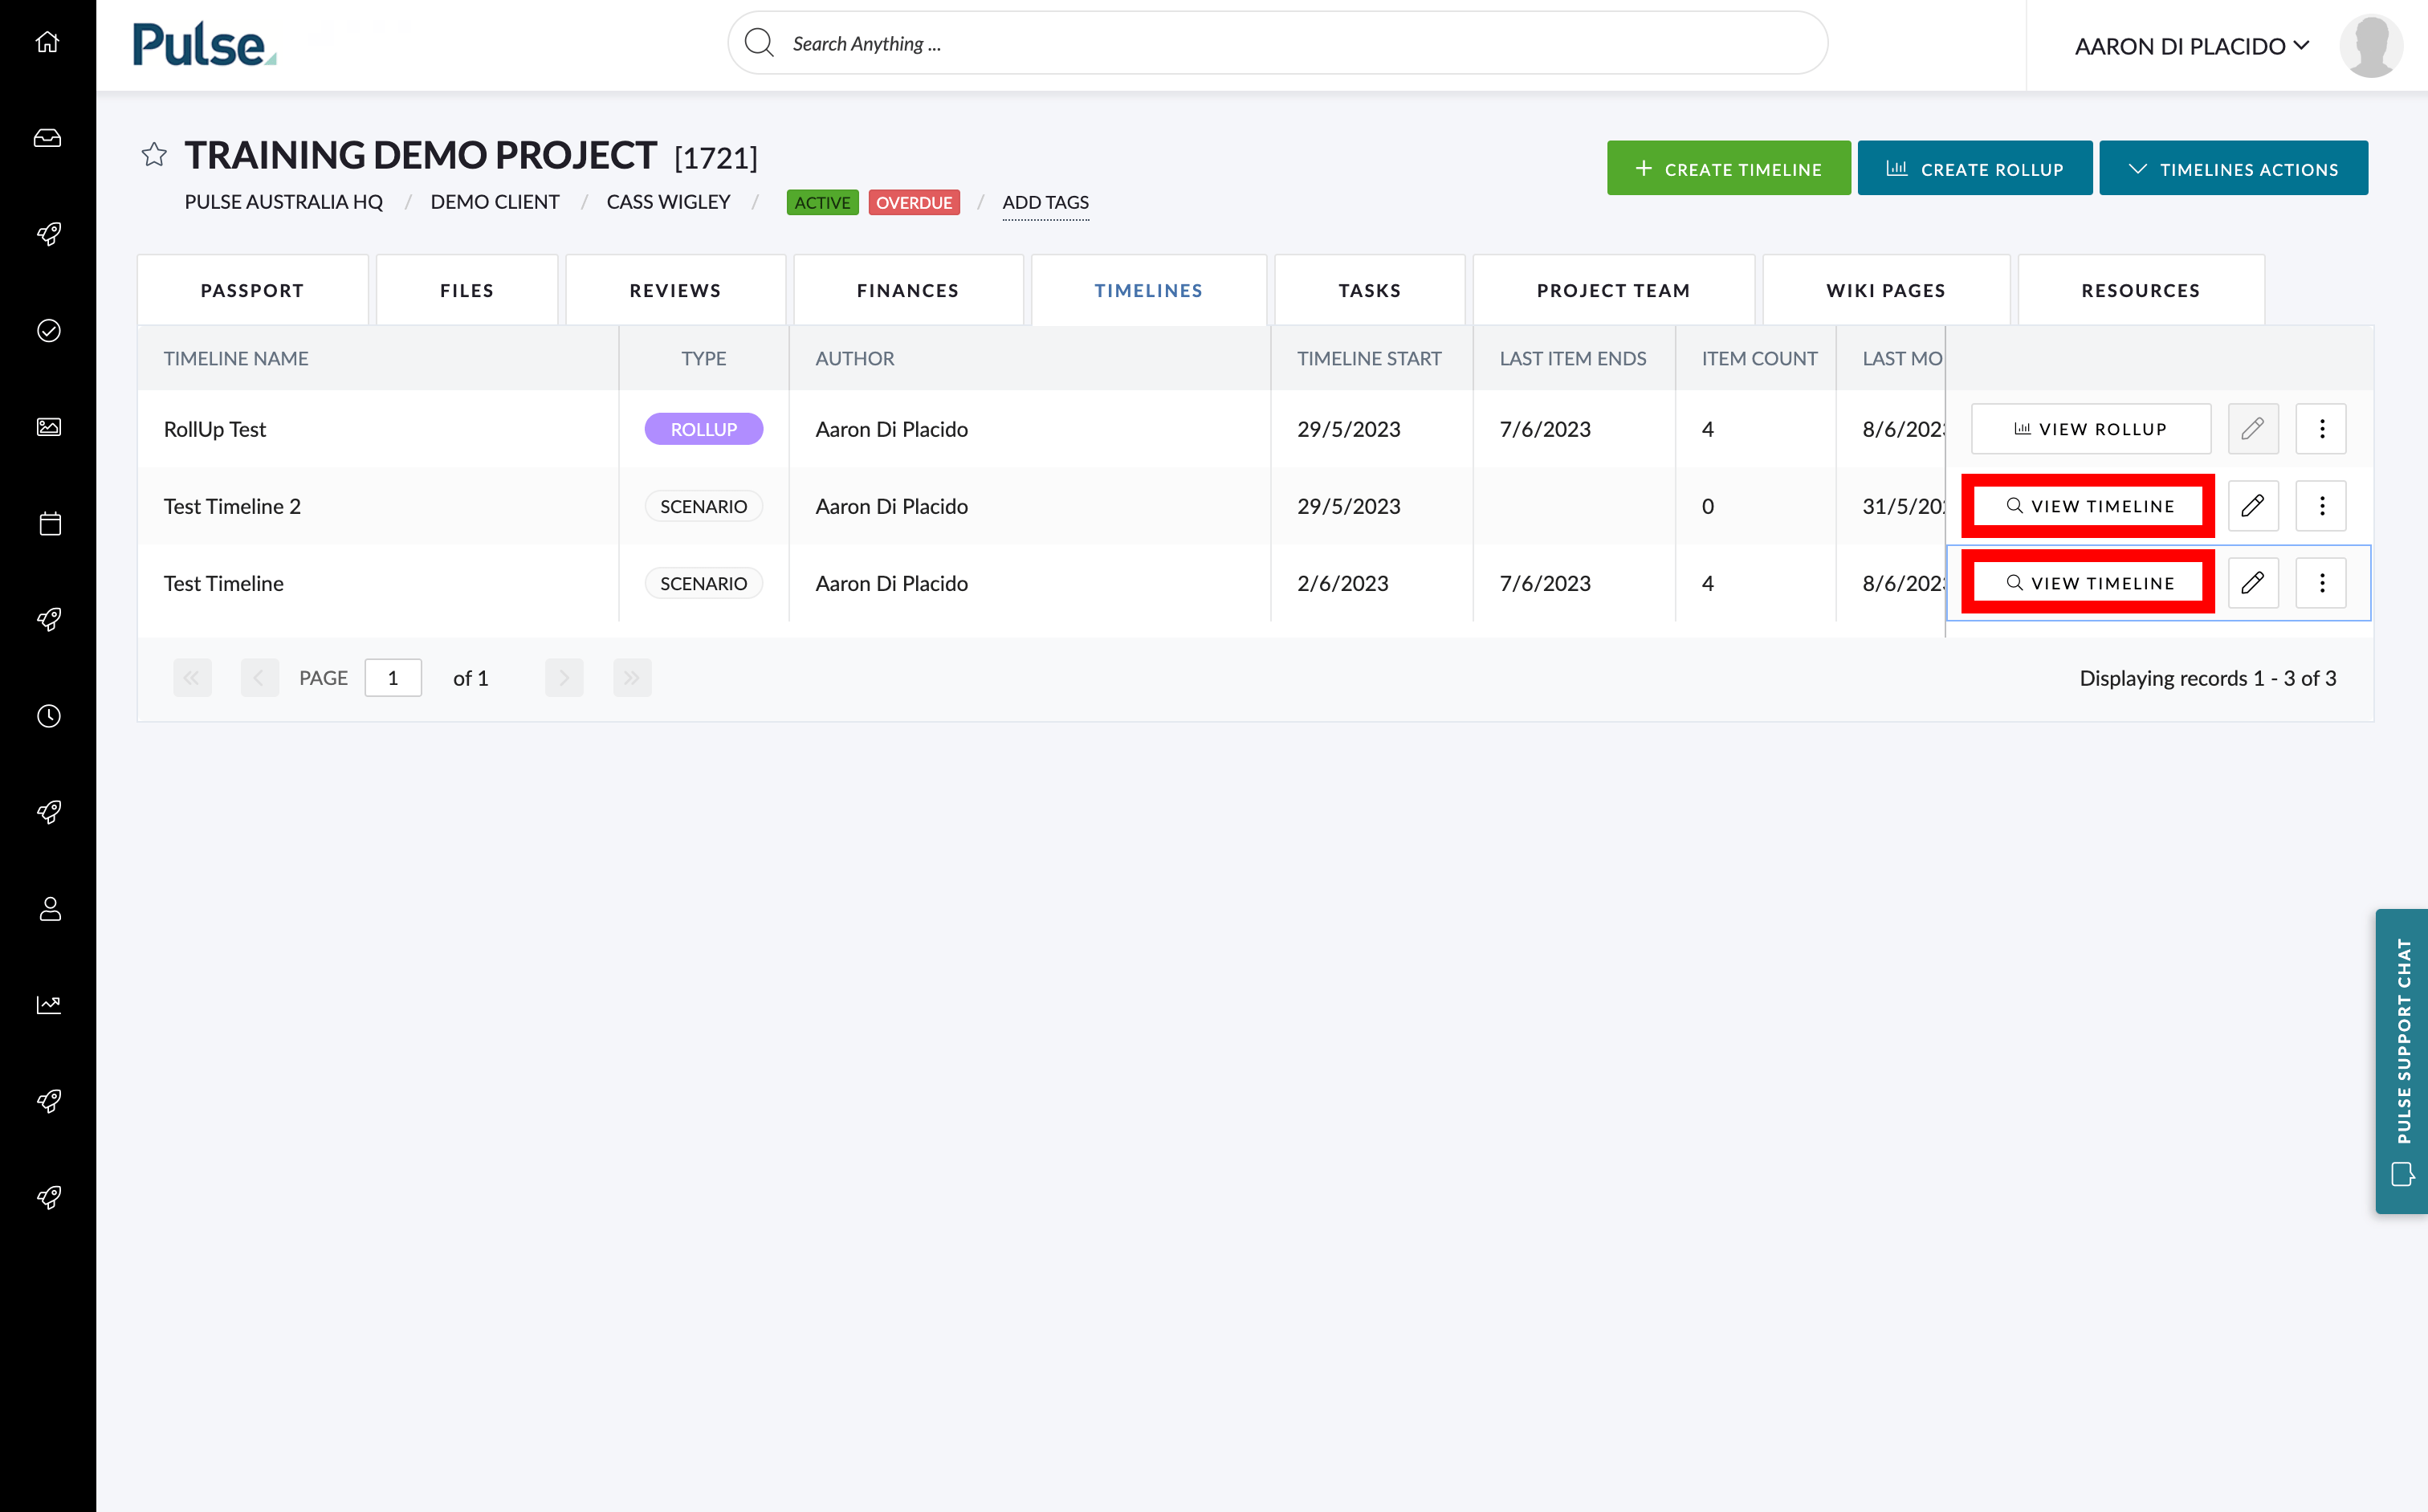
Viewing a Timeline
To view your Timeline from the Timeline Grid you can click the “View Timeline” button on the far right column.
This will open the selected Timeline in a new tab and allow you to make any necessary changes.