The Project Wizard is designed as a Multi-Step form, to guide you through the process of creating Projects in Pulse with the correct Workflow and Team settings.
In most cases, this requires no training at all, simply follow the Steps in the Wizard!
The Project Wizard will update the options on each Step, based on your the information you provide as you go.
Project Wizard Steps
However, if you would like to learn more about what happens in each step, review the ‘Steps Overview‘ below.
| Step | Screengrab | Title | Description |
|---|---|---|---|
| 1 | 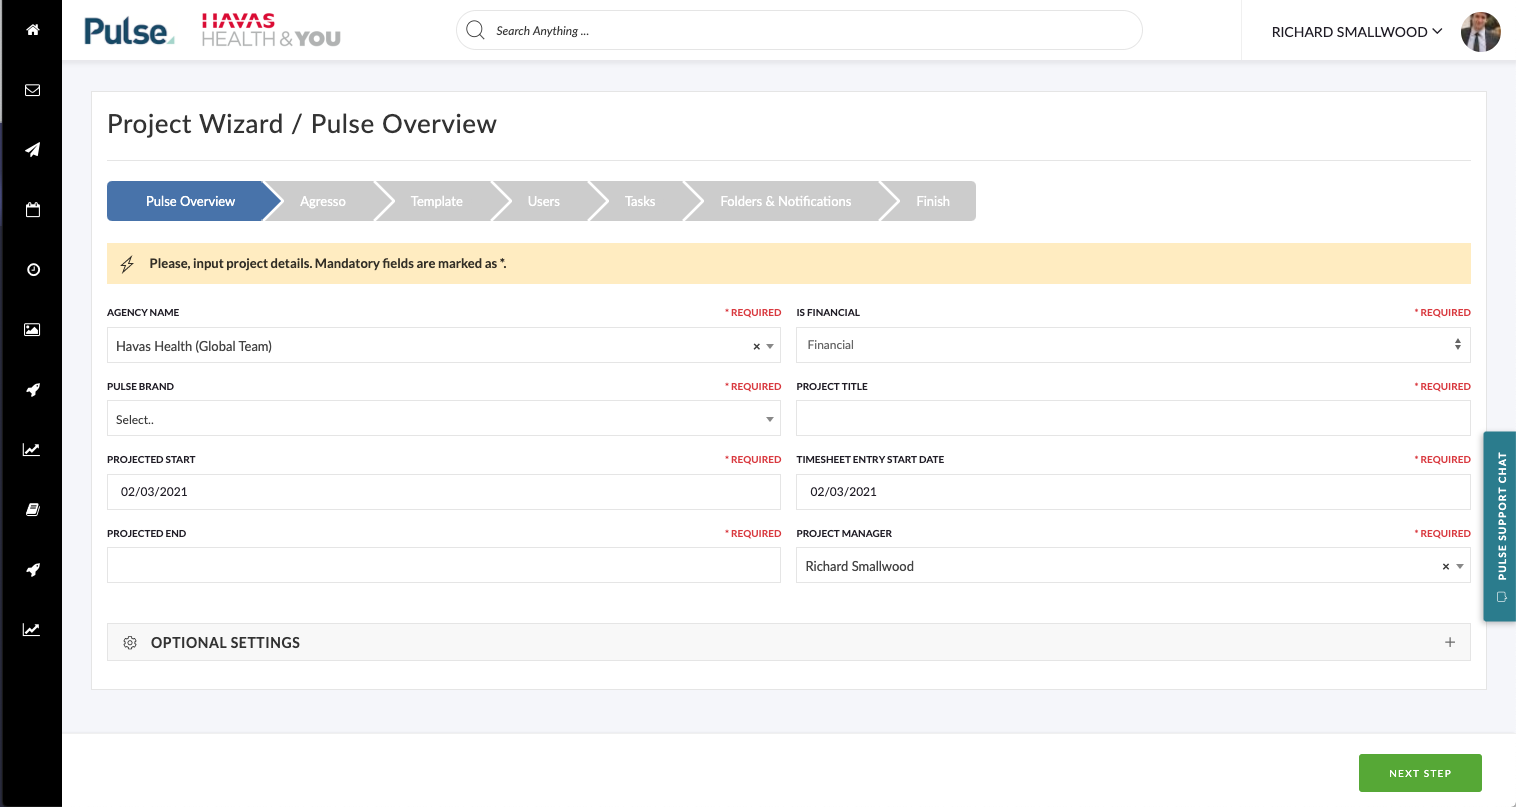 | Basic Project Details | Enter the basic information for the Project, including: – Project Title – Project Manager – Office Location to complete the work. – Assign the Project to a Brand – Forecast Start Date – Forecast End Date – Project ‘Type’ |
| 2 | 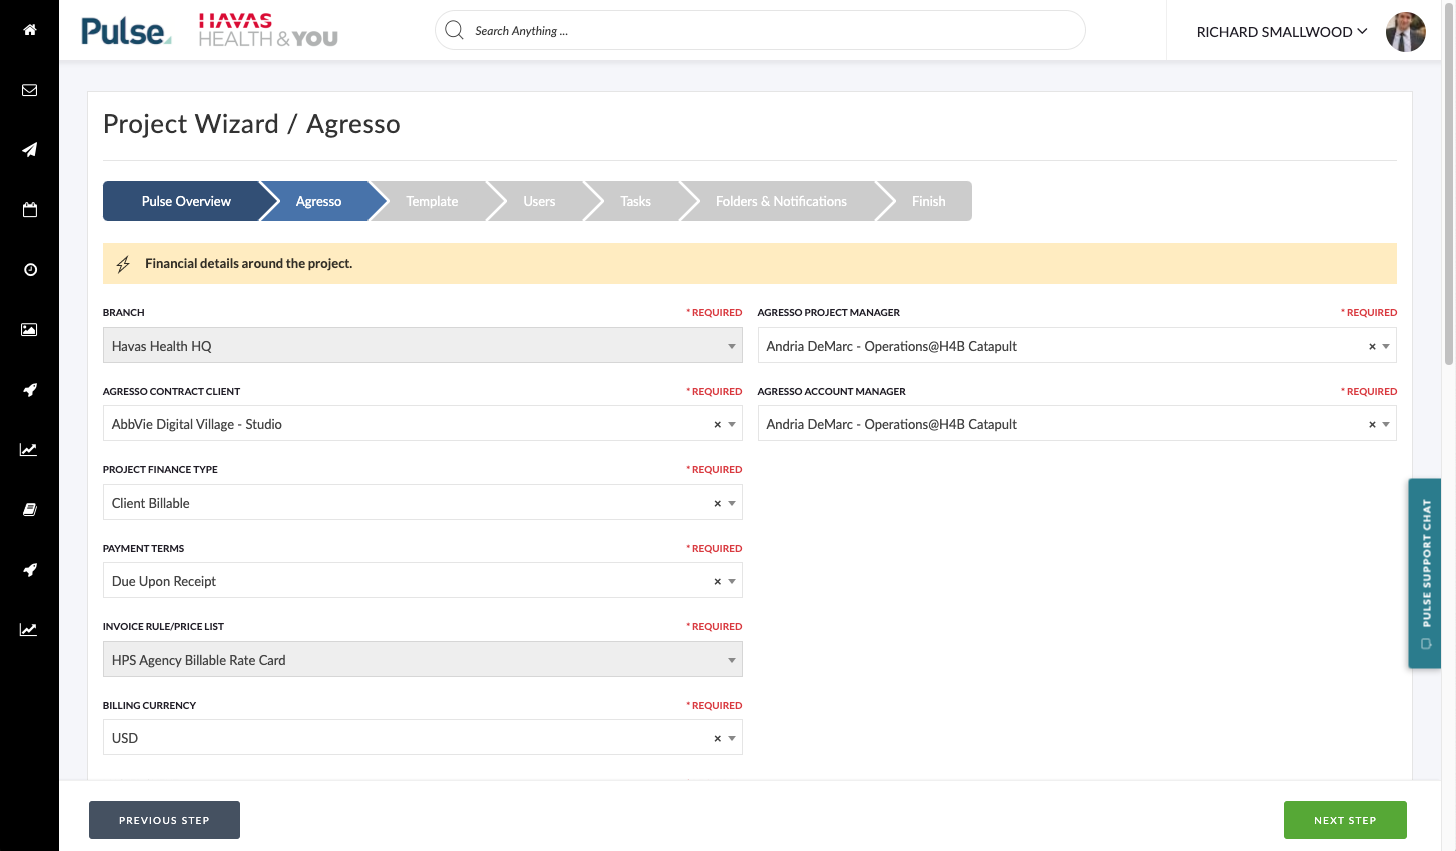 | Agresso Finanical Details | If the selected Office for the Project (Step 1) is associated to an Agresso Profile, then Step 2 will load with additional questions relating to the Finance Configuration for the Project. Depending on how the chosen Office is configured, there may be lots of questions to answer, or there may only be a few questions. Furthermore, if the chosen Office has ‘Default Options’ set for Agresso Configuration – then most of the options available in the Agresso Fields may be already set. You can learn more about how to set the Default Office settings for Agresso in the ‘Address Book‘ training Module, in the ‘Advanced Settings’ area. |
| 3 | 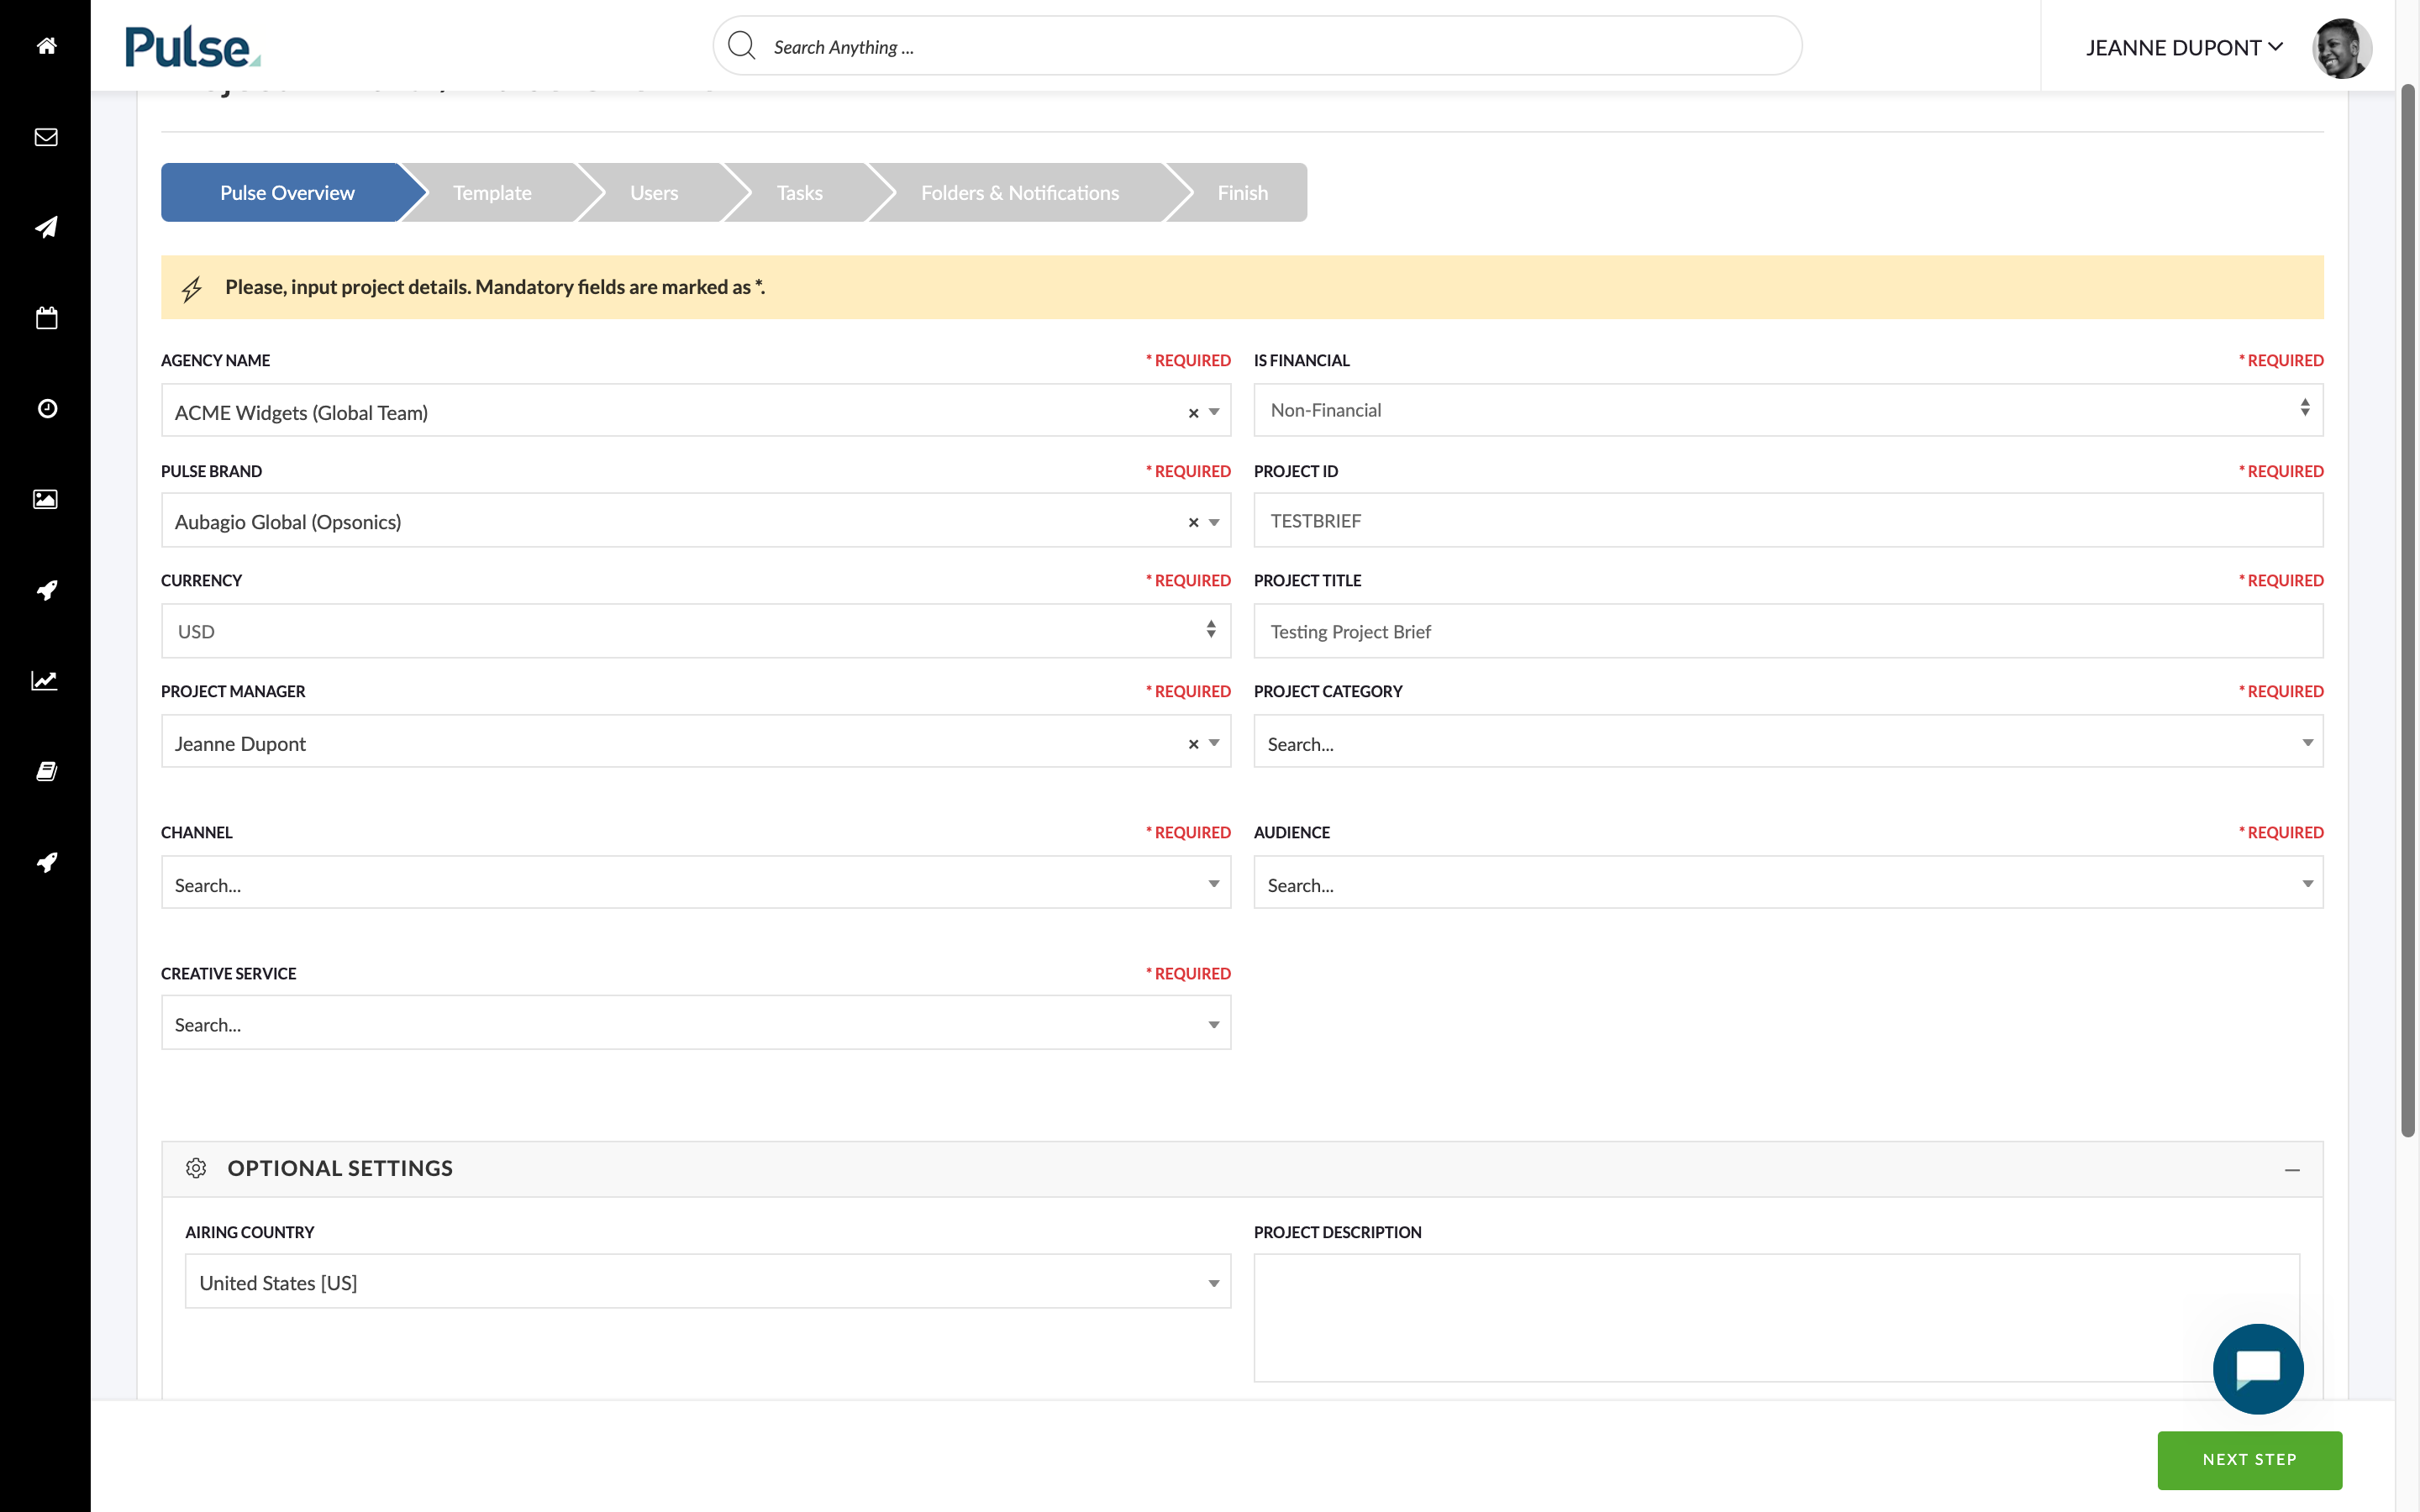 | Project Template | The Project Template selector will show as ‘Step 2’ – unless you are creating a Project in an Agresso Office – in which case it will show as ‘Step 3’. The Project Template selector lets you choose a pre-made Project Template for your Project. A Project Template is a pre-made Project which can contain Tasks, Files, Folders and Team Members, which have been configured to streamline Project Management for a specific type of Project. For example, you may create a Project Template as a ‘Standard Template’ to define the ideal Task and Folder structure for your Business. And you may also define a Project Template for a specific Project Type – such as ‘Photoshoot’ – which would contain the specific tasks and folders recommended to conduct a Photoshoot. For some Offices & Brands there may be a ‘Default Project Template’ pre-defined |
| 4 | 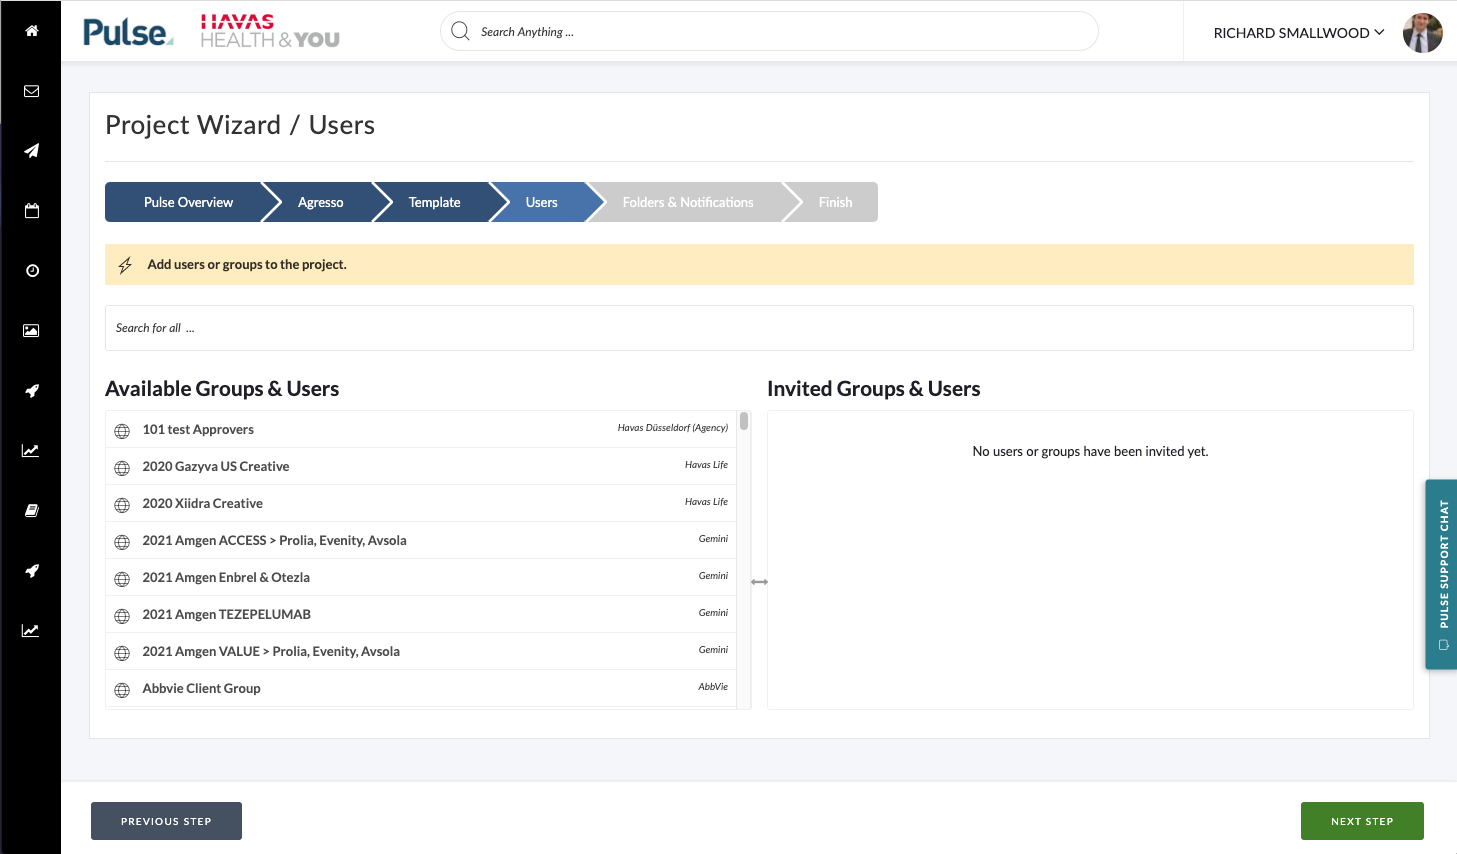 | Project Team | In this step, you select the Users and Groups you wish to invite to the Project Team. Users who are invited to the Project Team will have access to the Project – regardless of what their personal Access Level is – and regardless of what their Origin Office is. Users invited to the Project Team will also be eligible to complete Timesheets on the Project. Note: There are other settings & validations to control when a Project is ‘Open’ for Timesheet entry. You can learn more about this in the ‘Timesheet Administration‘ training Module. |
| 5 | 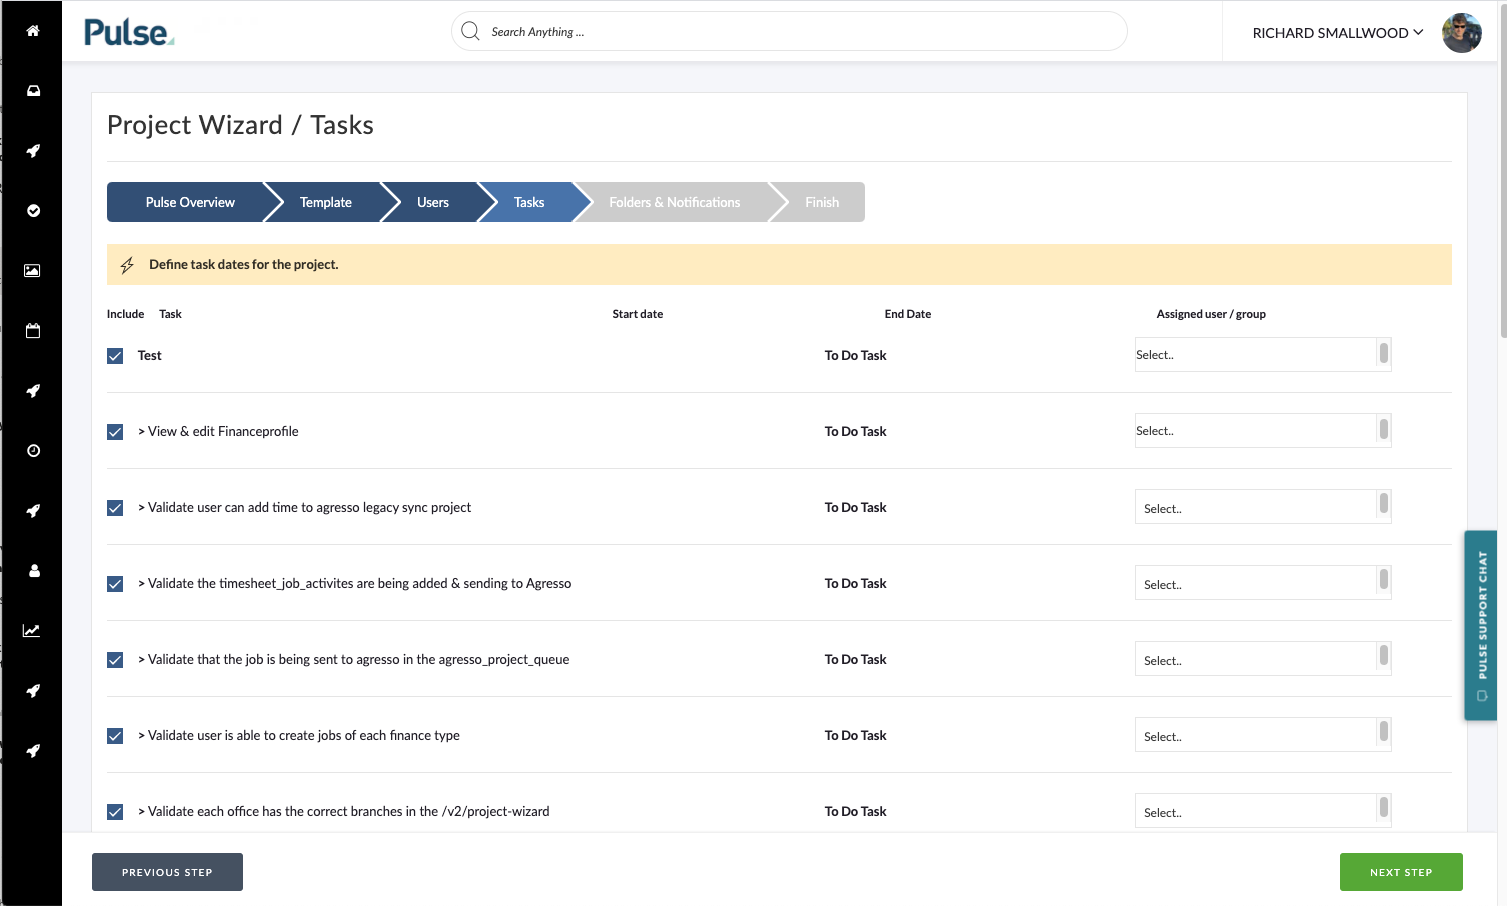 | Template Tasks | If you chose a Project Template in the previous step that includes ‘Tasks’ in the Template, then the available Template Tasks will be shown in the next step. In this step, you can review the Template Tasks and update the proposed Timings and User assignments for your Project. You can also remove any Template Tasks from the list that you do not need. In some situations – it is possible that a specific Office / Brand combination forces a Template with associated Tasks. In this situation it is possible that the list of Tasks will not show in this step. |
| 6 | 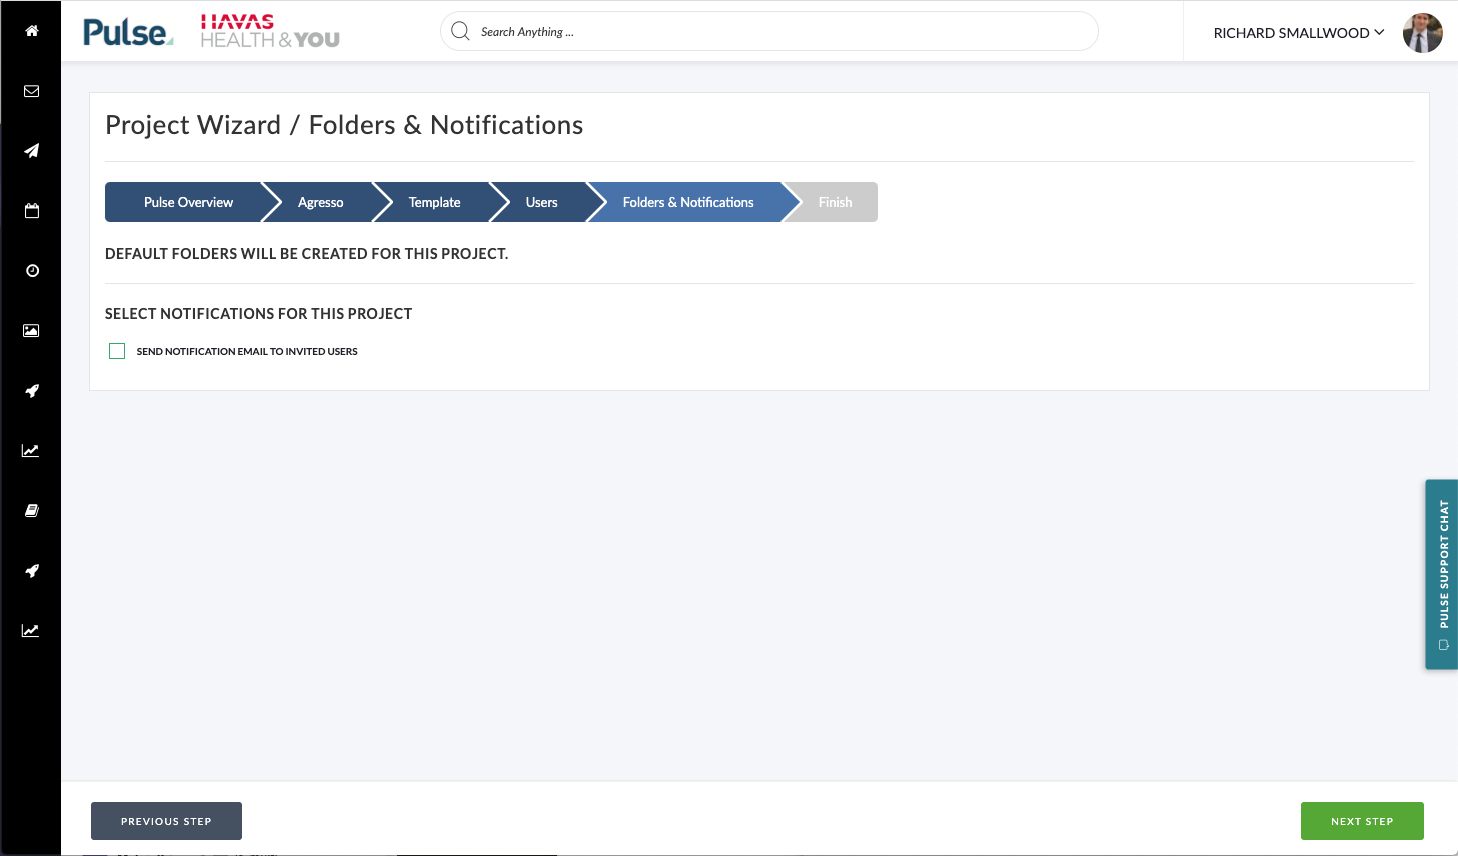 | Notifications & Folder Options | In this step, you are given a couple of options on how to create the new Project. 1. Do you want to send a Notification Email to the Users invited to the Project? 2. Do you want to create the new Folder System based on the Template? In both cases the default is ‘Yes’ – but you have the option to disable these. |
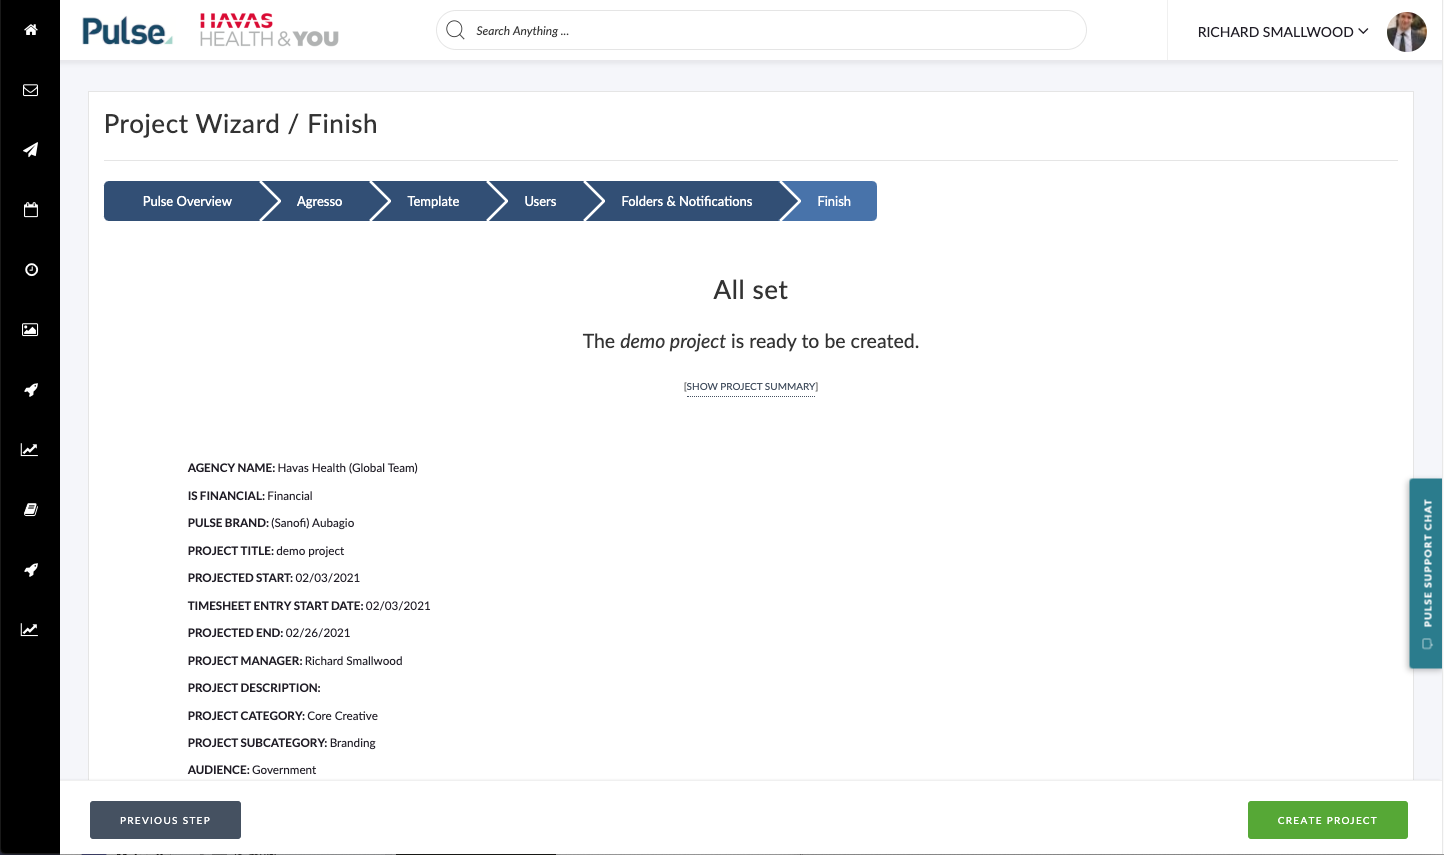 | Review Project Details | The last step in the Project Wizard is a review of the options you have chosen. If you click to expand the available window, you will see a summary of all the chosen settings. If you are happy with the settings, click ‘Create Project’ to submit the form. Once the form is processed (which can take a few seconds) you will be redirected to the new Project. If you are un-happy with the settings, you can click the ‘Previous Step’ button to move back and change the settings as required. |