Master Client – What has changed?
[Master Client in Pulse]
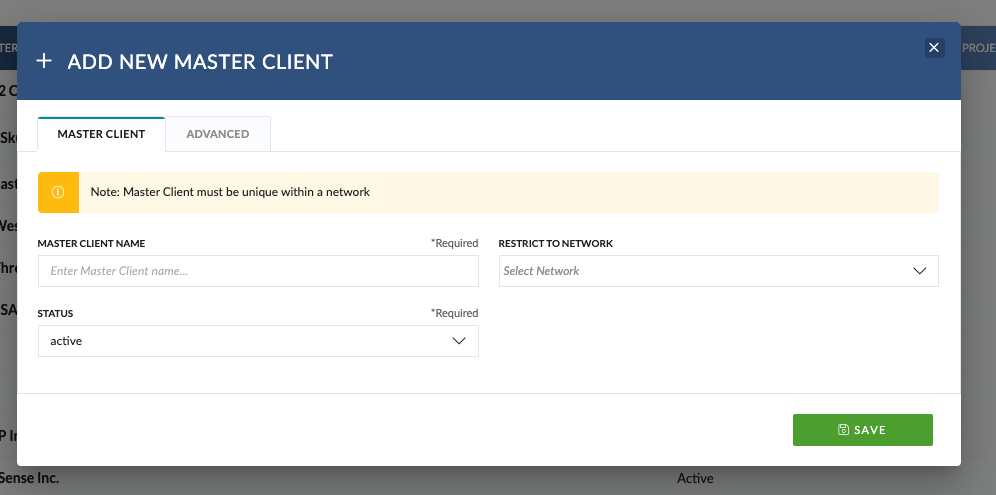
We have introduced the ability to restrict a Master Client to a Network. Some Master Clients could be considered Global Havas MC, but others may be a small market only used in Brazil.
We have removed the ability to delete a Master Client but have introduced the concept of setting a Master Client inactive. Setting a Master Client inactive will also set the related Brands & Products as inactive.
The Master Client name must be unique. However, you can create the same Master Client if restricted to a Network. For example, you could have ‘Pulse’ as a Global Master client (that’s us!) but also ‘Pulse’ is restricted to a network in Istanbul and is a small Boutique.
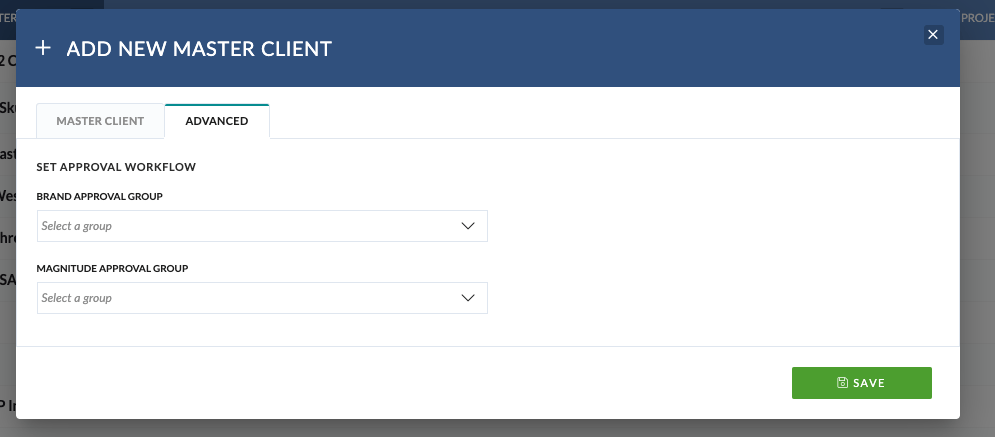
You will notice an advanced tab that can be used to set approval groups. This is to use in a feature we hope to release in Q2 2023.
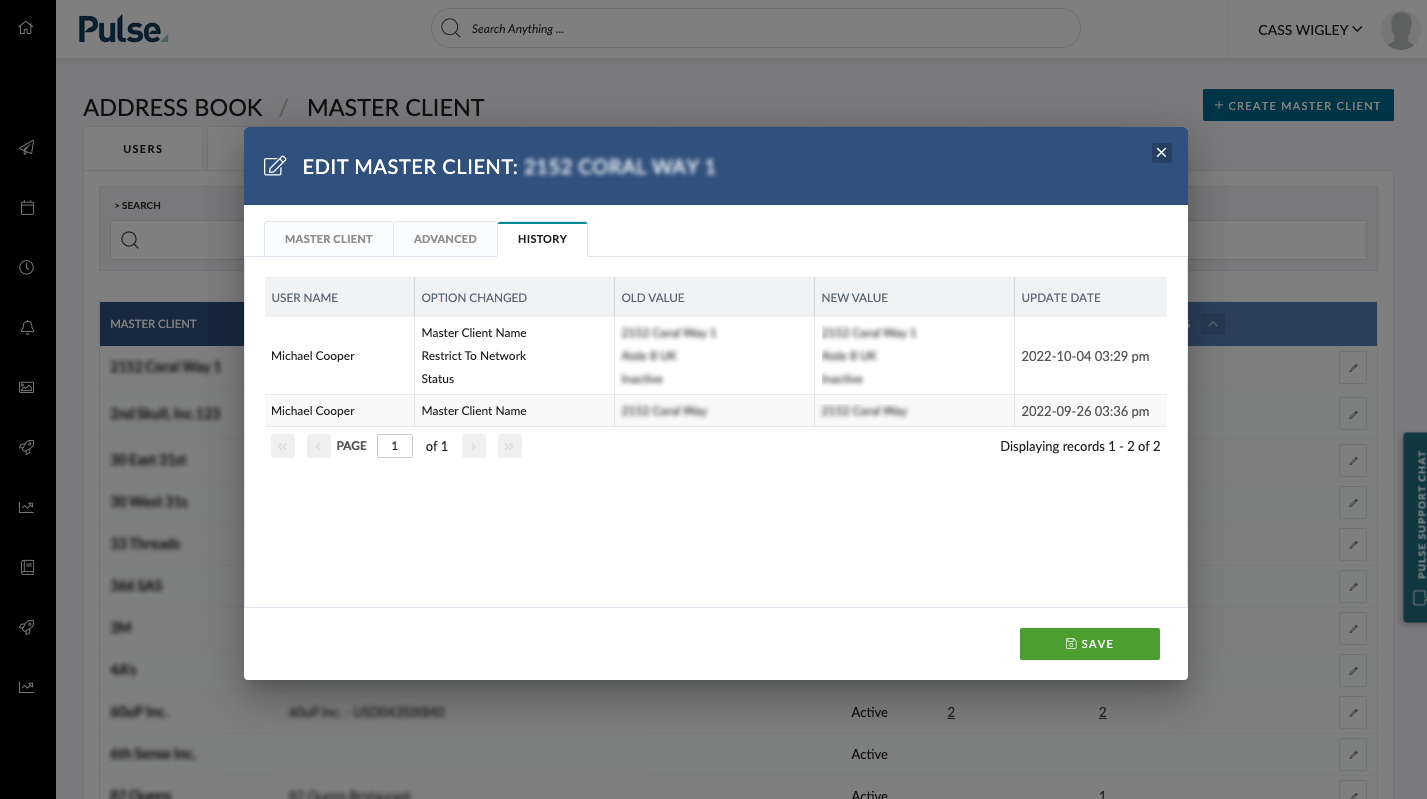
You will also see a ‘History’ tab that tracks any changes made on Master Client.
How to Edit a Master Client
- Go to Master Client in the address book /v2/address-book/brand-categories/
- Click to edit a Master Client
- Validate it shows a new design with a ‘restrict to network, ‘status’ and tabs of ‘advanced’ and history’
- Make a change and save
- Click to edit
- Validate it saves and logged on the history tab
How to Create a Master Client
- Click to create a new Master Client
- Validate it shows a new design with a ‘restrict to network’ which is NULL and optional, ‘status’ which is ‘active’, and tab of ‘advanced’
- Add a name
- Click to the advanced tab
- Click Brand Approval Group
- Validate it shows groups you have access to in alphabetical order
- Click Magnitude Approval Group
- Validate it shows groups you have access to in alphabetical order
- Save
- Click to edit newly created Master Client
- Click History
- Validate the creation was logged