Brands correspond to real-world trademarked names for a Company’s end-products and services. For this reason, Brands are sometimes referred to as “Products” and the terms are interchangeable in Pulse.
Brands are a global setup in Pulse and exist across a Pulse Network. A Brand belongs to a Brand Category (aka ‘Client Group’), who is the trademark owner of that product or service. Whilst this Client Group owns a Brand, they may not always be the “Billing Client” for Projects that involve a particular brand or product – many different Pulse Offices may work on the same Brands in different markets for different Customers.
The management of the global brand directory is a complex process that is maintained by the Pulse Support Team.
Adding New Brands (aka Products) in Pulse
Please Note: Currently new Brands & Brand Categories can only be added by Pulse Support. We are in the process of redeveloping the management of Brands (aka Products) in Pulse to automate the process of adding and approving new Brands.
Existing Brands can be mapped to an Office by an Operations User by going to the Address Book > Offices > Product Mapping tab and searching in the existing Brand directory.
Before a new Brand can be added to the Global directory of brands it must satisfy certain legal and practical requirements. It is good practice to include a website so that the support team can check that this is a real brand, and does not violate any of the rules for brands.
What cannot be a brand:
- Anything that indicates legal statute,
- geographical data,
- project type,
- audience and similar attributes.
1. Navigate to the Address Book > Brands
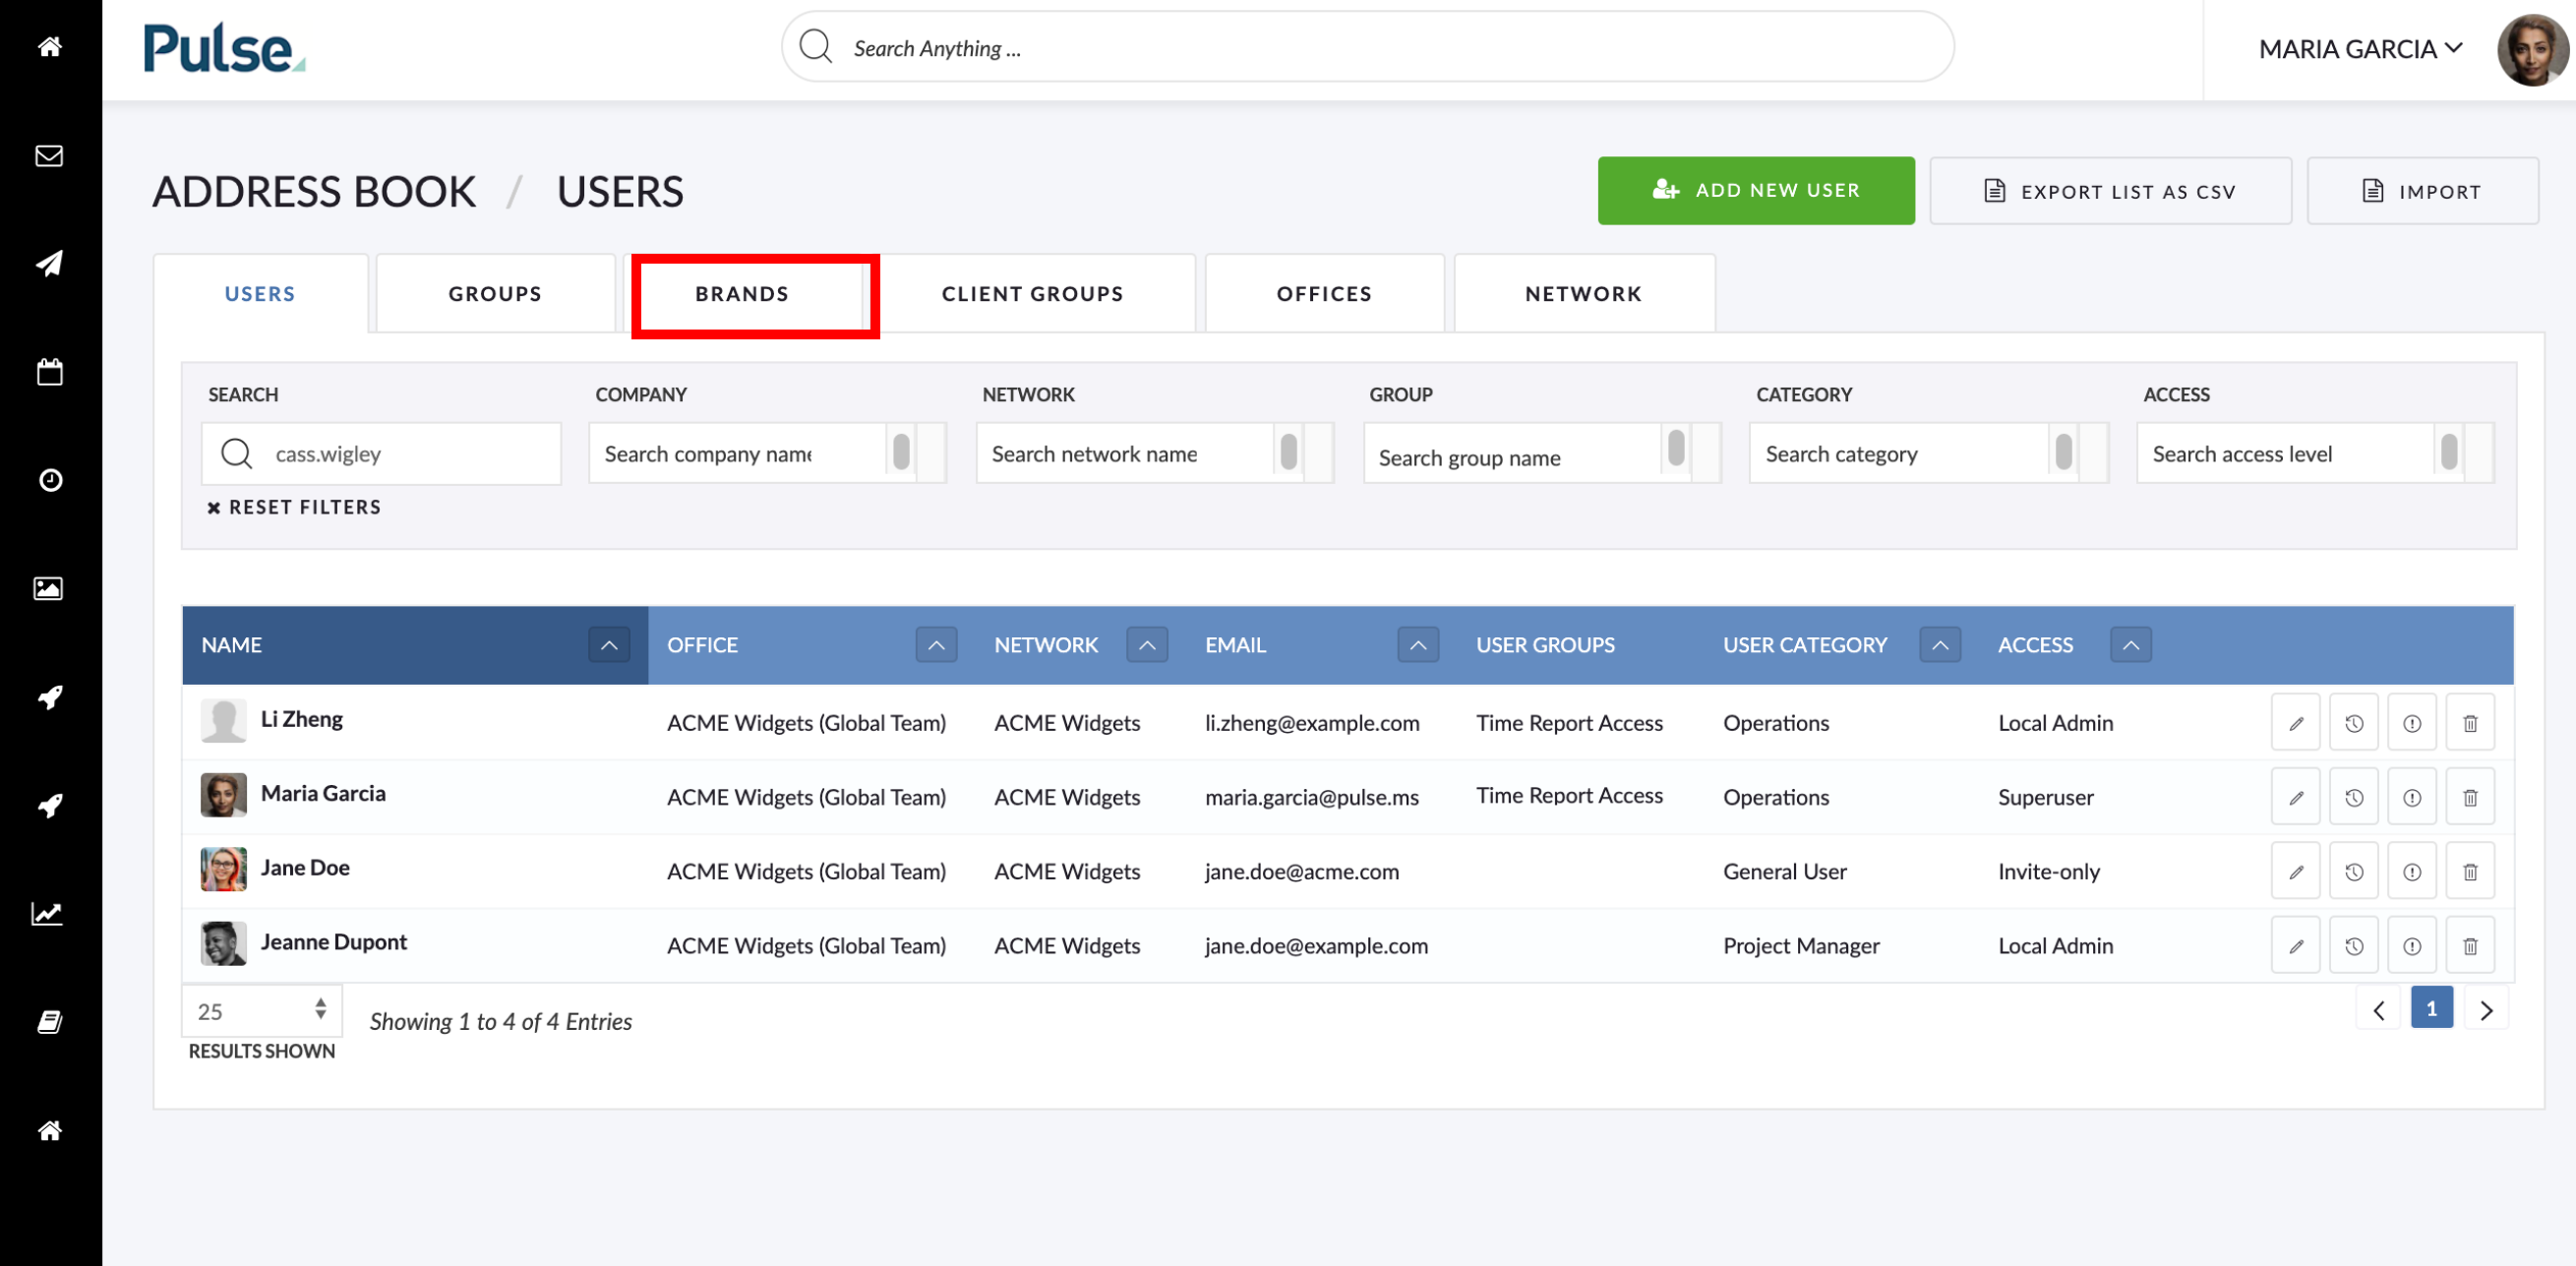
2. Click “Add New Brand” button

3. Enter the name of the Brand
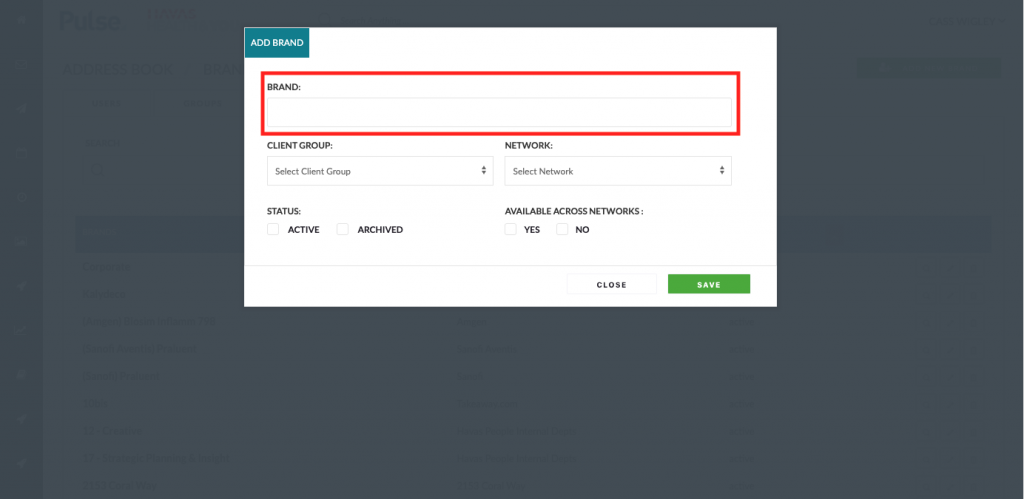
4. Select Brand Category (aka ‘Client Group’)
Brands (aka ‘Products’) must be mapped to an existing Brand Category (aka ‘Client Group’)
If you need to set up a new client you will need to do this before setting up the new Brand or Product.
To create a new Brand Category (aka ‘Client Group) follow the same steps listed here, however go to the ‘Brand Category‘ (aka ‘Client Group’) tab inside the Address Book and click ‘Add Client Group’.
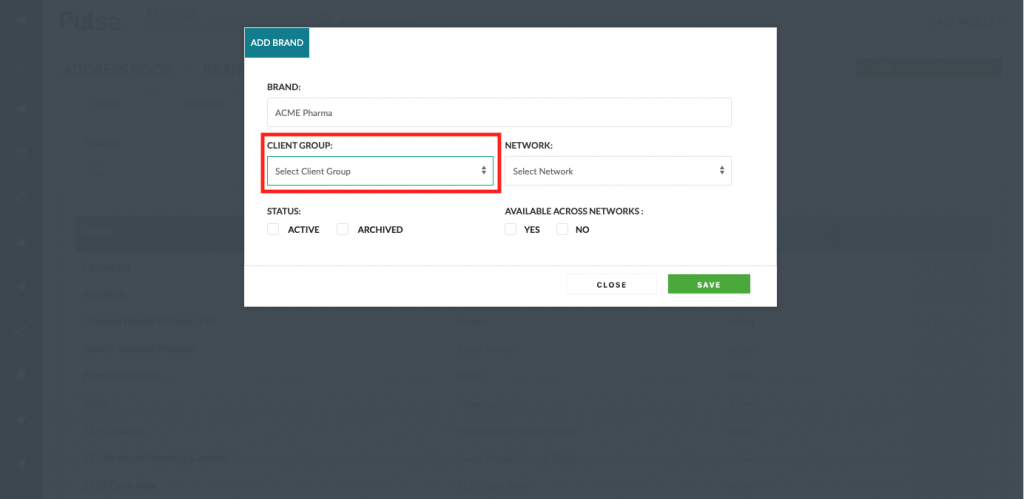
5. Select Network
Brands or Products must be mapped to an existing Network.
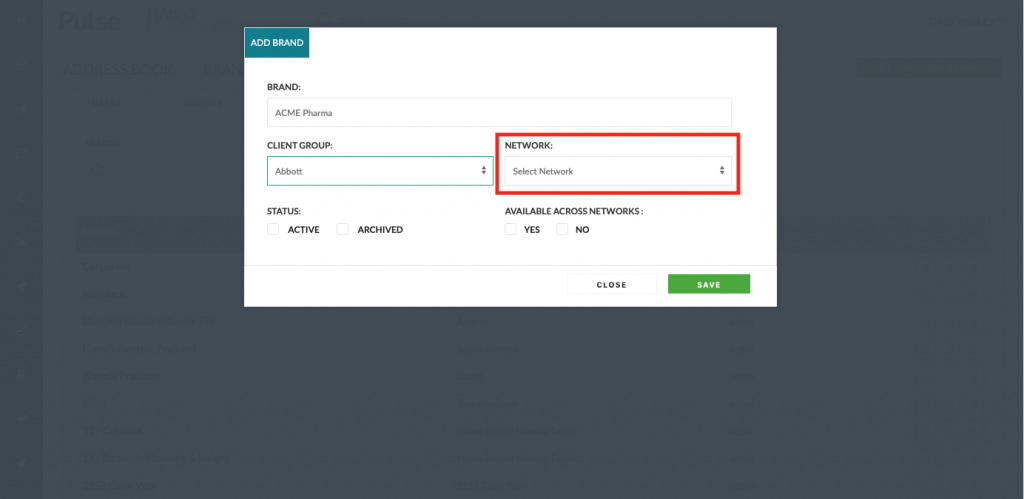
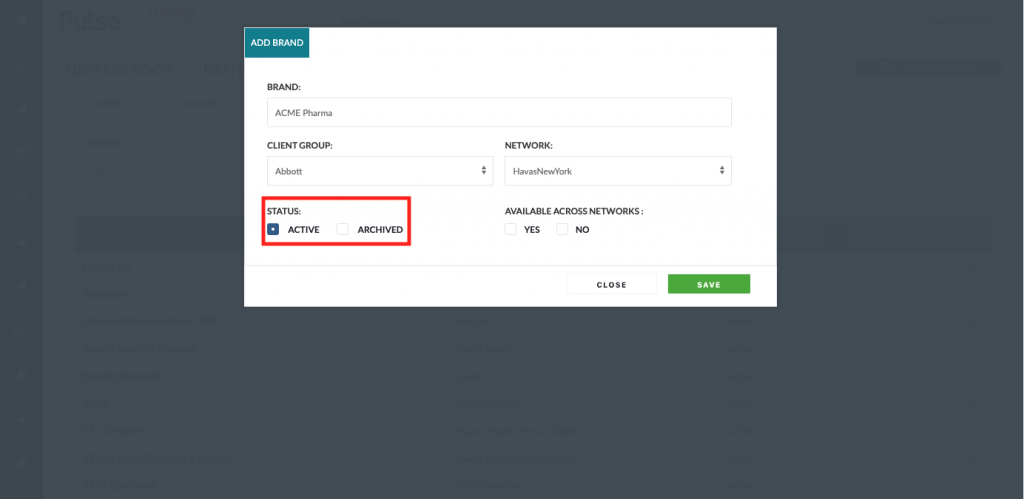
6. Select Status
Brands can be either in an “Active” or “Archived” state. For a brand to appear in select lists and search results it must be Active.
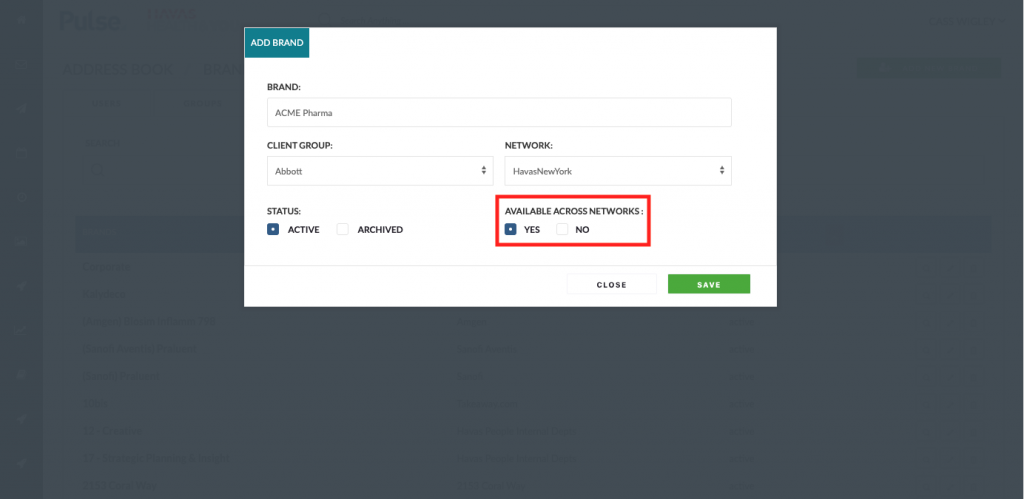
7. Select Availability Across Networks
You can make this brand available across Networks or limited to a single Network.
You have successfully added a new Brand or Product.
KB.44857