The article below describes the relationship between Brands and Offices and how to update this mapping in the Pulse Address Book.
- If you need to map a Brand to a specific User – instead of the whole office – please read the article I can’t see a Brand in the Project Wizard
- If you need to create a New Brand or New Master Client please read this article: How to create a new Brand or Master Client
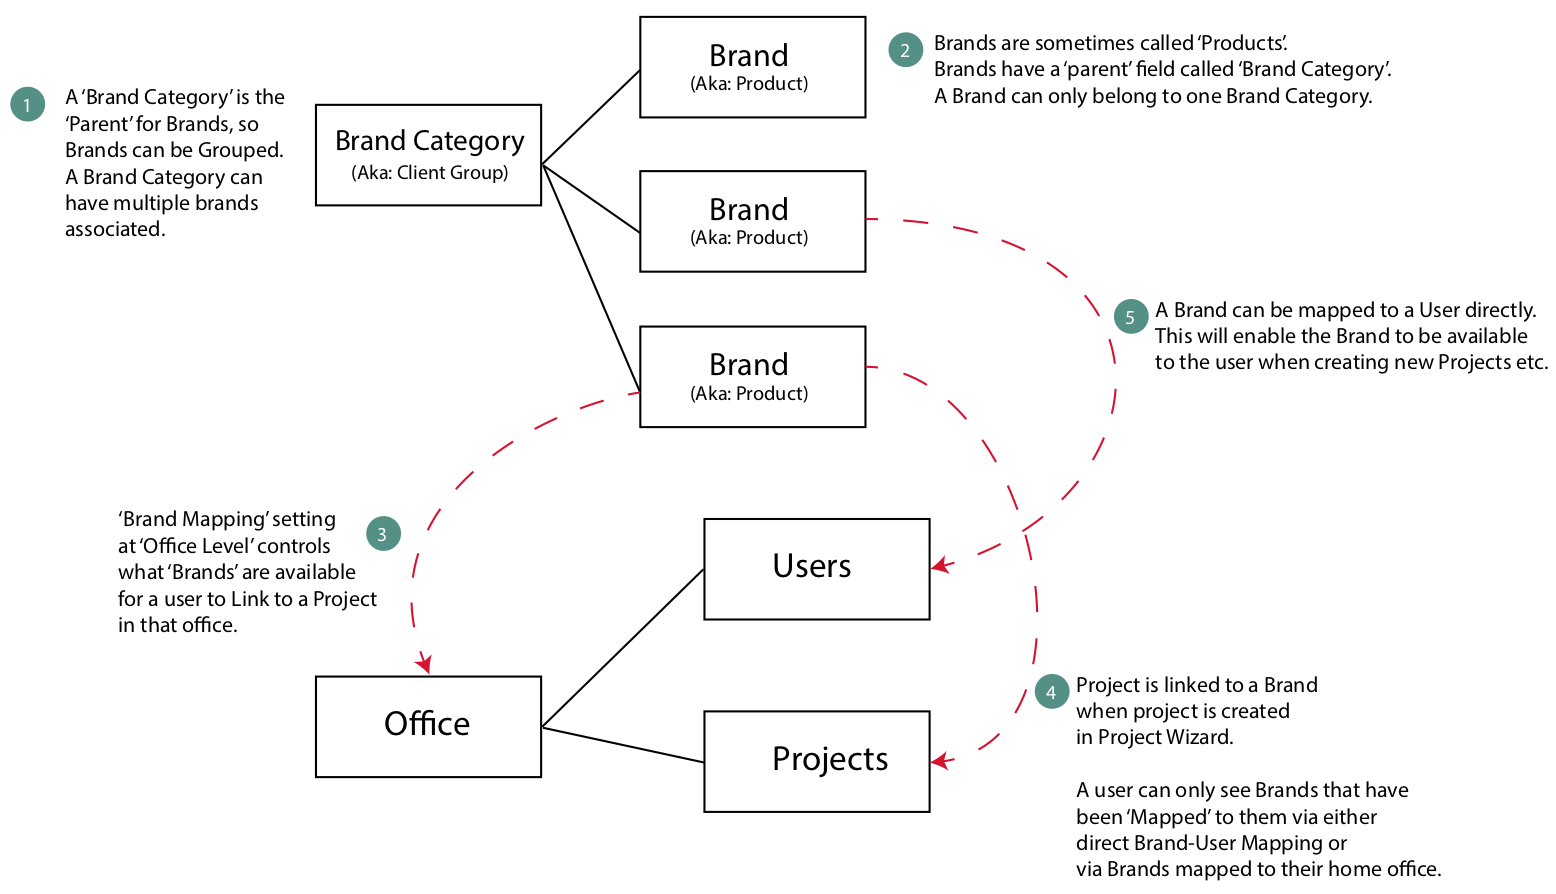
Introduction: ‘Brand Mapping’
Pulse uses a security model based on Brands (aka ‘Products‘) to control who can access Projects and Assets in the system.
To make a Brand (aka ‘Product‘) available to users in an Office you must either map the required Brand to the user’s Office, or you can map the Brand directly to a Specific User (If you need more specific control on who needs access to the Brand. EG: for a ‘Global Brand Director‘)
Brand and Office Relationship
- Each Office (aka “Agency”) in Pulse is mapped to a number of different Brand (aka “Product“)
- In turn, each Brand belongs to a Master Client
- Mapping a Brand to an Office makes that Brand available when a User from that Office creates Projects in the Job Wizard
- Also, you can map a Brand to a specific User, if you need to grant access to the Brand for only that user – and not the whole Office.
Mapping Brand to Office – Step by Step
Note: The solution steps in this article requires the User Permission of Manage Brands. Typically this permission would be provided only to Operations Users in Pulse.
If you need to update a Brand Mapping to an Office – but you don’t have the ‘Manage Brands‘ Permission – you can contact an Operations User in your office to do this – or raise a support ticket with the Pulse Helpdesk to organise this.
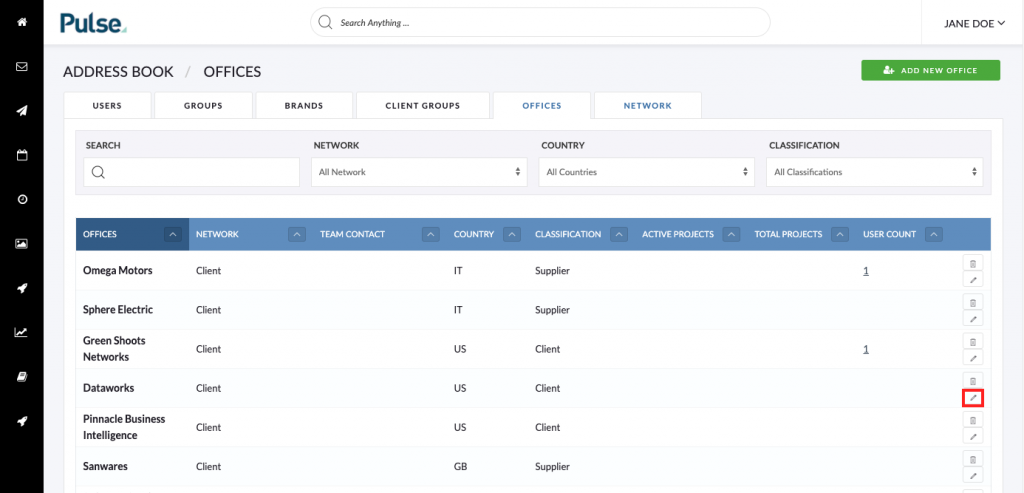
1. Locate the Office in the Address Book
Go to ‘Address Book, and then select the ‘Offices’ tab.
Search and find the Office you want to update. Click the “pencil”icon to open the Office Details Modal and edit the details of your Office:
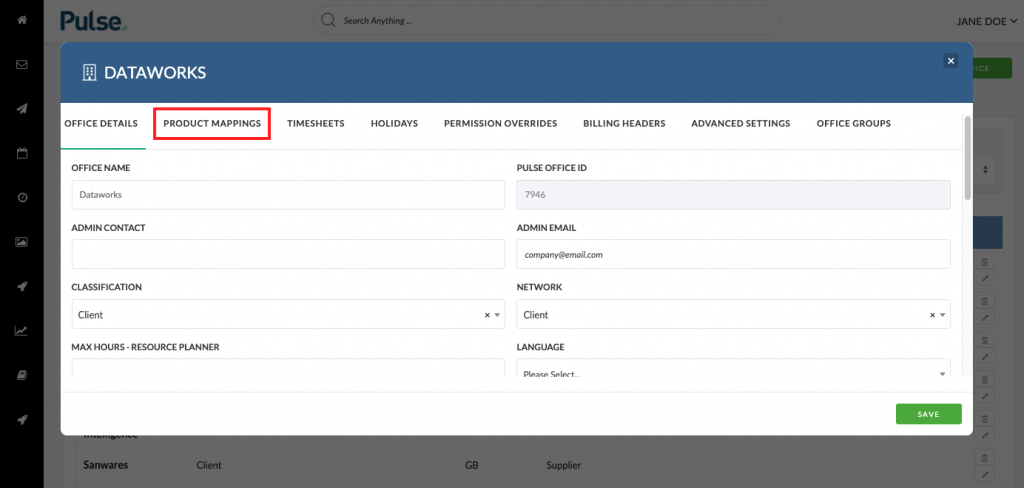
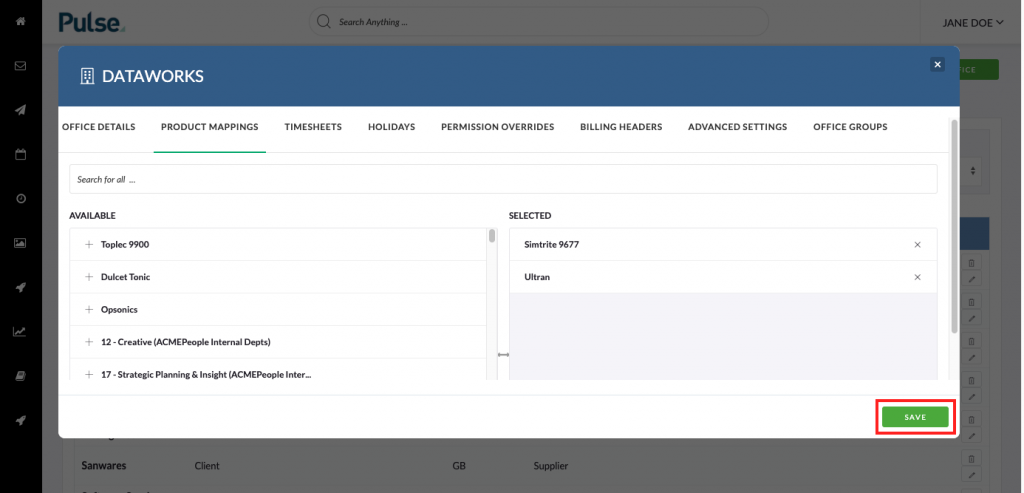
2. Click the ‘Product mapping’ tab
With the Office details modal open, click on the “Product Mappings” tab.
Reminder: ‘Brands’ are sometimes called ‘Products’ in Pulse. The exact wording will depend on the translations configured in your office.
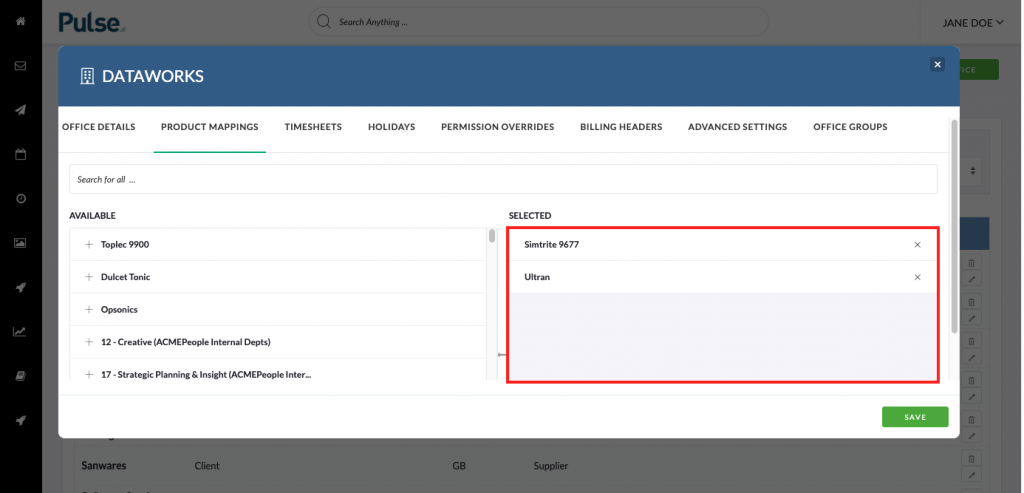
3. Select From the available Brands (aka ‘Products’)
On the Product Mapping tab you will find a list of the available Brands (aka ‘Products’) that you can map to your office.
The Brands you can see in this list will be controlled by:
– You Permission level in Pulse. (eg: Invite Only, Office Admin, Access all Offices)
– Brands mapped directly to your user account.

Clicking on a Brand (aka ‘Product’) will move it into the “Selected” column. Clicking Brands in the “selected” column will remove them and place them back in the “Available” list.
4. Save your changes
Once you have selected the Products you wish to make available in your office, click “Save”.
KB.43664
Helpdesk Text: How to update the Clients and Customers available to your Office?