This article explains how to add a new Pulse User Account.
Use this approach to manually create a User Account directly into Pulse.
Note: If your office is linked to Agresso, the Pulse User Accounts will automatically be created. Learn more here: https://www.pulsecollab.com/knowledge-base/43556/
Typically, you will manually setup a User Account in Pulse in the following scenarios:
- Any User that is Not Linked to Agresso
- Freelance User Accounts
- Client User Accounts
- Supplier User Accounts
- Temp User Accounts
For the example shown in this Article, we will setup a ‘Client User Account’.
Client User accounts can be used to provide clients limited access to Projects (clients can only see tasks assigned to them by default) or to enable them to participate in approval workflows on creative assets or financial documents.
To set up new User Accounts, you must have the following user profile in pulse:
- Your user Permission Profile must be set to Operations
- You must have Access Permissions to the appropriate Office.
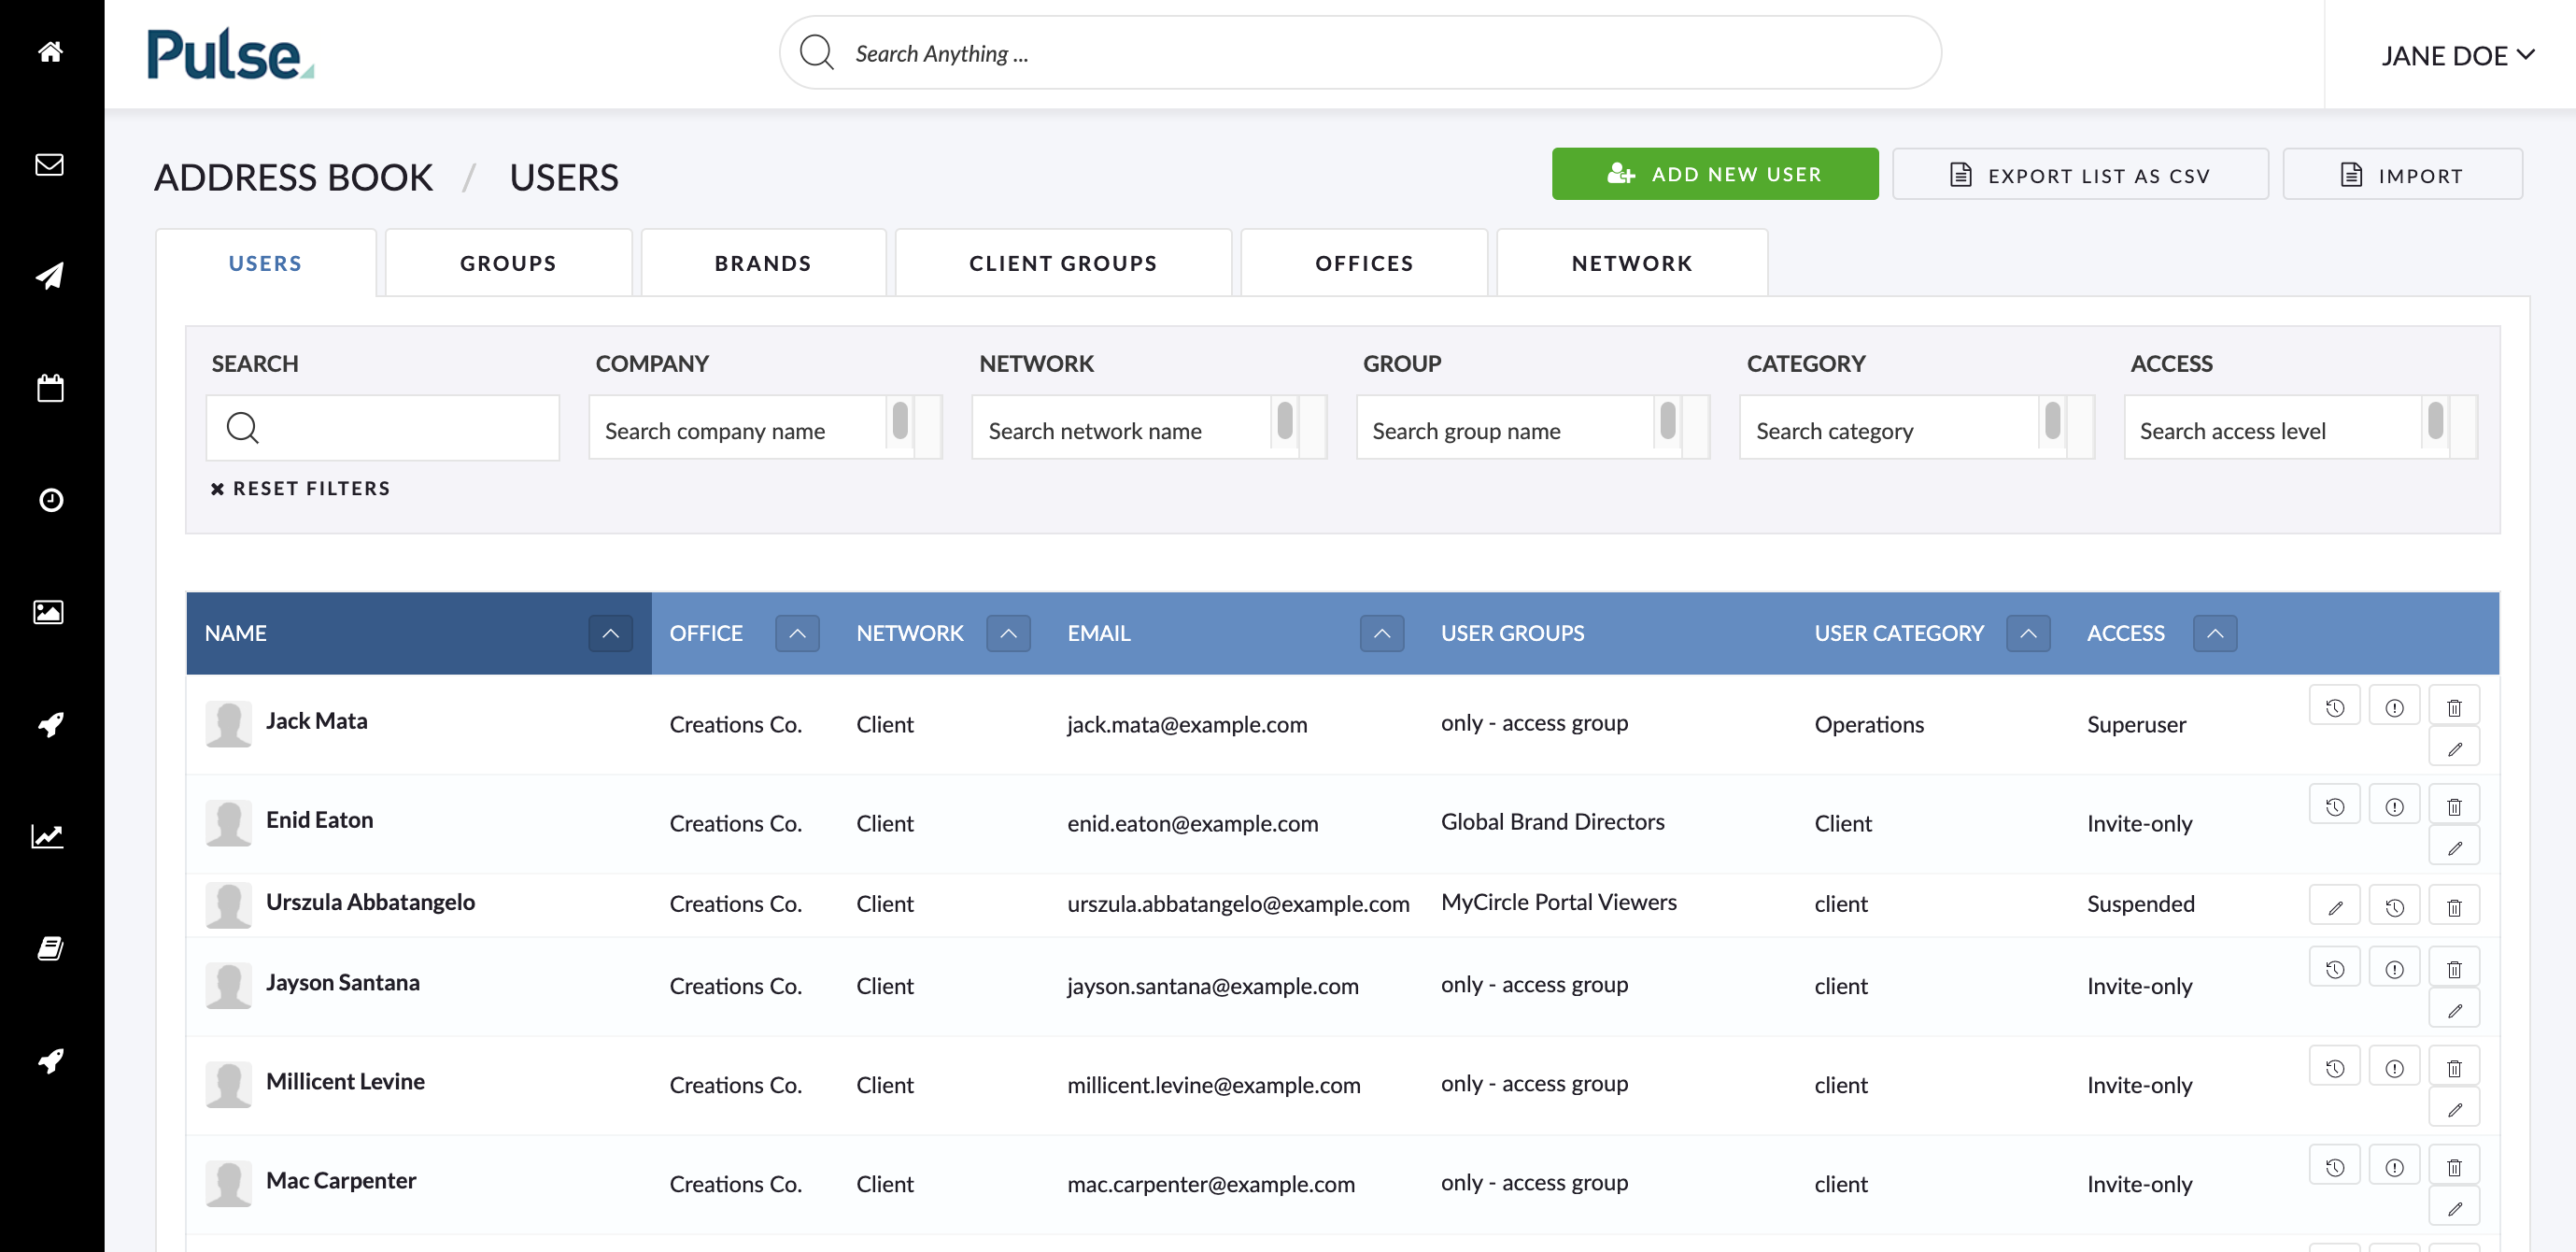
1. Navigate to the Address Book > Users
Click USERS from the main nav on the left
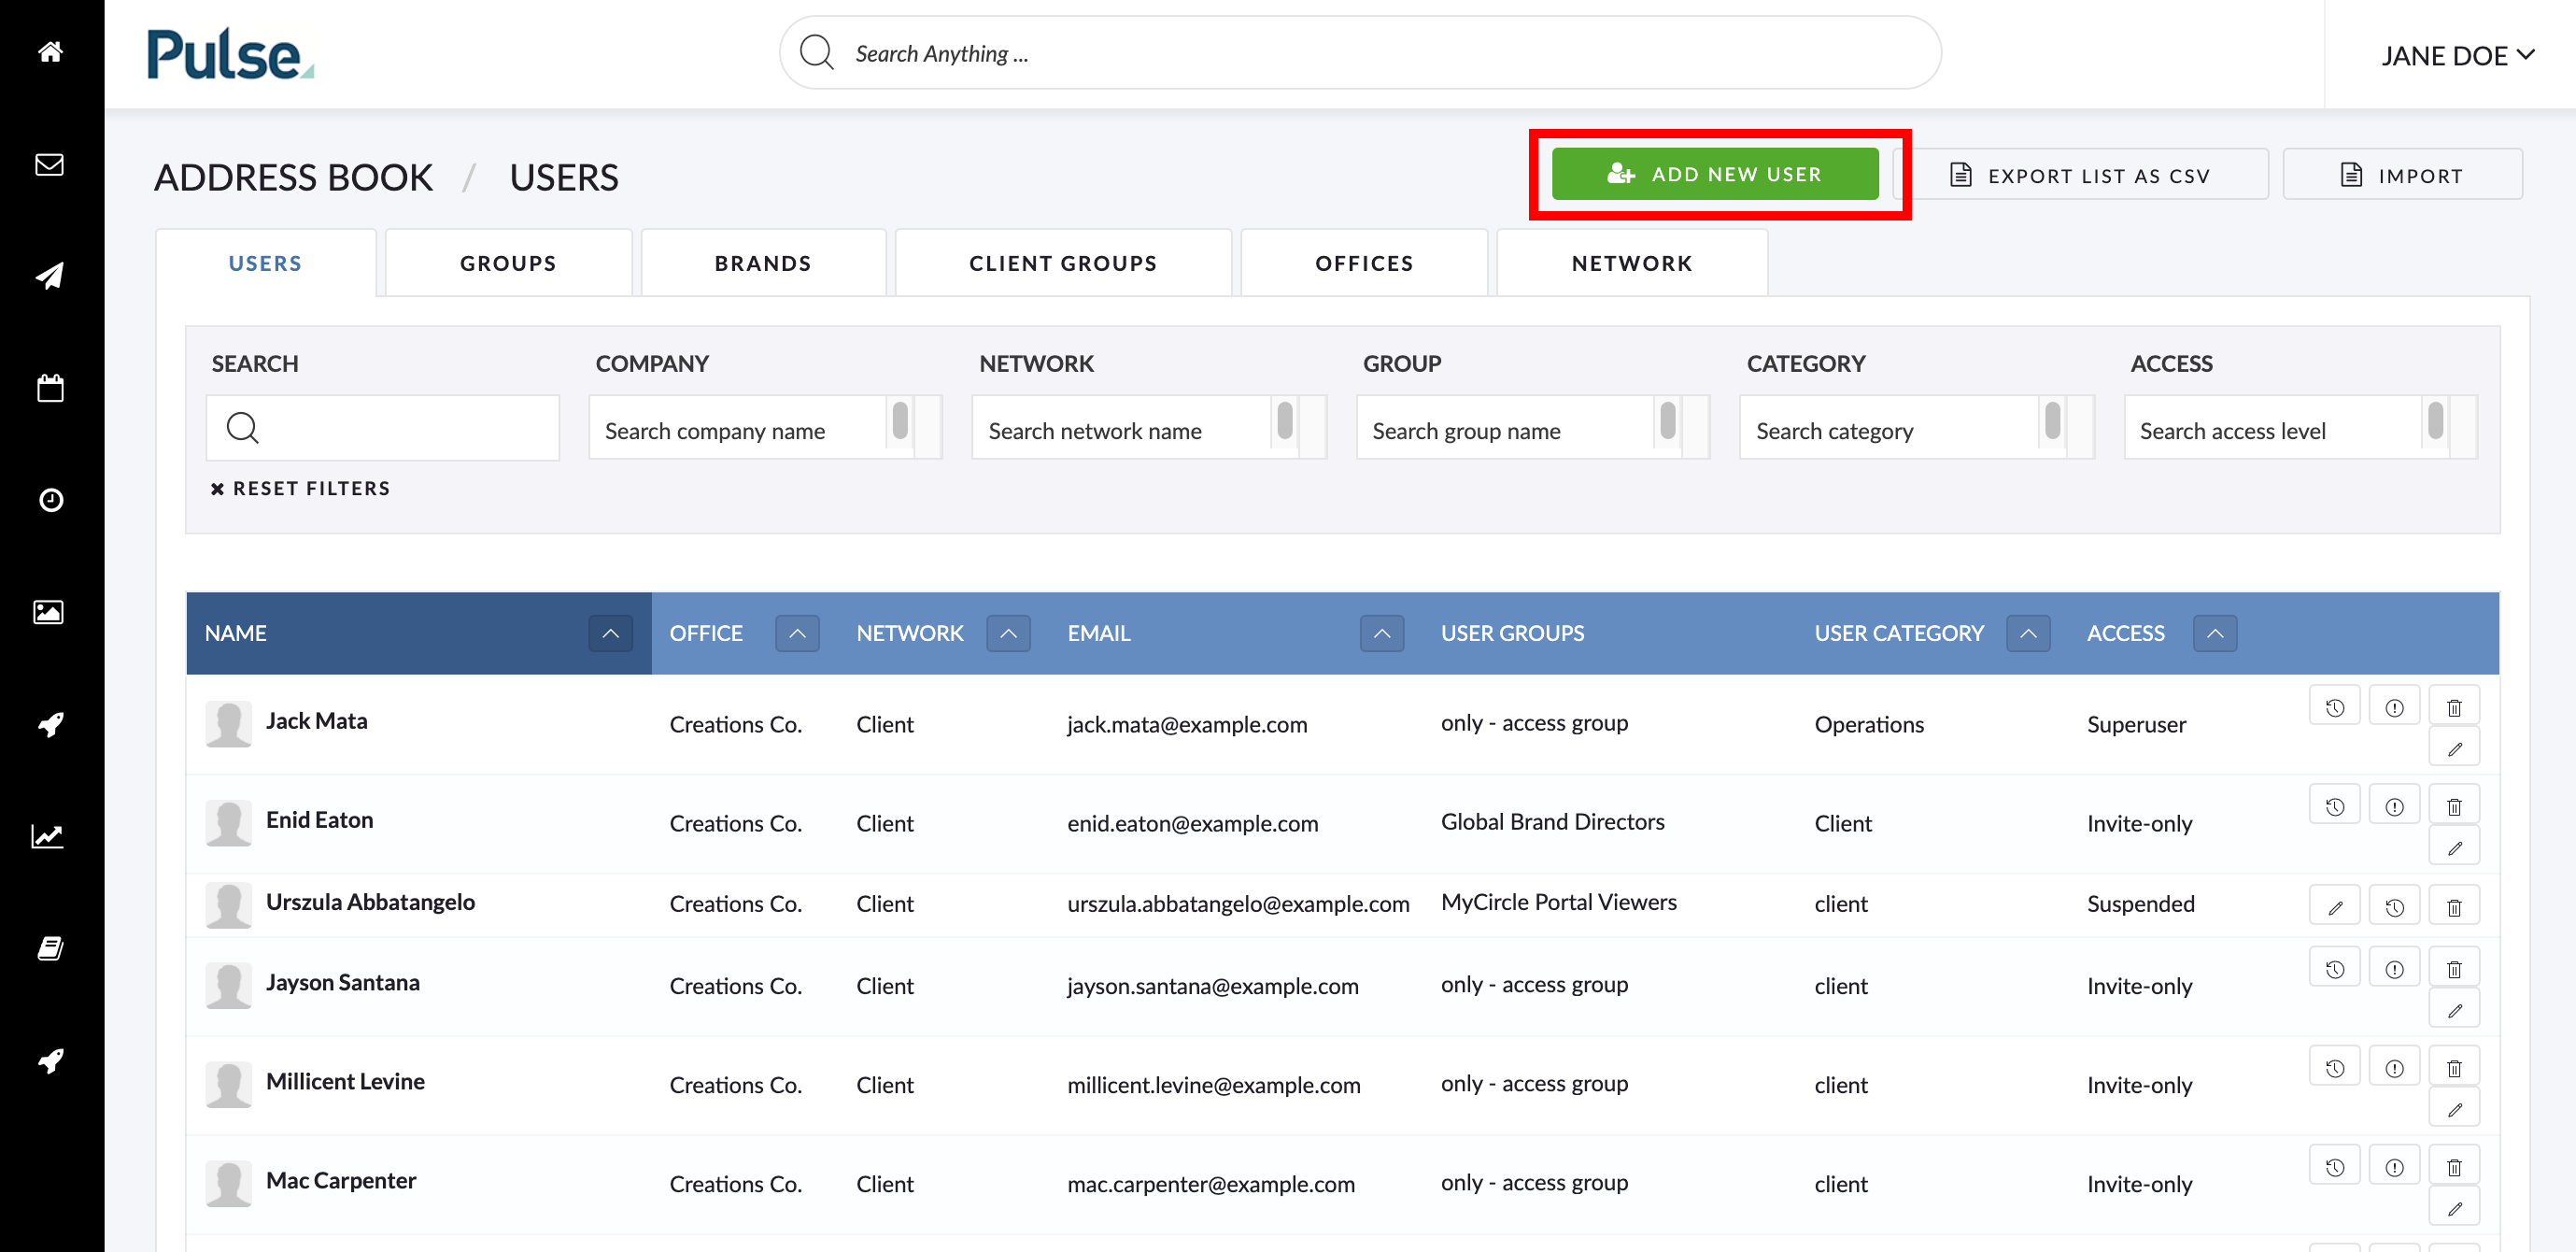
2. Click the green “Add New User” button
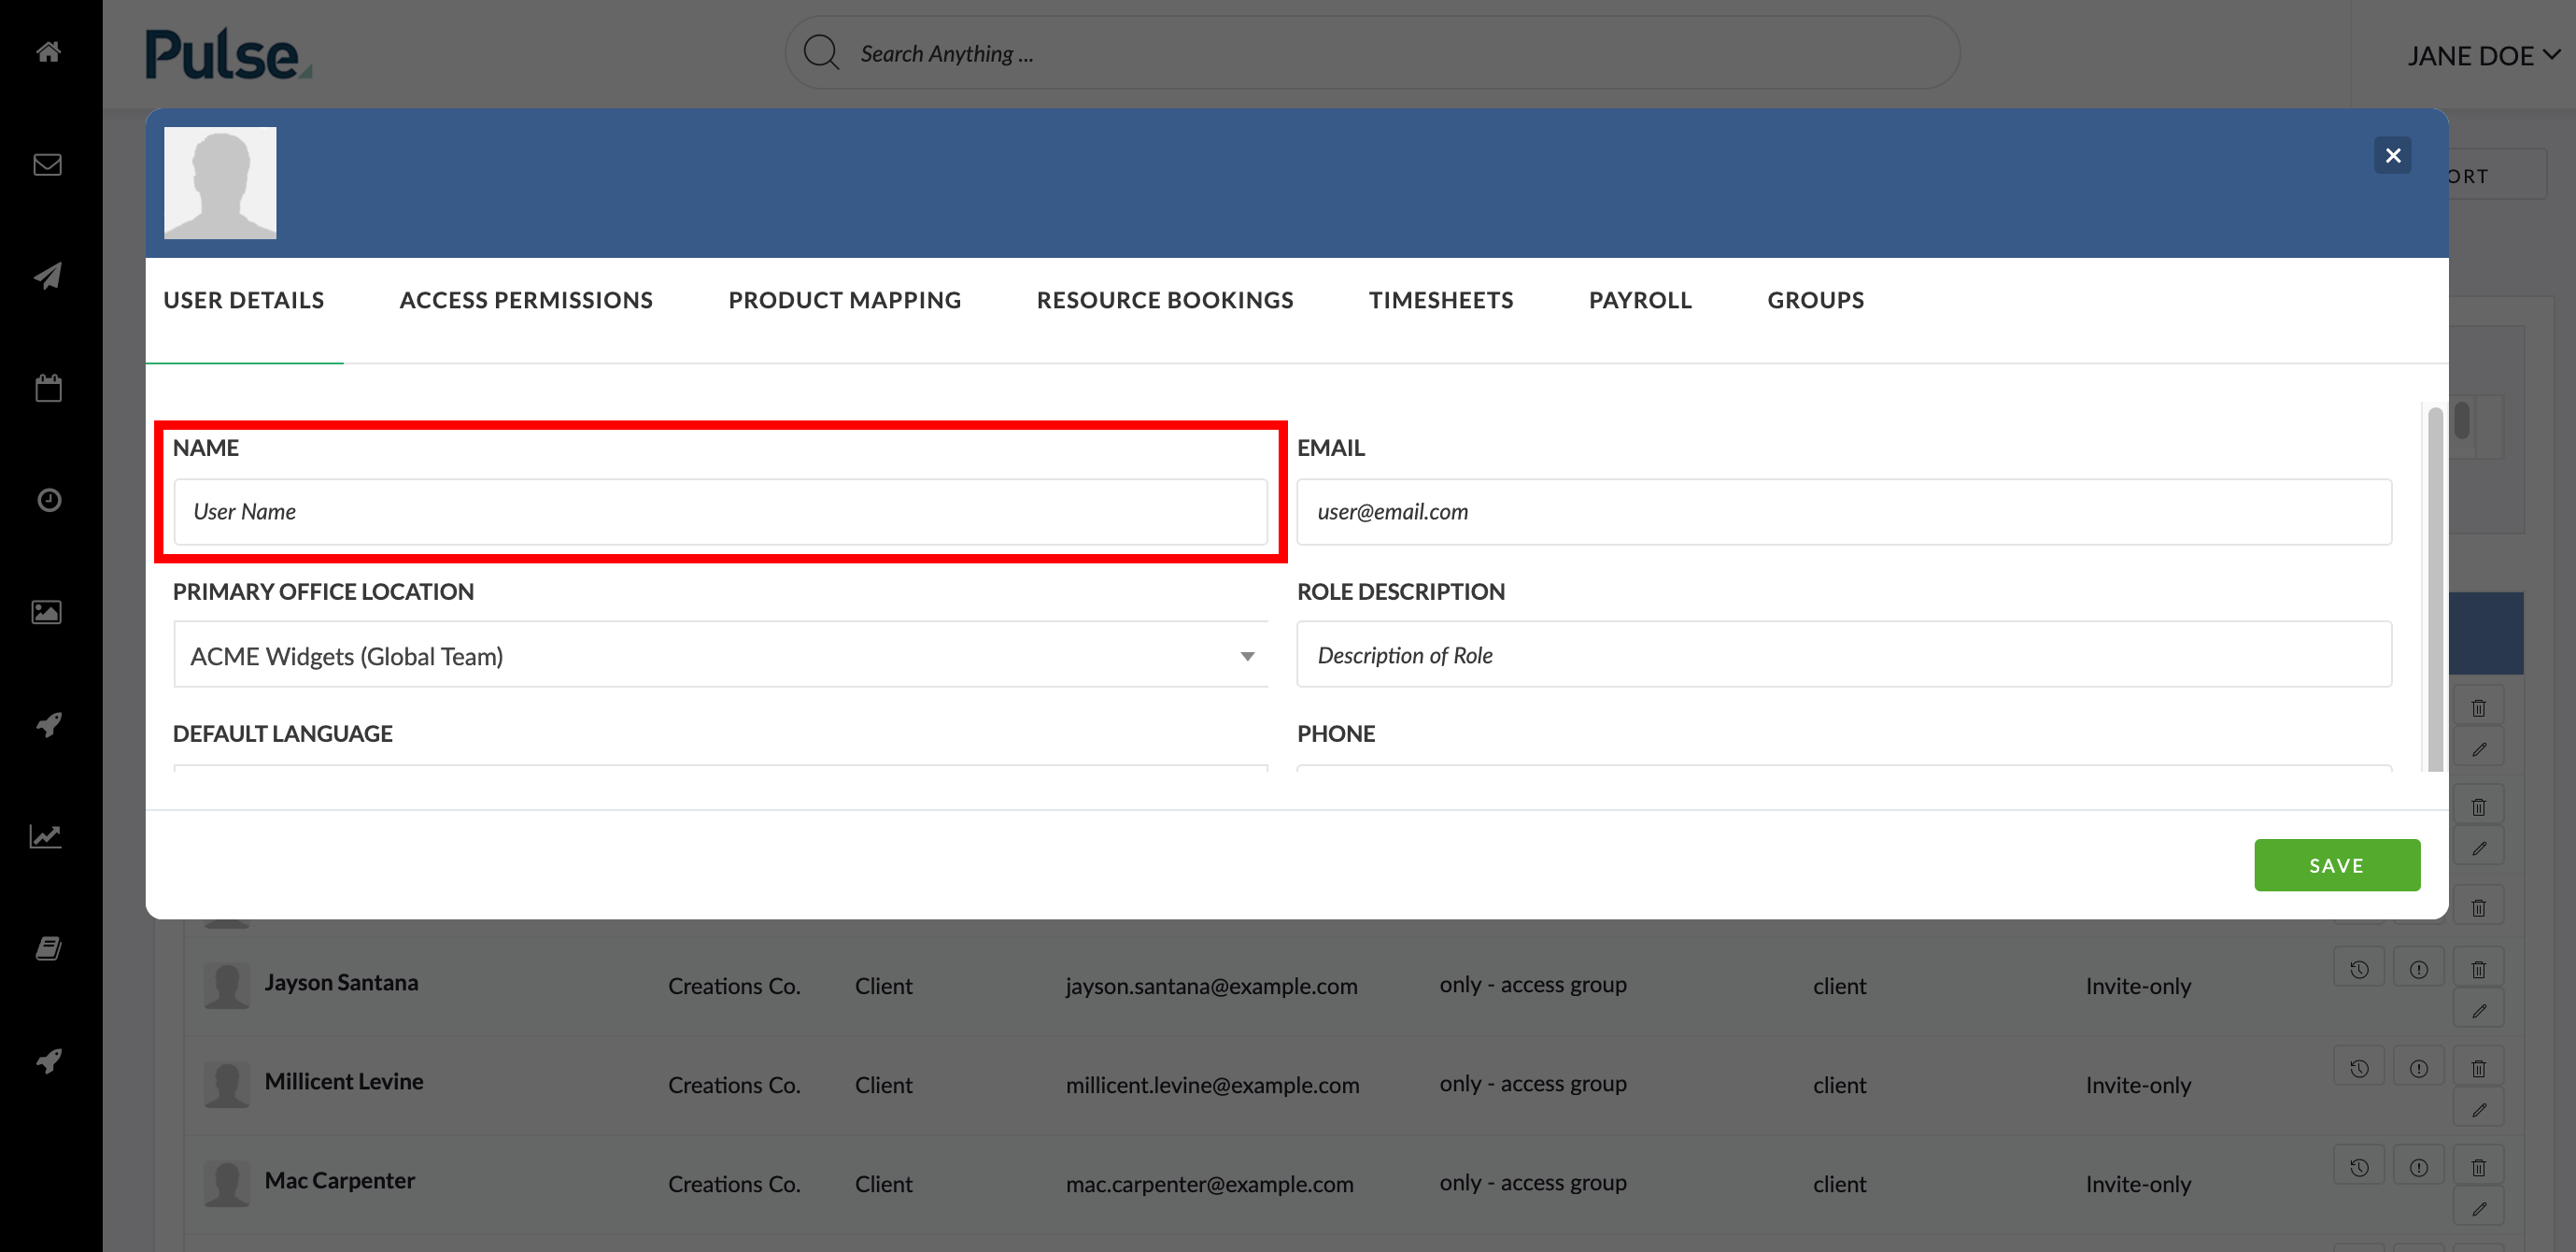
3. Fill in User Details tab
NAME: first and last name
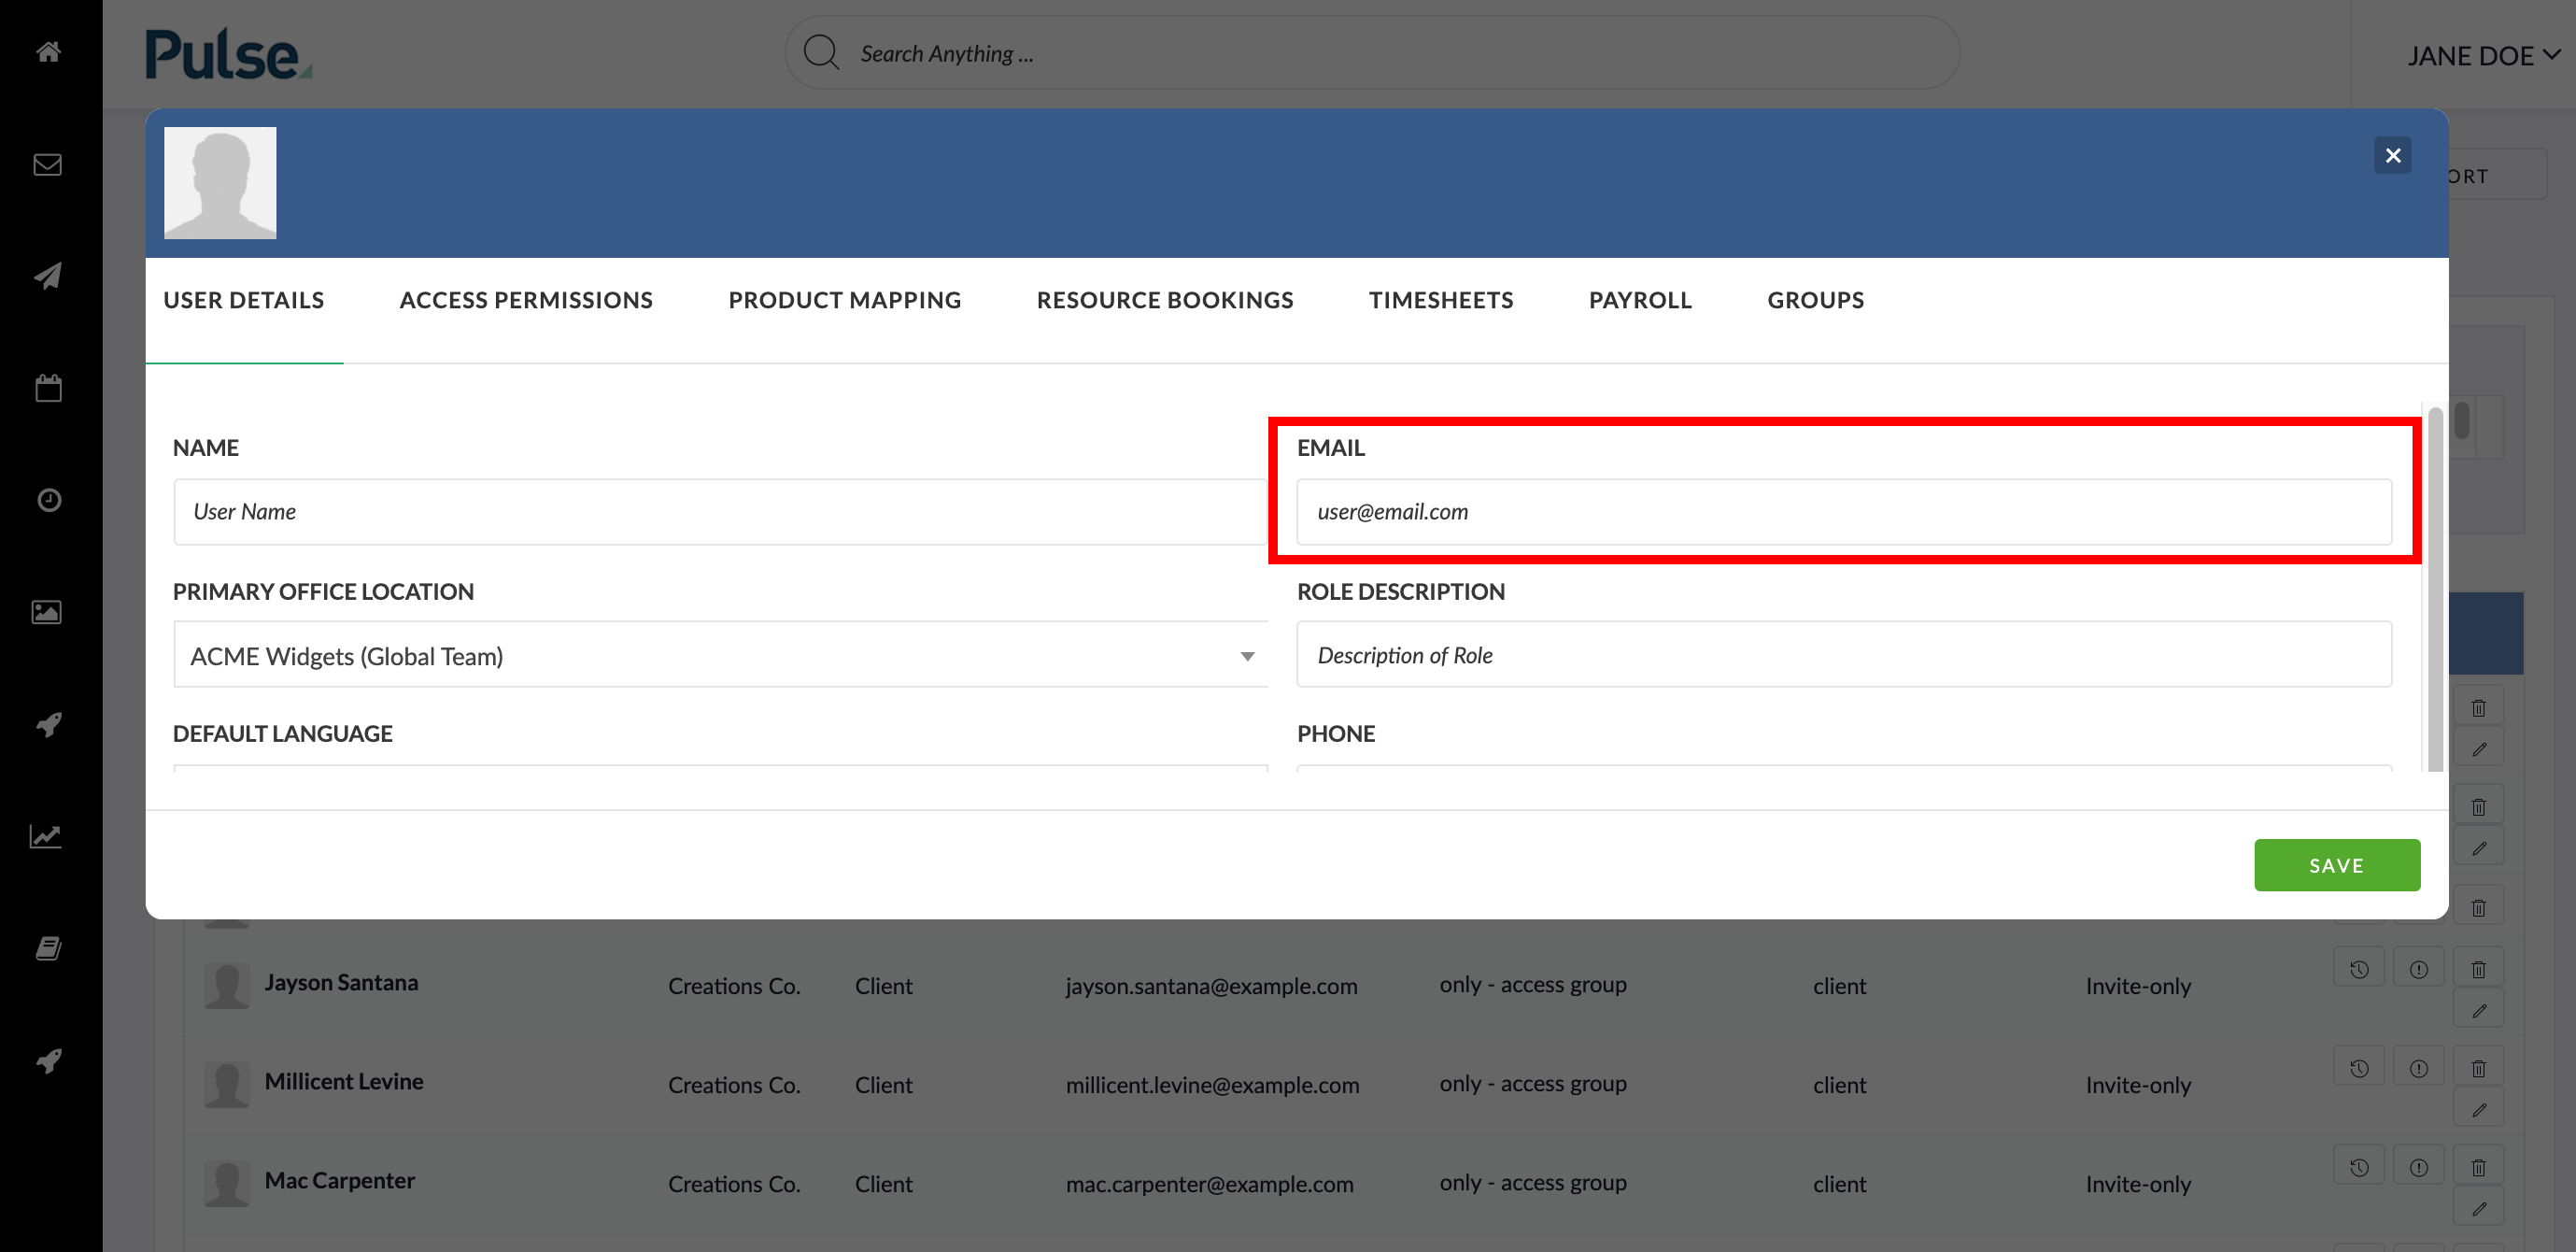
EMAIL: please use work emails for security (Do not use personal gmail/yahoo/etc). This email address will be also used as your client’s login “username”.
PRIMARY OFFICE LOCATION: Set this to your primary Office if it is a new client for your Office. Some clients can be set up with their own dedicated client Office with multi-office access to the Offices where projects are placed.
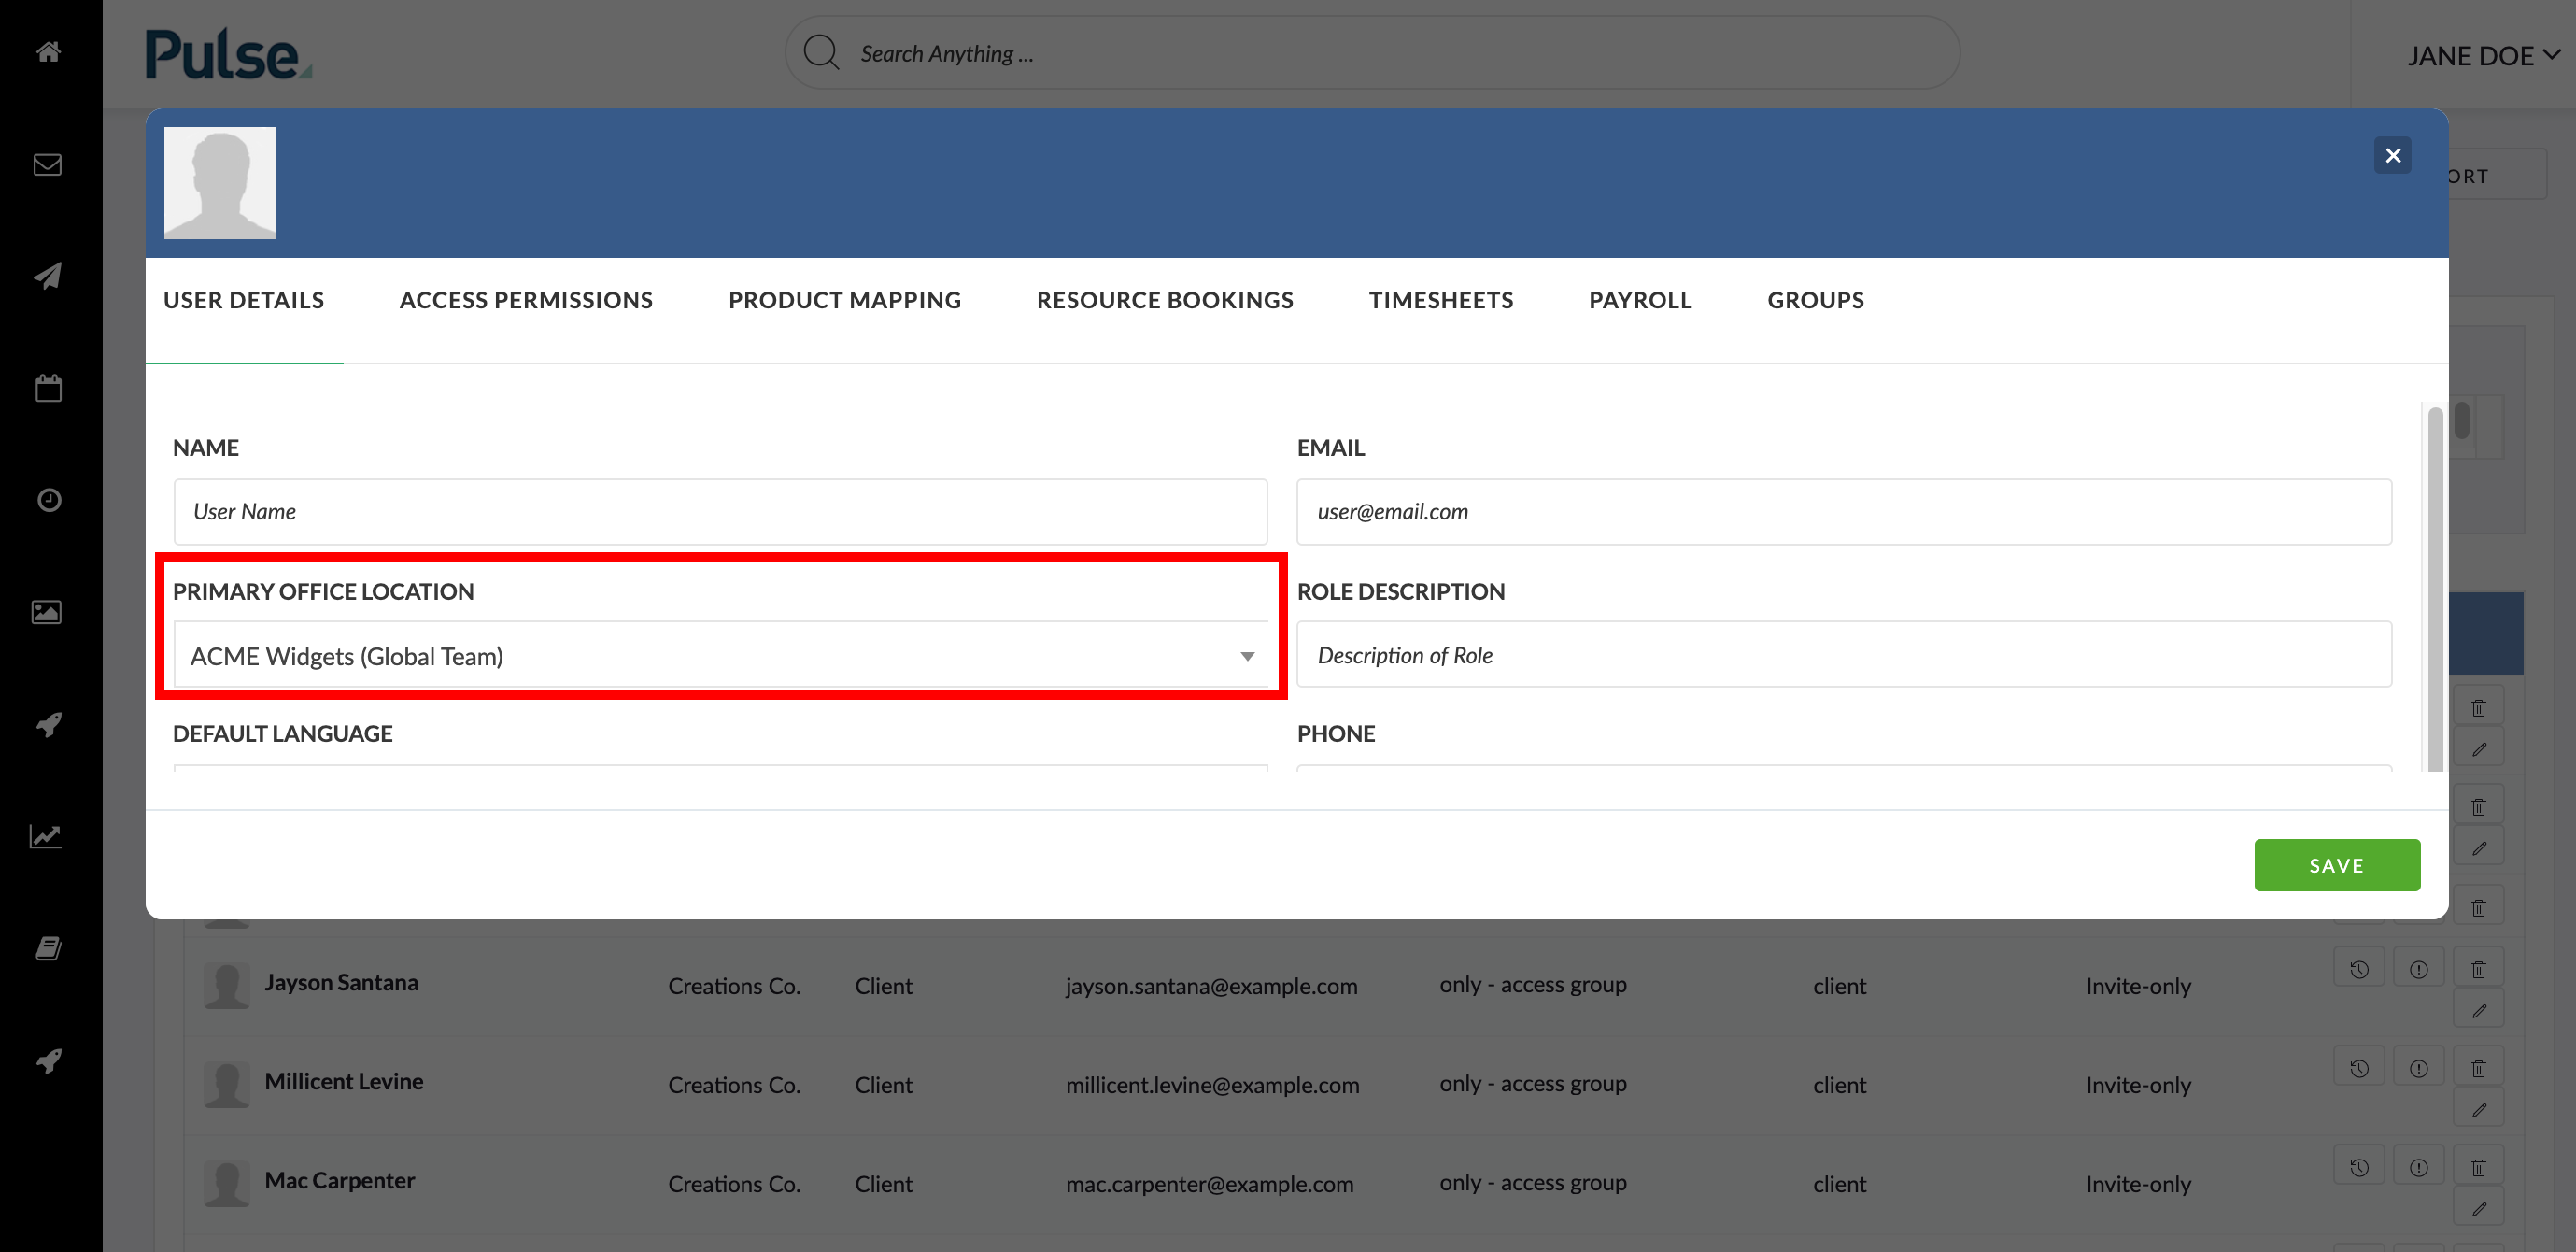
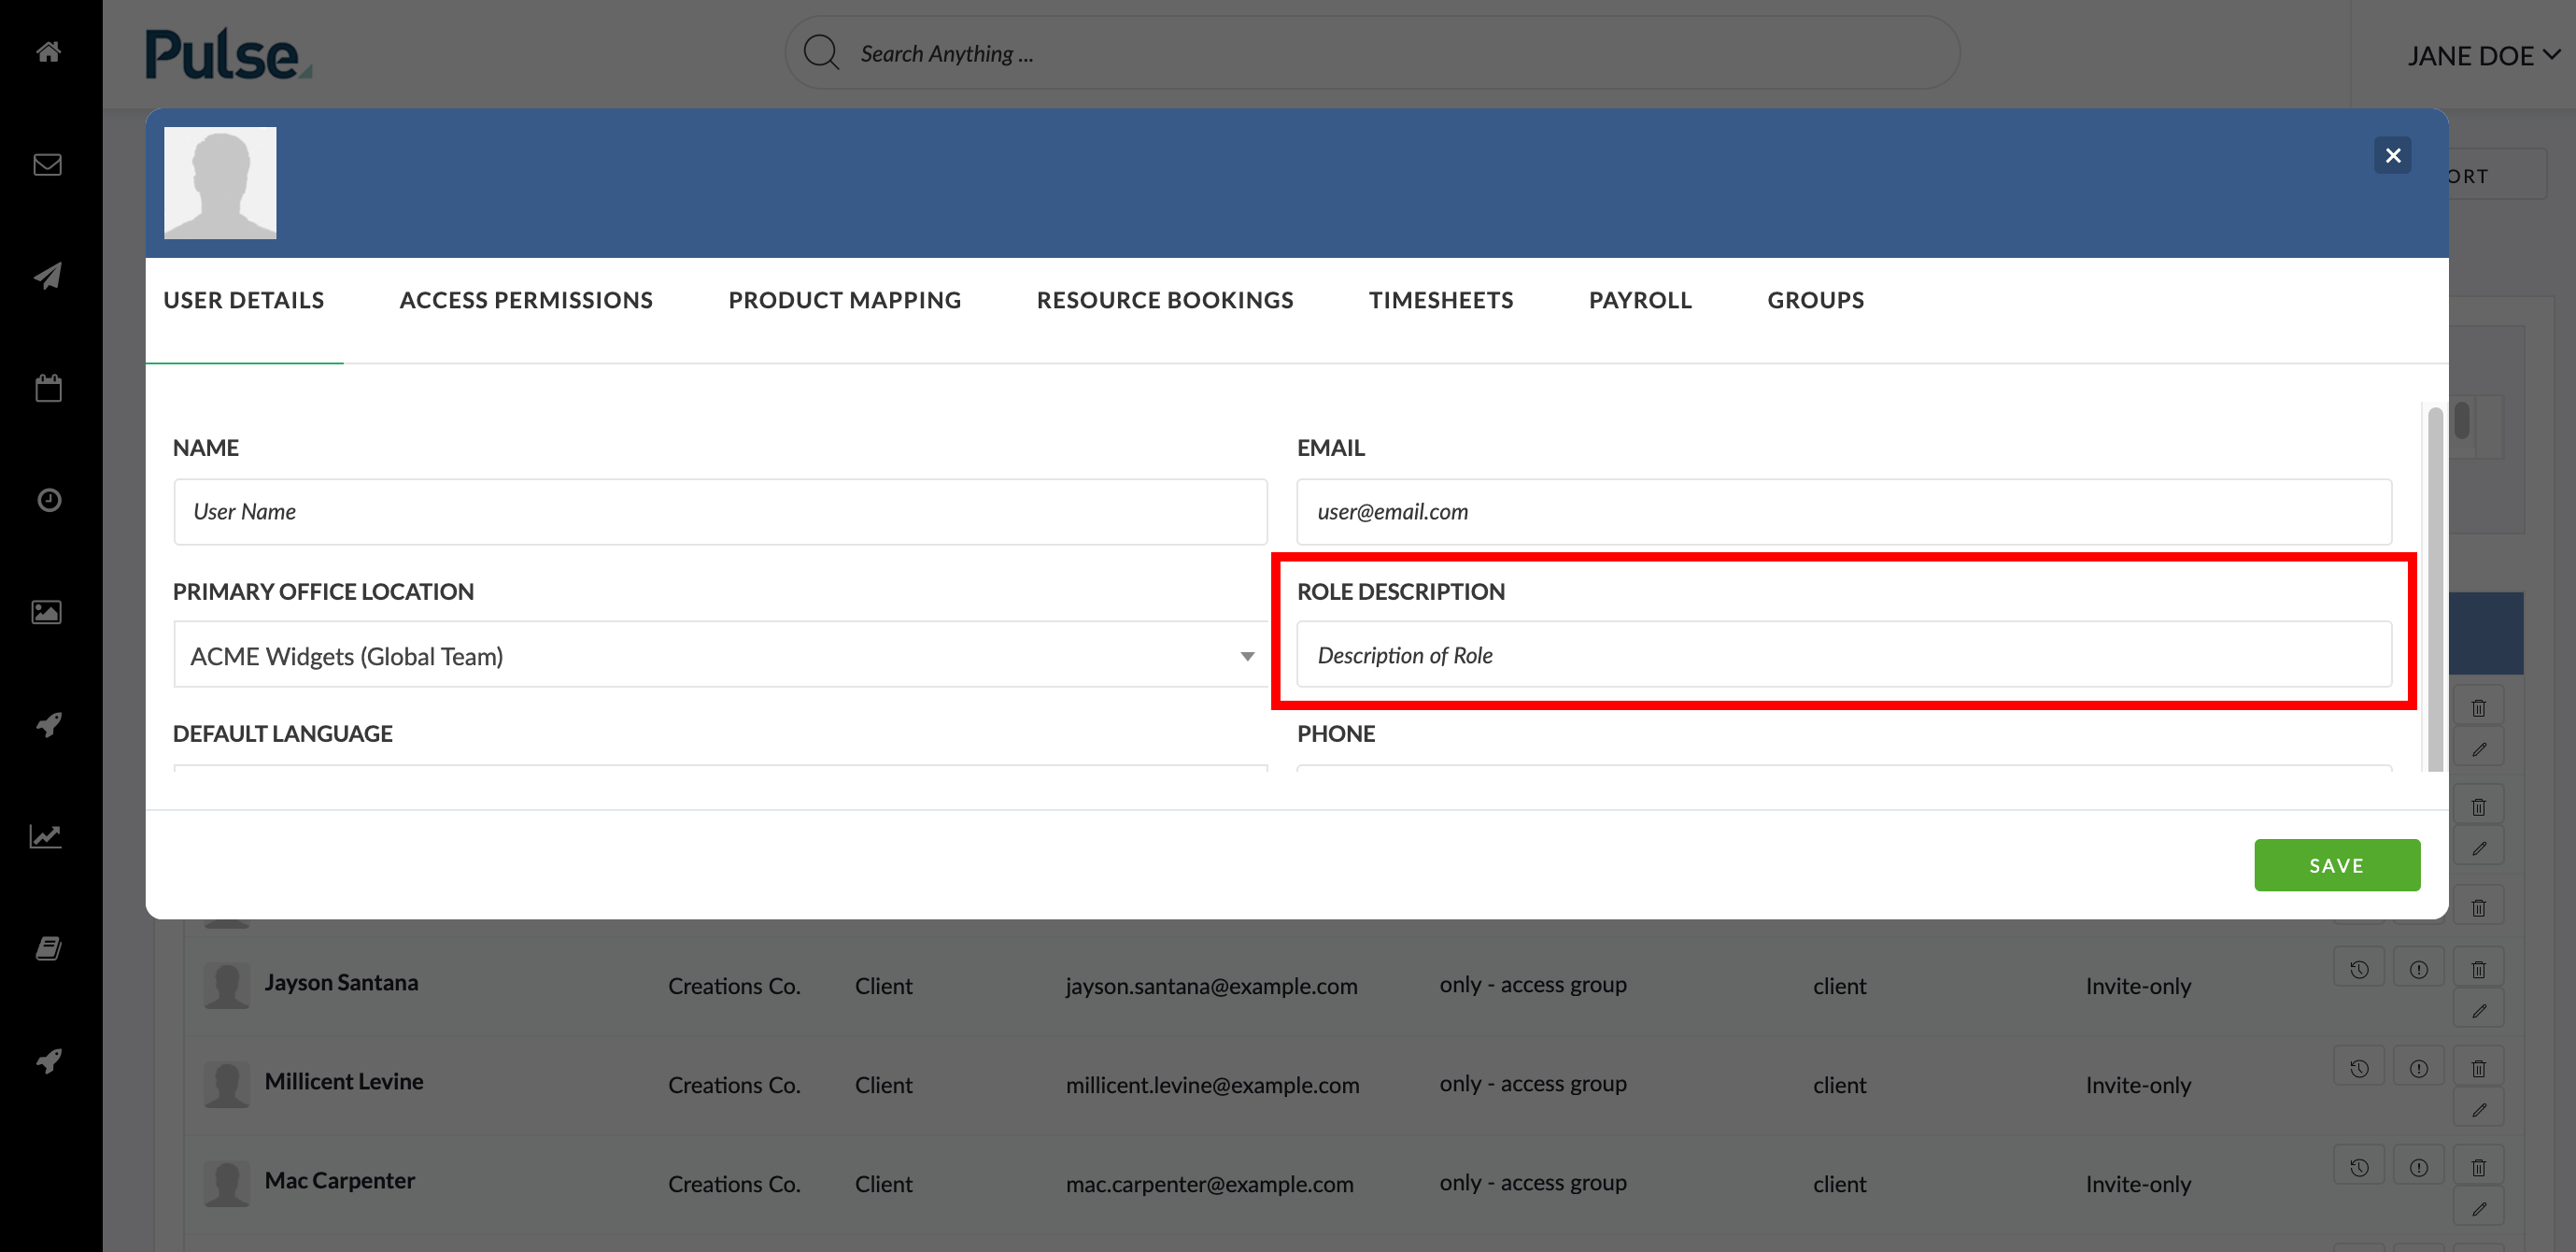
ROLE DESCRIPTION: Optional. You can put their official job title here.
PASSWORD: You must assign them a password here to be able to log in.
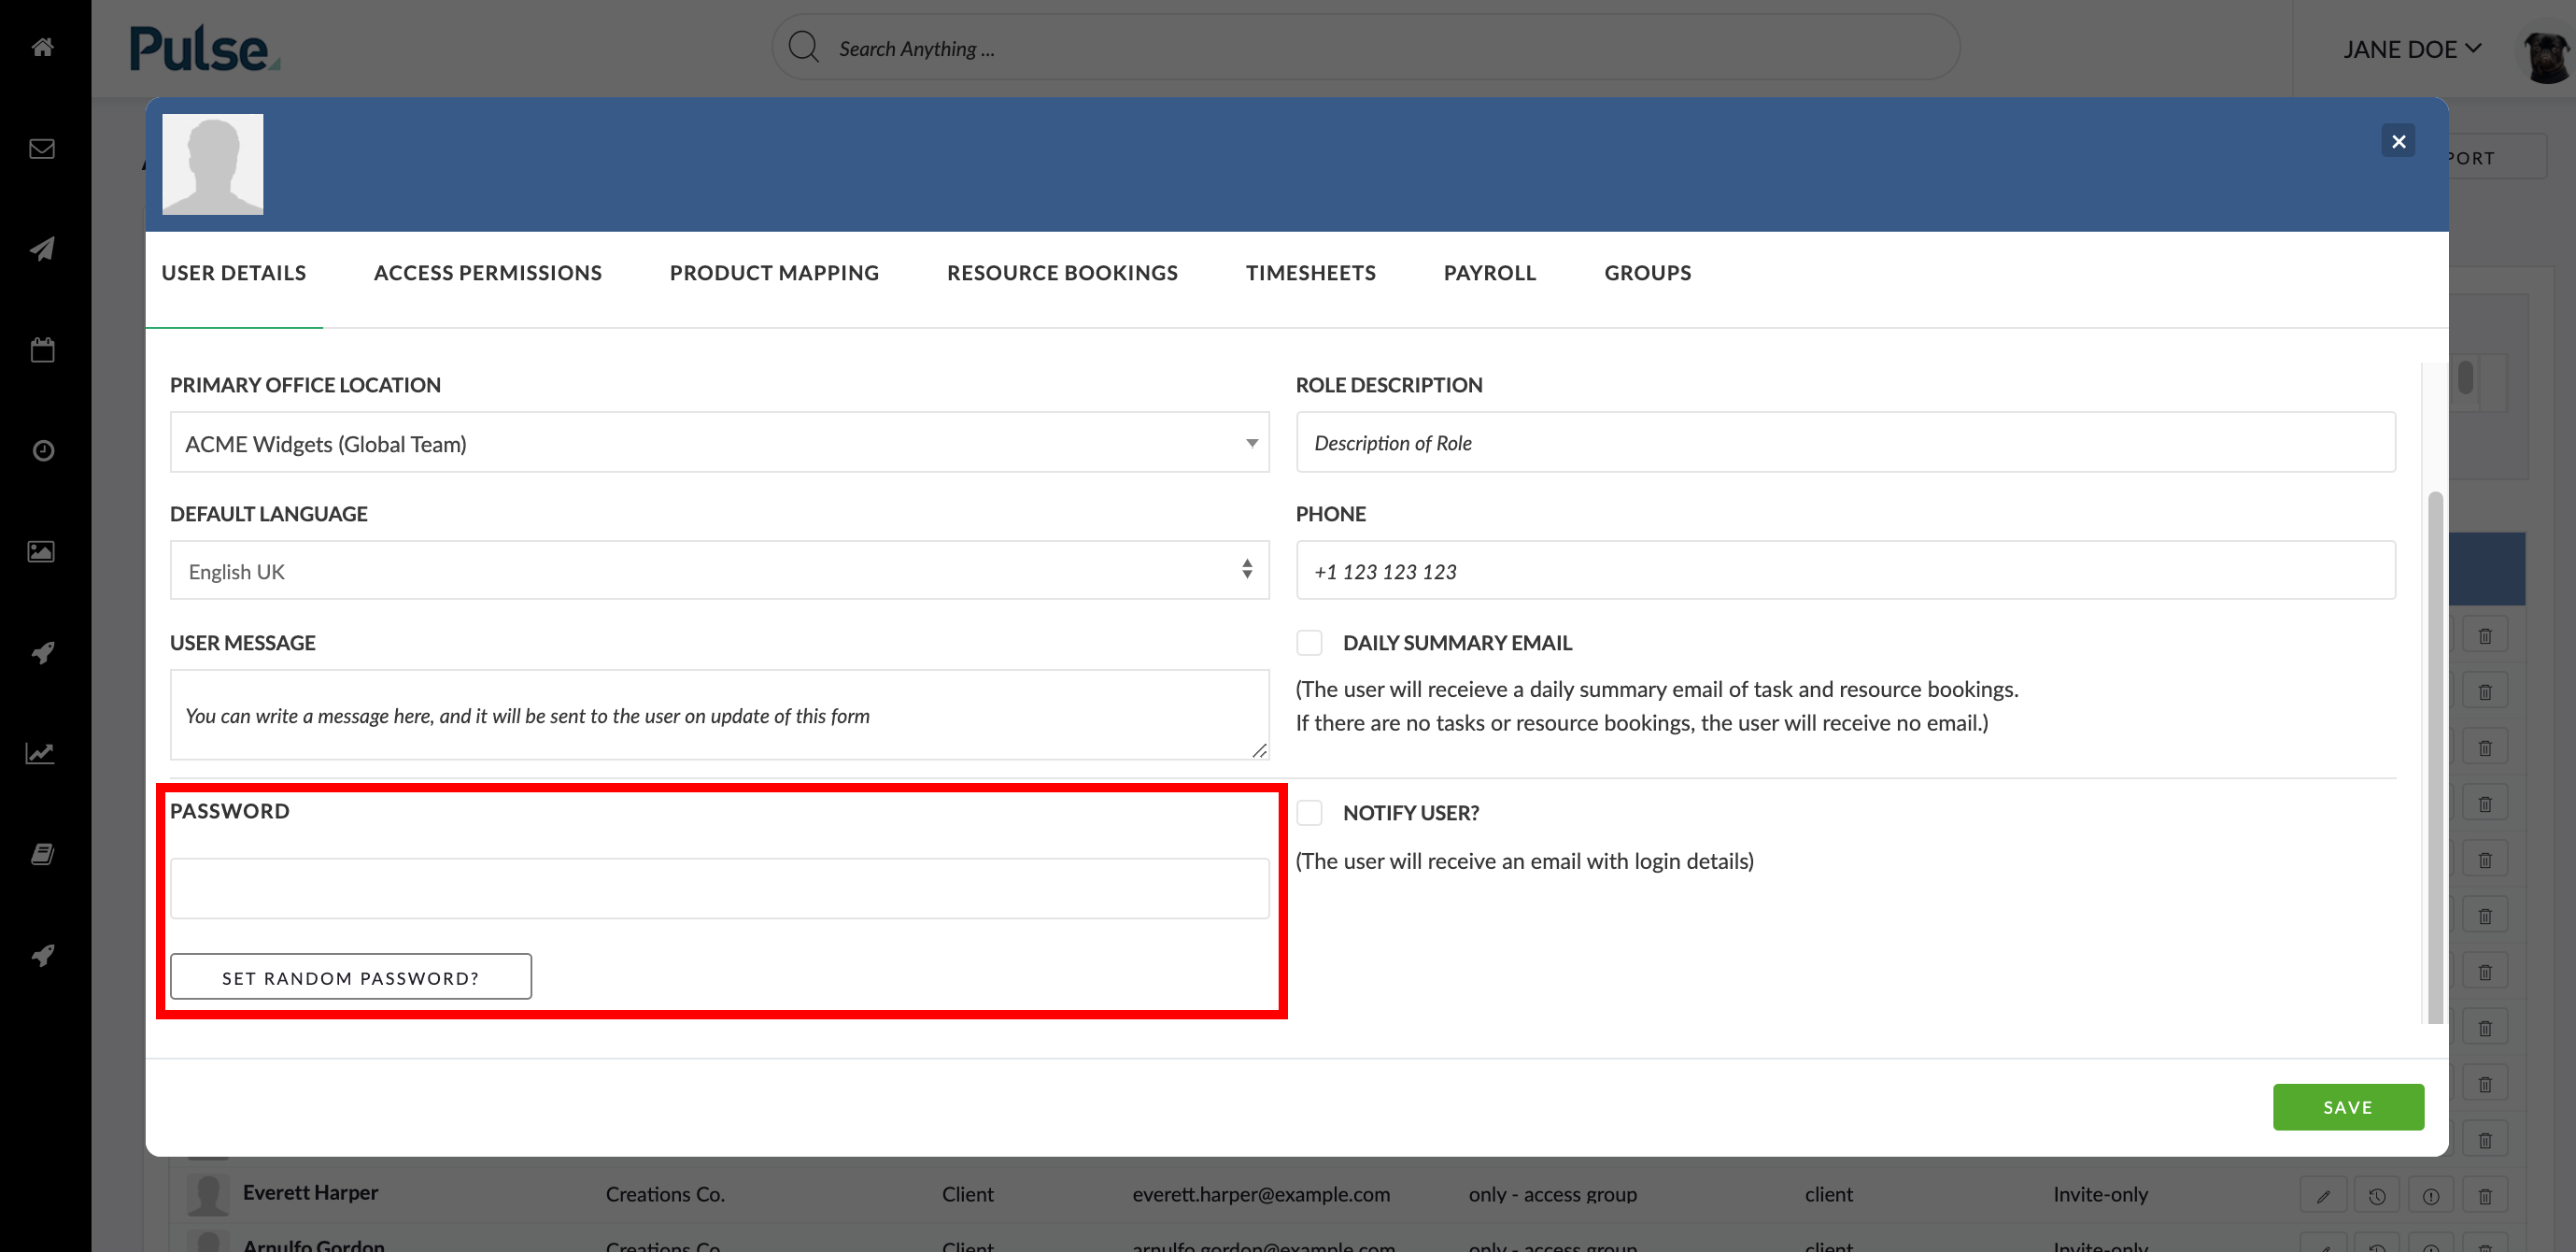
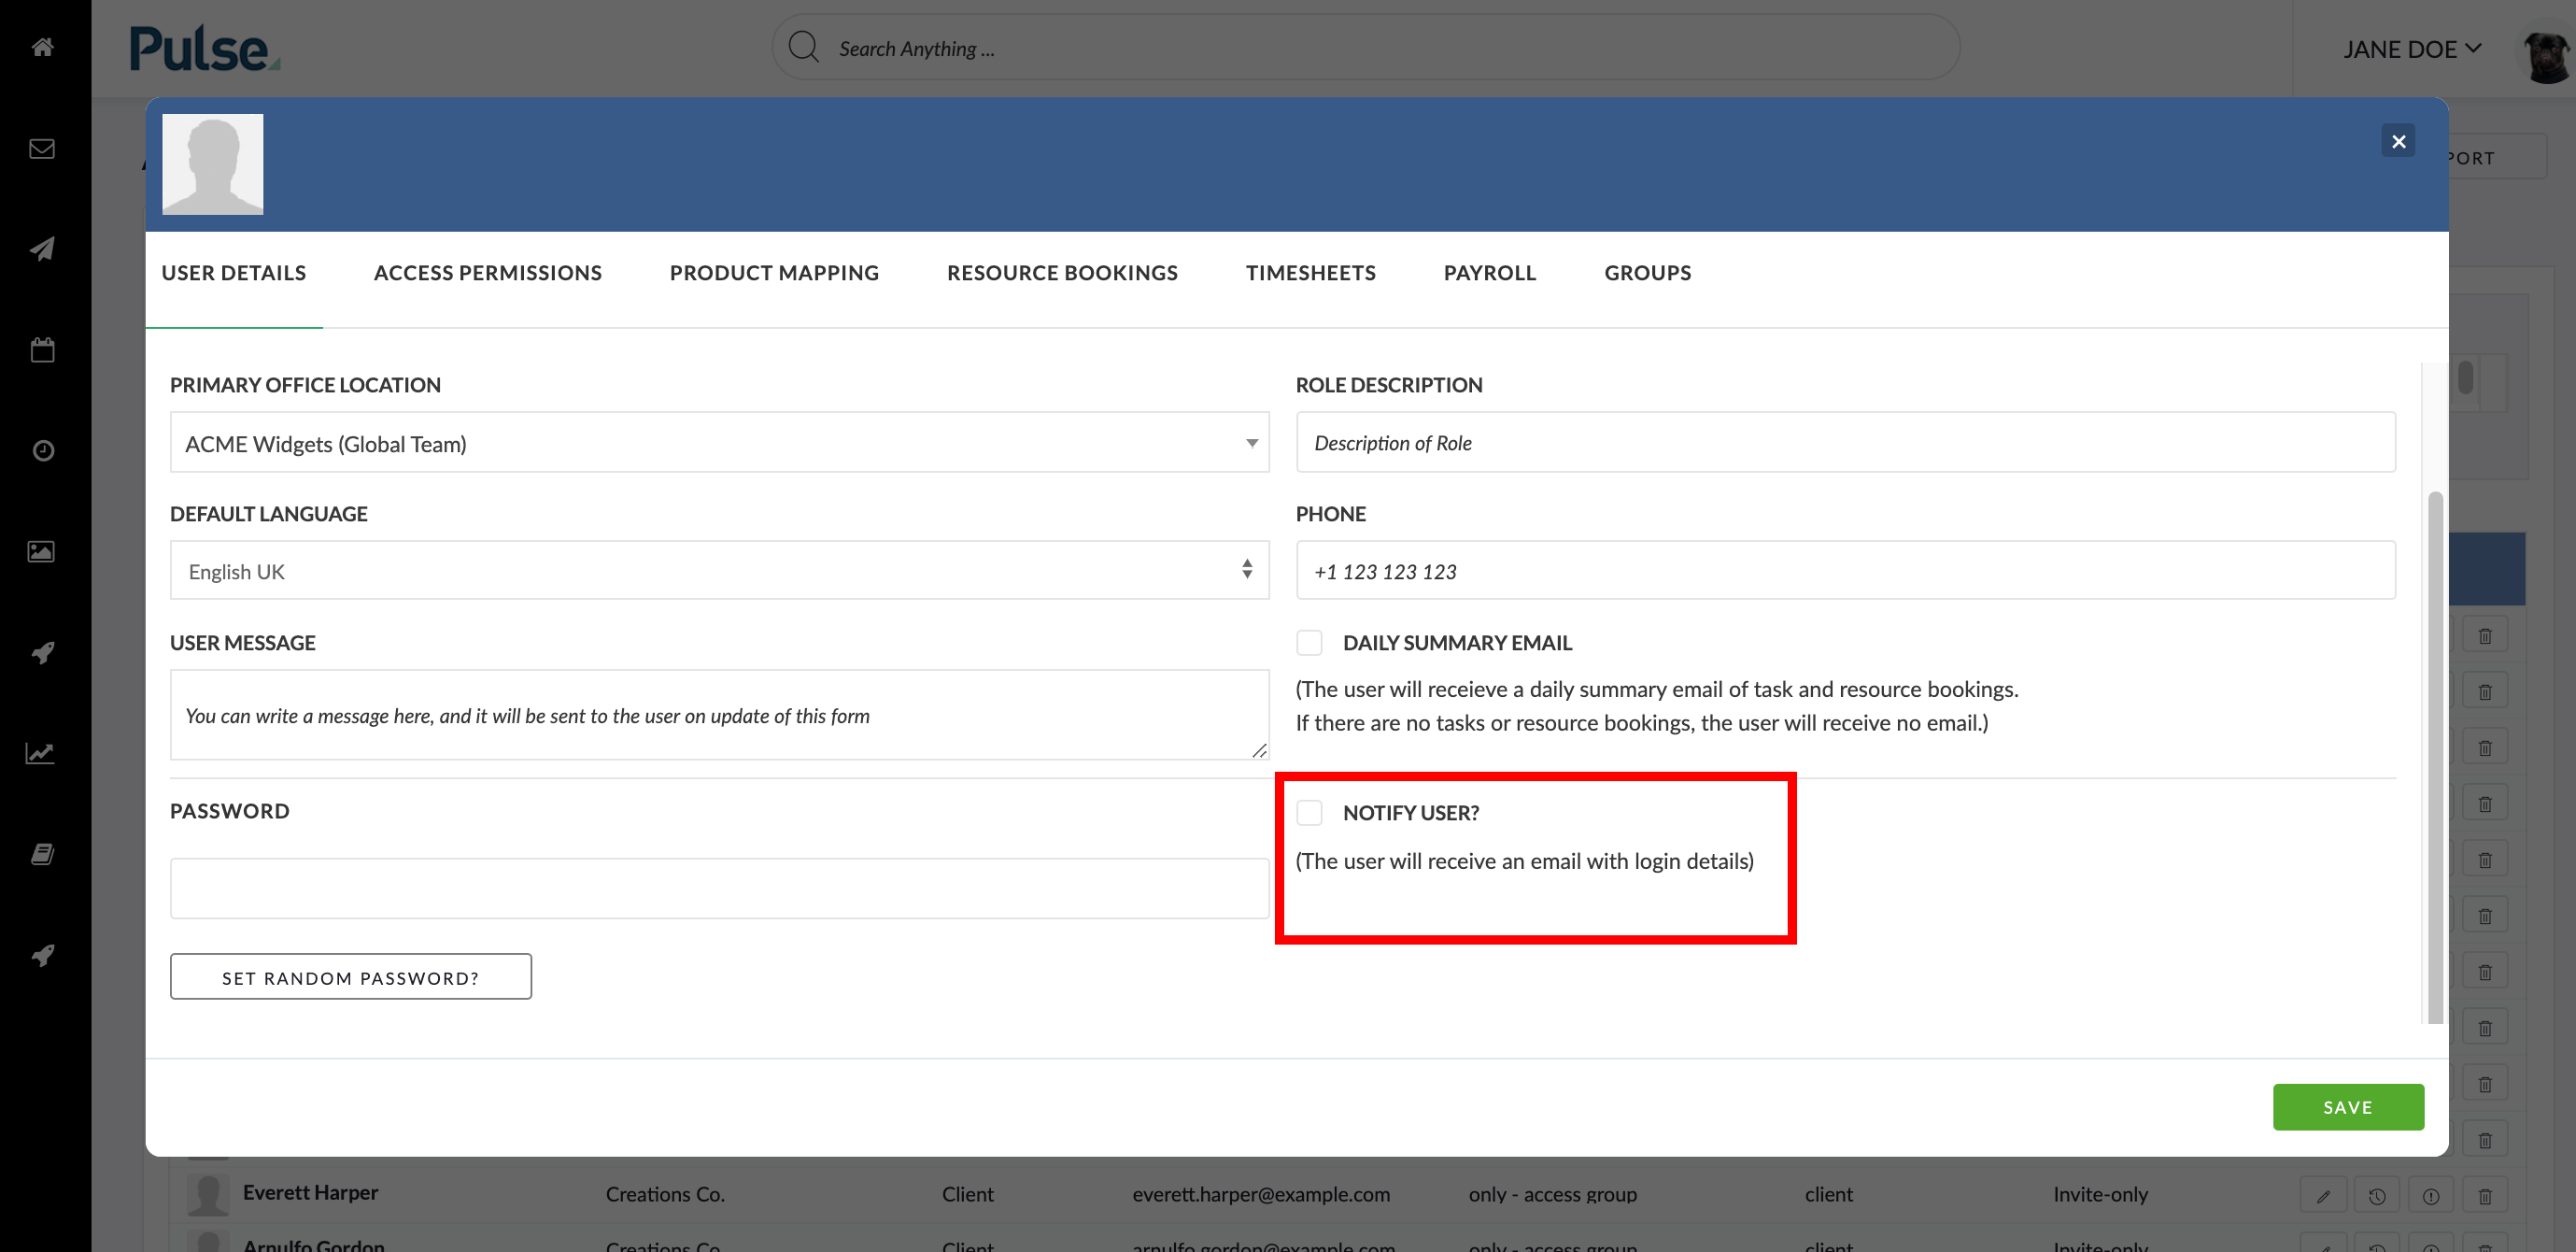
NOTIFY USER: If you leave this box checked, the system will send the new user an email from you with their username and password. Uncheck this box if you are just making an update to their existing account and do not wish to send them a notification.
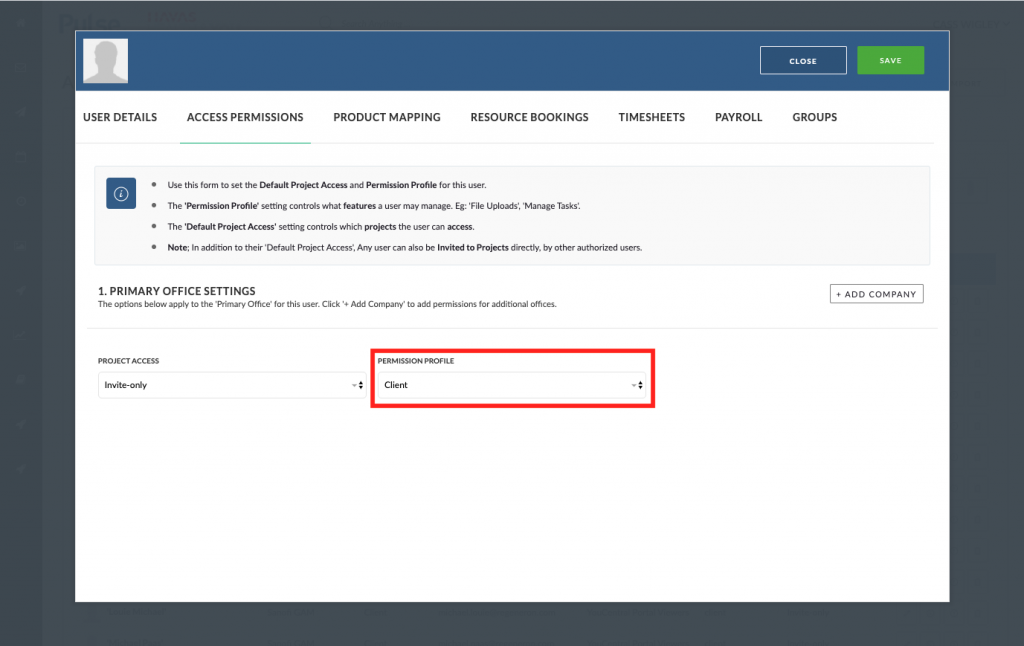
4. Click the “Access Permissions” tab
PROJECT ACCESS: Set this to Invite Only

PERMISSION PROFILE: Set this to Client
5. In the Product Mapping tab
Select the Brands/Products from the list on the left to give them access.

This is the permission which allows them to view Assets in the MINE (Asset Library in pulse) which have been marked as “Approved for Release” by any agency globally for that product.
Click SAVE to create the user.
KB.43520
Article Tags: How to Add a User, How to Add a New User, How to Create a New User