1. ALL REGIONS
FEATURES
[1747] BRANDS API – AGRESSO INTEGRATION
We are excited to introduce the Pulse-Agresso integration feature, offering you enhanced control and flexibility in managing your Brands API configurations. With this integration, you can streamline your processes and ensure seamless communication between Pulse and Agresso.
This enables integration between Pulse’s powerful and flexible Brands API, so that Brand Attributes can be sent to Agresso.
MASTER CLIENTS
Your Master Client configuration is the main link between the Brands API and Agresso. Pulse-Agresso integration offers two configurations for Master Clients to utilize the Brands API:
Configuration Level 1: Enable Brands API for Agresso Client
- Pulse Developers now can enable the Brands API for the Agresso Client (Ledger). Please note that only Pulse Developers can enable this feature.
- Configuration Level 1 is enabled for all Agresso Clients in the US and UK, but it is disabled for the EU.
Configuration Level 2: Enable ‘Send to Agresso’ for Master Client
- ‘Send to Agresso’ functionality can be independently enabled for each Master Client. This allows for more granular control over the integration.
- By default, ‘Send to Agresso’ is disabled for all existing and new Master Clients.
Ho to Enable ‘Send to Agresso’ for the Master Client:
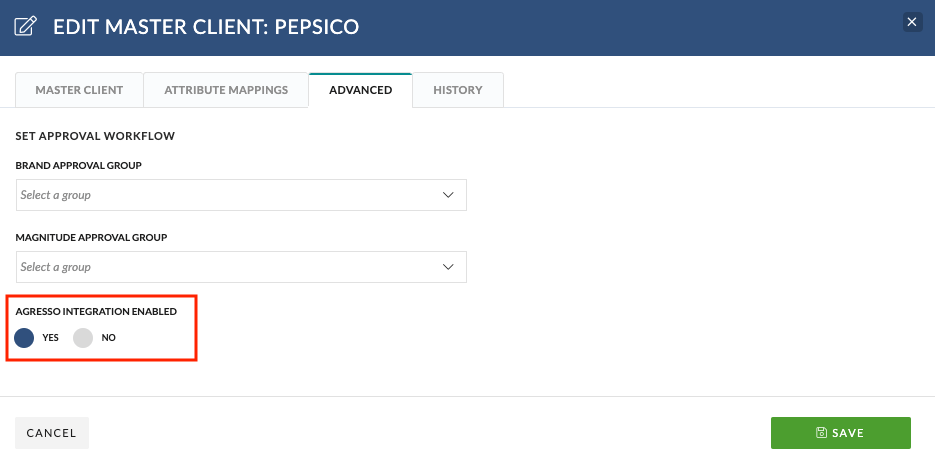
- Click to edit the Master Client.
- Navigate to the ‘Advanced’ tab.
- Set ‘AGRESSO INTEGRATION ENABLED’ to ‘Yes.’
Understanding Master Client Settings
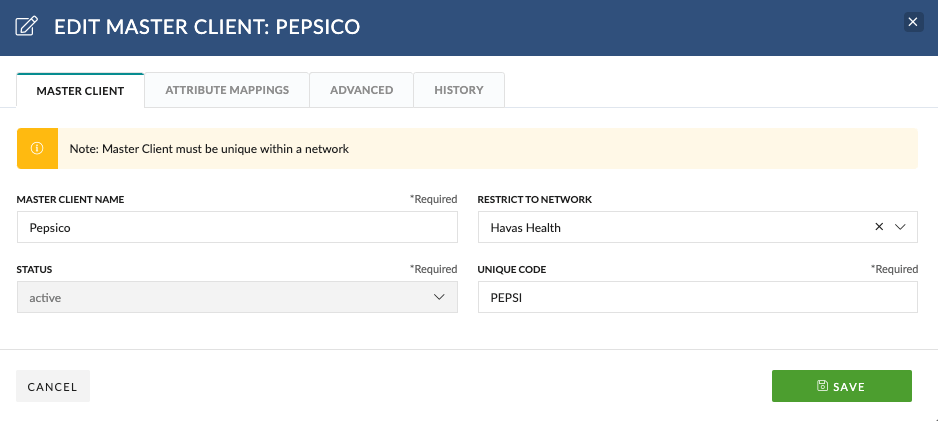
- Master Client Name: The Master Client Name must be globally unique within the Pulse Network, or if no network is defined, then it must be globally unique across all networks. Pulse ensures this uniqueness when Master Clients are created.
- Restrict to Network: This restriction applies solely within the Pulse Network and doesn’t affect Agresso. Its primary purpose is to enforce the uniqueness of the Master Client Name.
- Status: The Status of a Master Client can be ‘active’ or ‘inactive.’ To set a Master Client as ‘inactive,’ there should be no ‘active’ projects associated with it. When a Master Client is marked as ‘inactive,’ all its related ‘Brands’ and ‘Products’ will also become inactive.
- Unique Code: For existing Master Clients, the ‘Unique Code’ must match the corresponding ‘Dim Value’ or ‘Unique Code’ in Agresso for verification. New Master Clients have a unique code generated from the first five letters/numbers of their name, converted to uppercase, spaces removed, and without special characters or symbols. Once submitted to Agresso, the ‘Unique Code’ becomes read-only and uneditable.
BRANDS
Each Project in Pulse is linked to a single Brand, and each Brand is connected to a single Master Client, ensuring that all Tasks or Files added to the Project inherit the Master Client and Brand Meta-Data.
Understanding “Brand” settings:
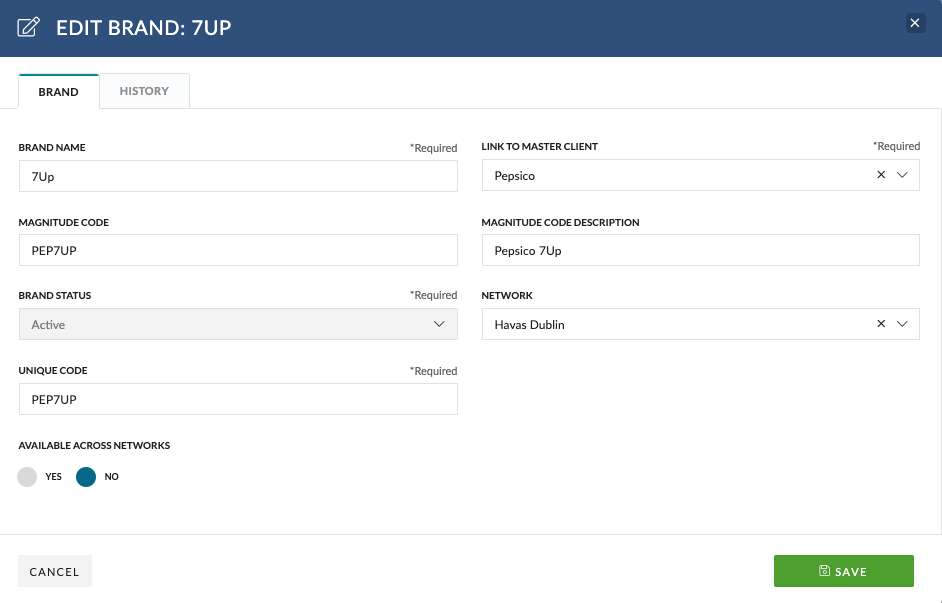
- Brand Name: The Brand Name must be unique within the Master Client.
- Link to Master Client: This is how we link a Brand to a Master Client.
- Magnitude Code: For new Brands, we automatically generate a Magnitude Code to match the Brand ‘Unique Code.’ This can be changed by a Superuser only.
- Magnitude Code Description: For new Brands, we automatically generate a Magnitude Code Description. This can be changed by a Superuser only.
- Brand Status: The Status of a Brand offers two options: ‘active’ and ‘inactive.’ Marking a Brand as ‘inactive’ affects related ‘Products’ as well.
- Network: Brands can be restricted to a Network. This restriction applies solely within the Pulse Network, enhancing visibility in the ‘Request a Brand’ feature.
- Unique Code: For existing Brands, the ‘Unique Code’ must match the corresponding ‘Dim Value’ or ‘Unique Code’ in Agresso.
For new Brands, a code is automatically generated by combining the first three letters of the Master Client Name with the Brand Name, converting all characters to uppercase, and removing any spaces to ensure uniqueness and avoid special characters or alphanumeric symbols. - Available across networks: This allows you to set the Brand to be globally accessible in the ‘Request a Brand’ feature.
PRODUCTS
We have formalised the concept of “Product” and its relationship with a “Brand”. Products are now separate entities from Brands. Each Brand in Pulse can have many “Products”.
Understanding “Product” Settings:

- Product Name: The Product Name must be unique within the Brand.
- Link to Brand: This is how we link a Product to a Brand.
- Status: The Status of a Product offers two options: ‘active’ and ‘inactive.’
- Unique Code: For existing Products, the ‘Unique Code’ must match the corresponding ‘Dim Value’ or ‘Unique Code’ in Agresso, ensuring data consistency. For new Products, we generate a code by combining the Brand Code and Pulse Product ID.
BRAND ATTRIBUTES
Brand Attributes can be set up in the Admin tool by a Superuser or anyone in the ‘Brand Attribute Admin Group’.
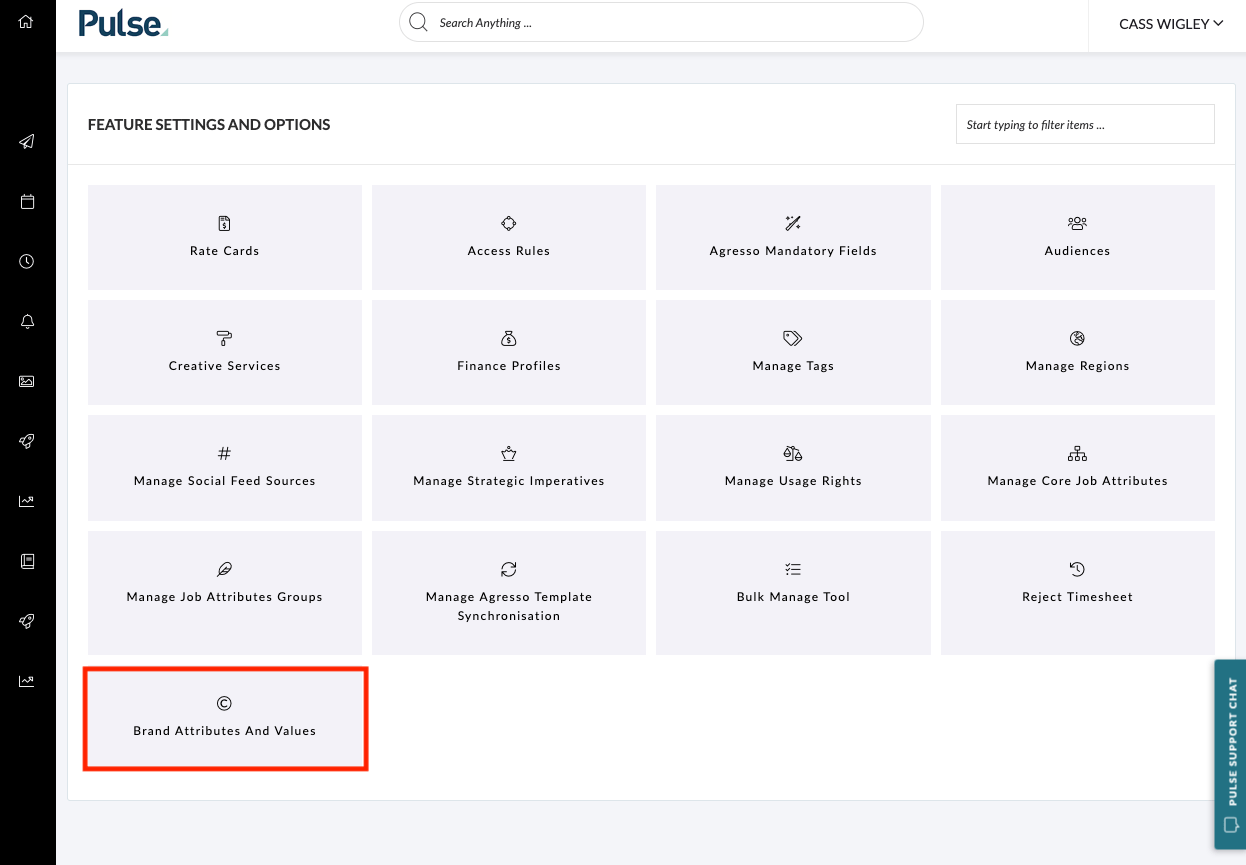
After successfully creating the Brand Attribute along with its corresponding Brand Attribute Values you can associate these values with a Master Client.
For more information on how to use this feature to create Brand Attributes and Brand Attribute options please see our Brands API Training Module in the Pusle Academy.
How to Associate Brand Attributes with a Master Client
To begin sending Brand Attributes to Agresso, you should define the Attribute Name to a slot and specify the slot ID in the “Attribute Mapping” tab of the “Master Client” .
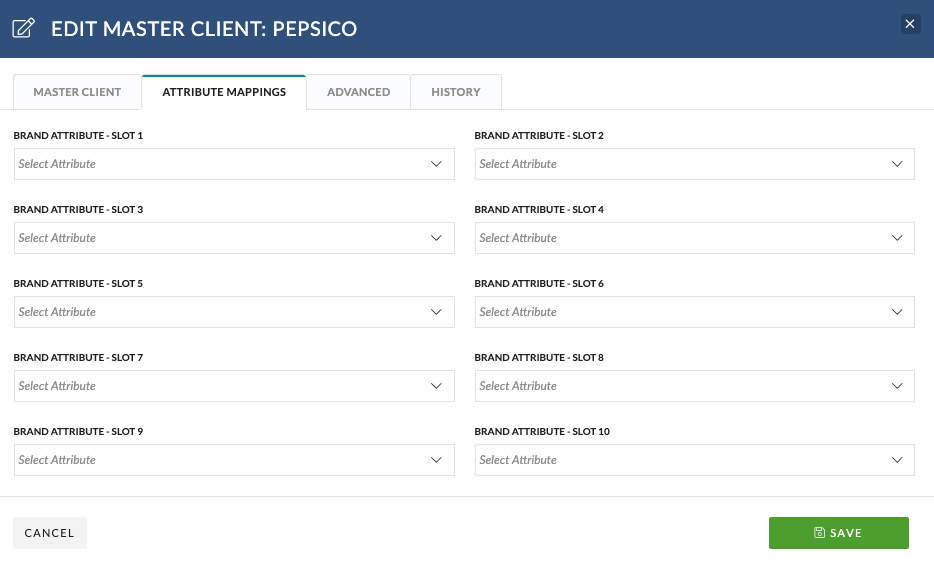
Once you have linked Brand Attributes to a Master Client, you will see these Attributes appearing in the Product Set Up Modal for any Products connected to this Master Client’s Brands.
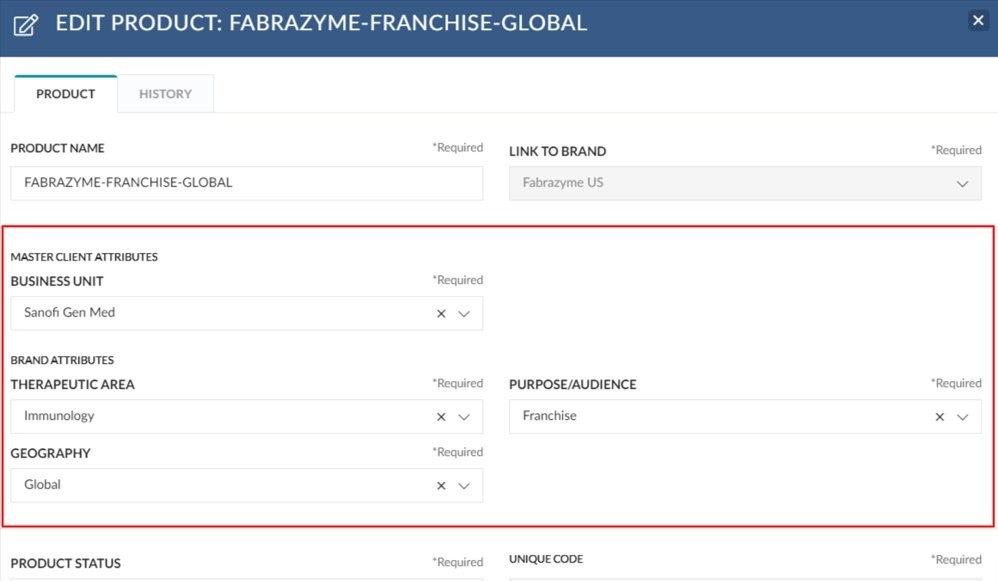
To set up the Product, simply choose the appropriate value for the corresponding Brand Attribute.
Project Wizard
When new Projects are created Brand Attributes flow to Agresso via the “Brand” and “Product” fields.
- The Pulse Brand dropdown shows the Brand Name and Unique Code.
- The Pulse Product dropdown shows the Product Name and Unique Code. If there are multiple Products, all options are displayed for selection. If there is only 1 product, we will automatically set the field.
Agresso Step – US Only:
To improve the user experience during the transition period, when both Pulse and Agresso are being utilized to manage Brands and Products we have implemented the following changes:
Scenario 1: ‘Send to Agresso’ Enabled
- Project Wizard: The Agresso Master Client and Brand/Product fields will be hidden to avoid duplication or confusion since the information will be automatically sent to Agresso.
- Finance Profile: Similarly, in the Finance Profile, the Agresso Master Client and Brand/Product fields will be hidden.
Scenario 2: ‘Send to Agresso’ Disabled
- Project Wizard: Agresso Master Client & Brand / Product fields will be visible, allowing the user to manually select and input the desired information for the selected Brand of the project in Agresso. However, if there is a matching entry between the selected Pulse Master Client / Brand / Product (using Pulse Unique Code & Agresso Dim Value) and an existing entry in Agresso, the ‘Master Client’ and ‘Brand / Product’ fields will be automatically set for the user, streamlining the process further.
- Finance Profile: Similarly, in the Finance Profile, the Agresso Master Client and Brand/Product fields will be visible.
Please Note: Only once the Project is Approved are the Master Client/Brand/Product/Attributes sent to Agresso.
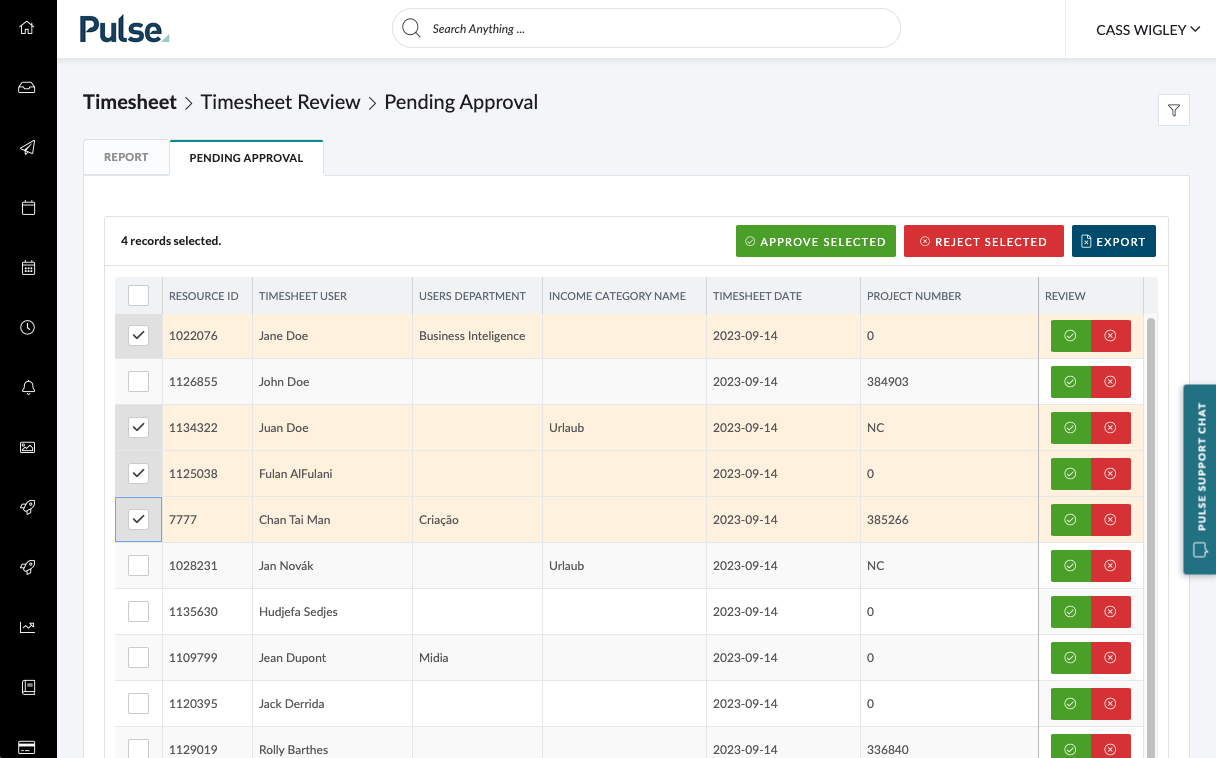
[1820] IMPROVED TIMESHEET APPROVAL REPORT
We are excited to introduce an enhanced Pending Approval Page that streamlines and optimizes the approval process for Timesheets.
This update serves several key purposes:
- Replacing the Weekly Time Approval Page and General Time Approval Page We have merged these pages into the new Pending Approval Page to simplify your workflow.
- Speed Improvements You can expect faster loading times, ensuring a more responsive user experience.
- Enhanced Visibility: The Pending Approval Page provides a comprehensive view of all timesheets pending approval, improving oversight and accountability.
- Customized Reports Customize your reports to suit your specific needs, making it easier to track and manage pending approvals.
- Intuitive Filtering We’ve designed intuitive filters to help you quickly find the information you need.
This enhancement incorporates the different rules for “Who can Approve timesheets” for Agresso and Non-Agresso users outlined below:
- Operations Users with “Approve Own Time” set to Yes can approve everything in their office.
- Operations Users with “Approve Own Time” set to No can approve everything except their own time, which their supervisor handles.
- Project Managers or lower roles with “Approve Own Time” set to Yes can approve timesheets on projects where they are the
- Project Owner (Agresso),
- Pulse Project Manager (Non-Agresso),
- Project Time Approver (if the office uses ‘Specify Time Approver’ Agresso + Non-Agresso).
- Project Managers or lower roles with “Approve Own Time” set to No are similar to the above condition but cannot approve their own time on those projects; instead their supervisor will approve their time.
- User’s Supervisors approve time on Non-Charge Projects (Agresso).
- User’s Supervisors approve time on Pulse PTO (Agresso + Non-Agresso).
ENHANCEMENTS
[#62648] CHANGE TEXT IN FRONT END WHEN UPLOADING NEW ASSET FOR REVIEW
Update to the Upload Modal to improve the usability of the selection or creation of file folders.
[#62850] BE: SET THE DEFAULT ‘EMPLOYEE TYPE’ TO ‘REGULAR EMPLOYEE’ FOR CREATE NEW USER
In an effort to enhance the Missing Time Report and streamline User management, we are implementing a refinement where the default ‘Employee Type’ for newly created Users will be set to ‘Regular Employee’.
[#63343] RE-ADD MASTER CLIENT IN FRONT OF THE BRAND ON THE PROJECT WIZARD FOR CLARITY
Add Master Client in front of the Brand on the Project Wizard and Edit Project Details for the ‘Brand’ dropdown.
[#61903] CUSTOM REPORT: SAINSBURY’S REPORT
This new custom report for Havas Studios UK. This report is an extended equivalent of Finance Summary Report V2 > Estimates tab
FIXES
[#63365] SUBMISSION FIXES
Fix – the submission id’s which were missing from the timesheet page for Daily Timesheet Users.
[#63069] FIX: ERROR VALIDATION SHOWS ‘BRAND CATEGORY’ INSTEAD OF ‘MASTER CLIENT’
Fix the validation message when creating a Master Client with the non-unique name, which now says ‘The Master Client is not unique, please enter a different name.”
[#63072] REQUEST TYPE: SAYS BRAND CATEGORY INSTEAD OF EXISTING MASTER CLIENT
Correct the field names in the Brand Approval Queue’s ‘Request Type’ to read as “Master Client” instead of “Brand Category”.
[#63110] BUG: REQUESTING AGENCY DROPDOWN IS EXCLUDING ‘OUR COMPANY’ INSTEAD OF INCLUDING
Fix the ‘Requesting Agency’ dropdown in the Brand Request form to only show Offices and not Suppliers and Clients.
2. NORTH AMERICA (US INSTANCE)
ENHANCEMENTS
[#62807] MIGRATION: US PROJECTS > ENABLE REVIEWS TAB AND TIMELINE TAB
Update to allow for all Projects in the US agencies to be able to see the Reviews and Timeline tab at a Project level. Doing so will give the permissioned users access to the creation of Reviews and Timelines for any given project.
[#62871] BE: UPDATE THE BACK SYNC LOGIC
Update the Project End Date mapping in the back sync to match the Pulse Agresso Mapping.
[#63275] UPDATE THE EXISTING PAYROLL CONFIRMATION TO ALLOW SUE TO SEE ALL USERS ACROSS ALL RELEVANT ACCOUNTS
Update the Payroll Confirmation Permissions to allow a user with multi-office access to see users across networks.
FIXES
[#62103] MIGRATION: FIX PROJECT DATES WIPED BY THE BACK SYNC
Ran a migration to fix the project dates that were set to ‘1900-01-01’ by a bug in the back sync a few months ago.
[#62790] FE: WE ARE NOT SETTING THE MASTER CLIENT & PRODUCT FIELD IN THE PROJECT WIZARD
In the Project Wizard, when a user chooses a Pulse Brand & Product that also exists in Agresso, the Agresso step will automatically populate the Master Client & Brand / Product fields.
3. EUROPE & UK (UK & EU INSTANCE)
ENHANCEMENTS
FIXES
[#63292] BUG: CHANGES APPLIED ON FINANCE PROFILE DELETE THE PROJECT DATES
Fix – the bug that is causing Project Dates to be erased when a modification is made within the Estimate / PO or Invoice workflow.