FEATURES & ENHANCEMENTS
![]()
![]()
![]()
You can now Reply to Sticky Notes
We have added the ability to Add Comment “replies” to Notes in our Sticky Notes feature.
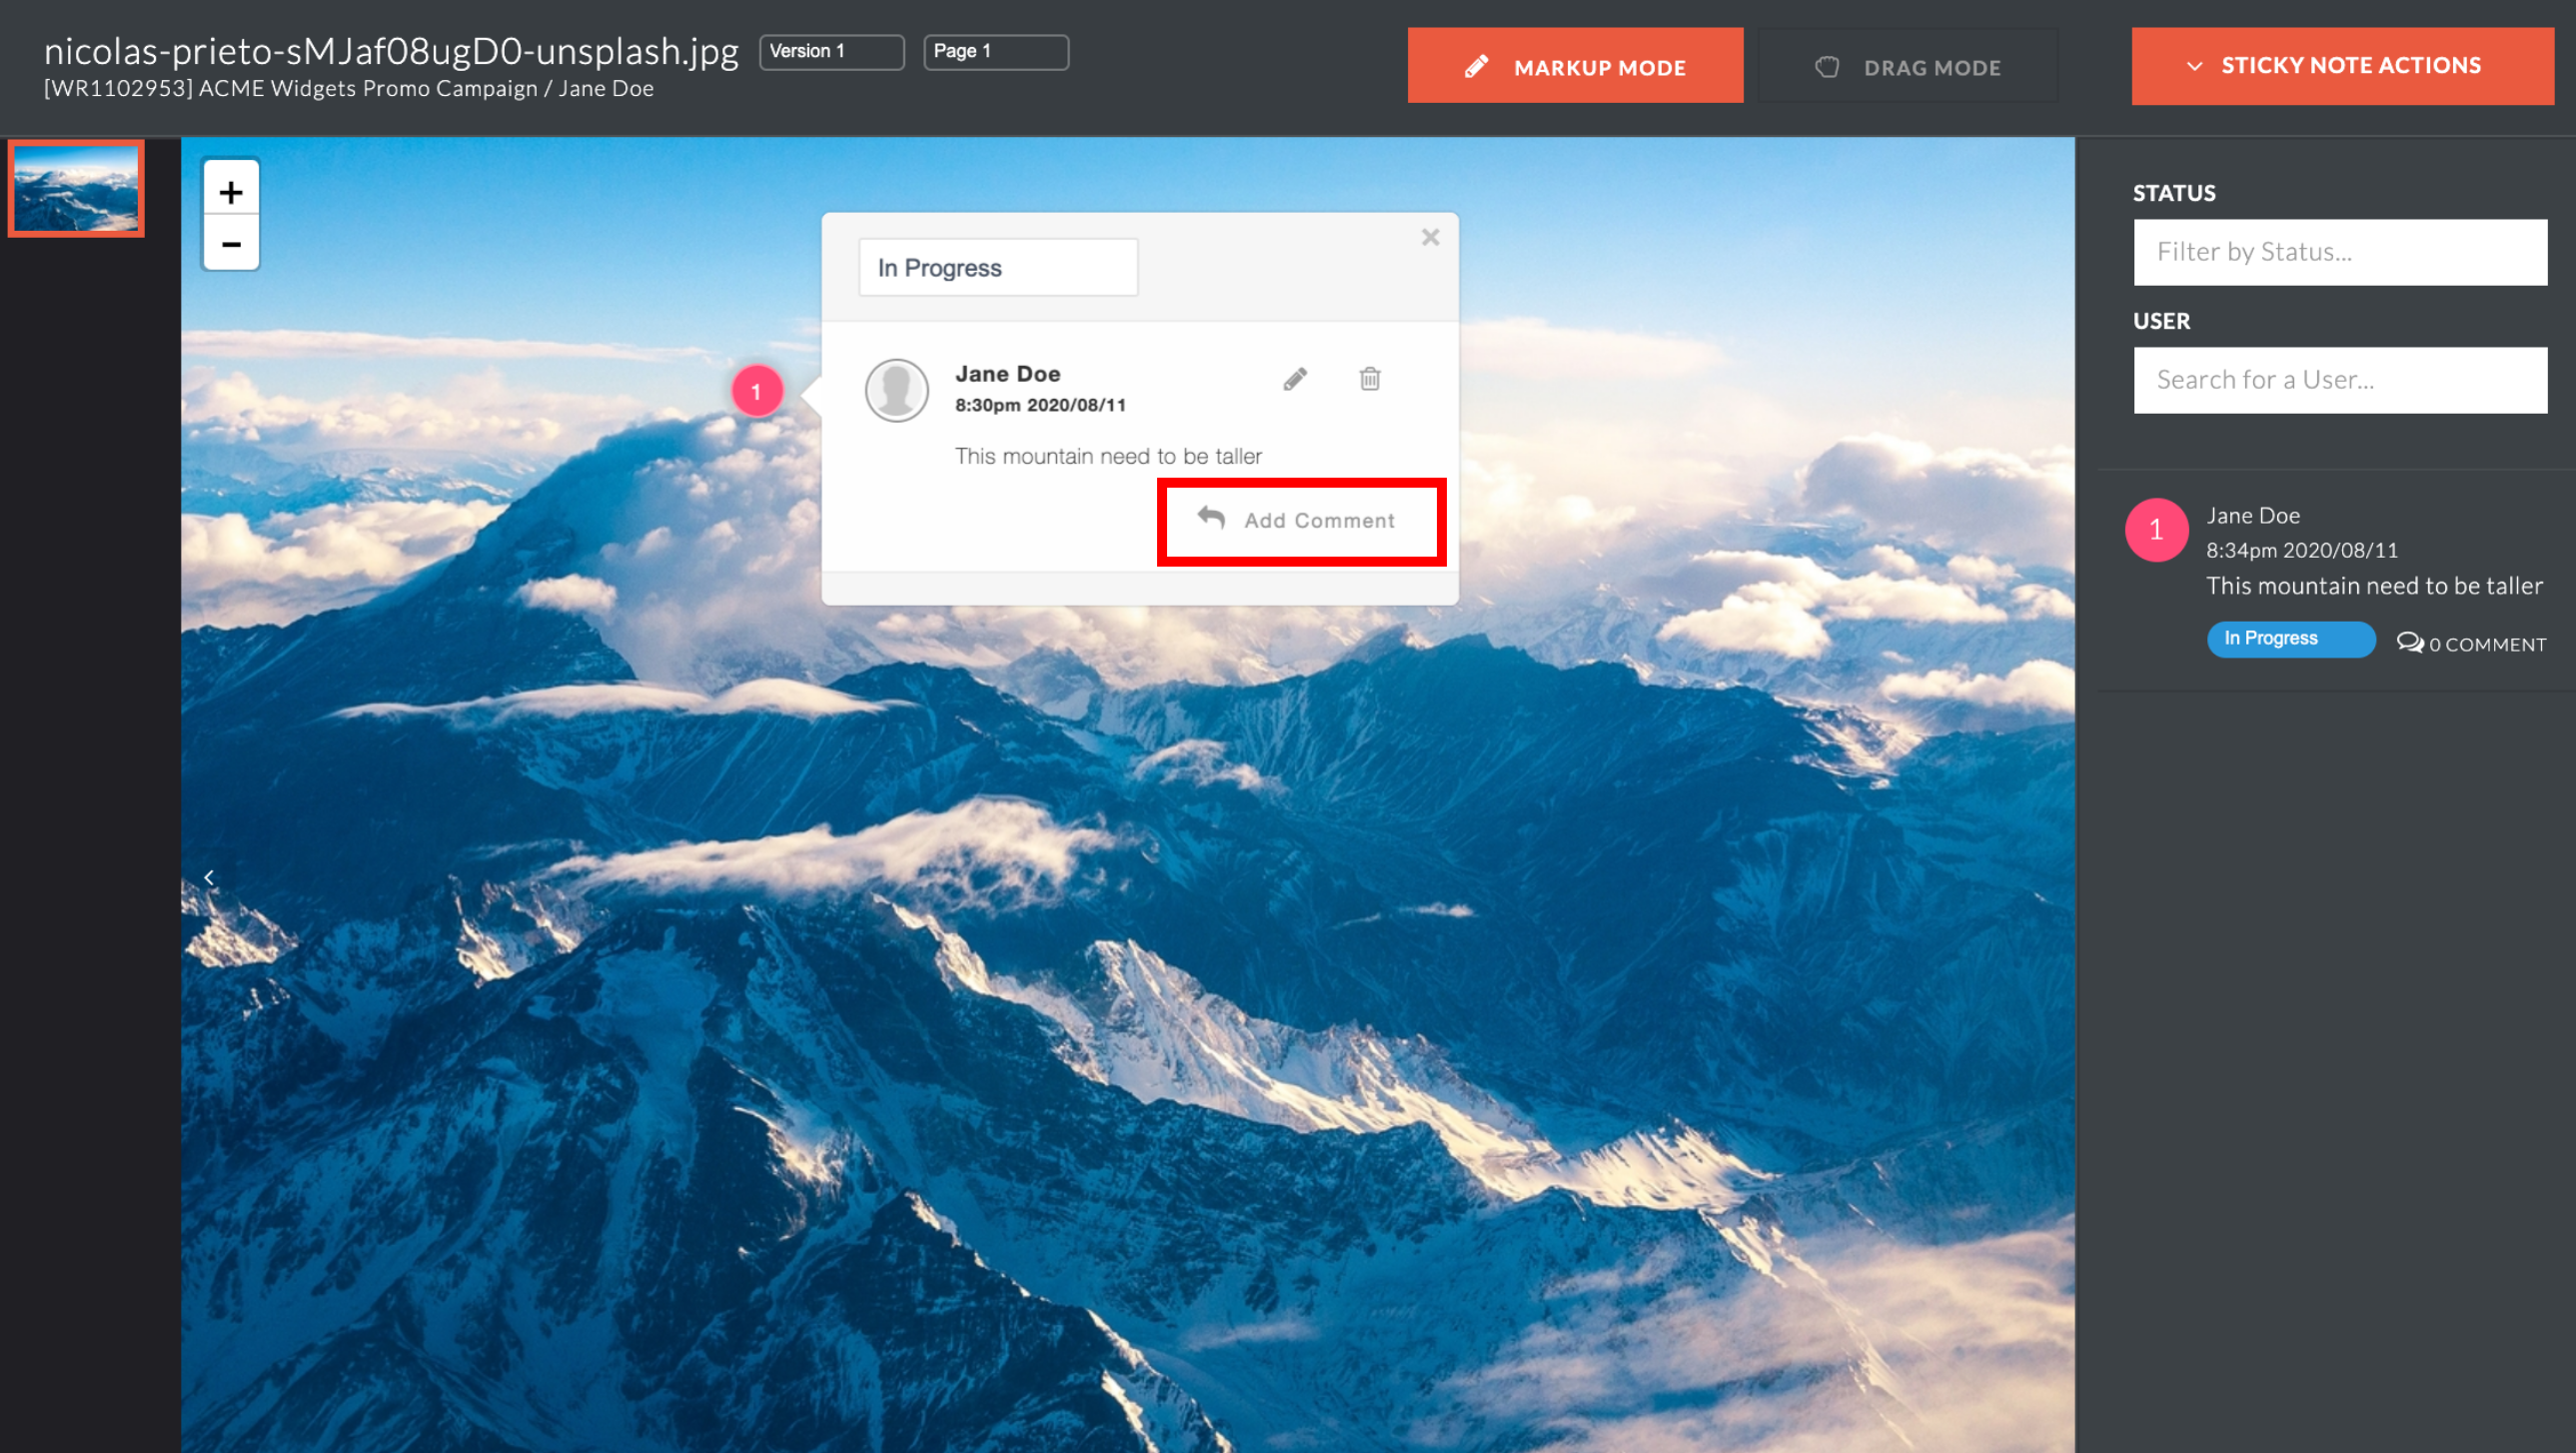
Sticky Notes can be edited or deleted by their author, while Comment Replies cannot be edited but can be deleted by anyone with the relevant permission.
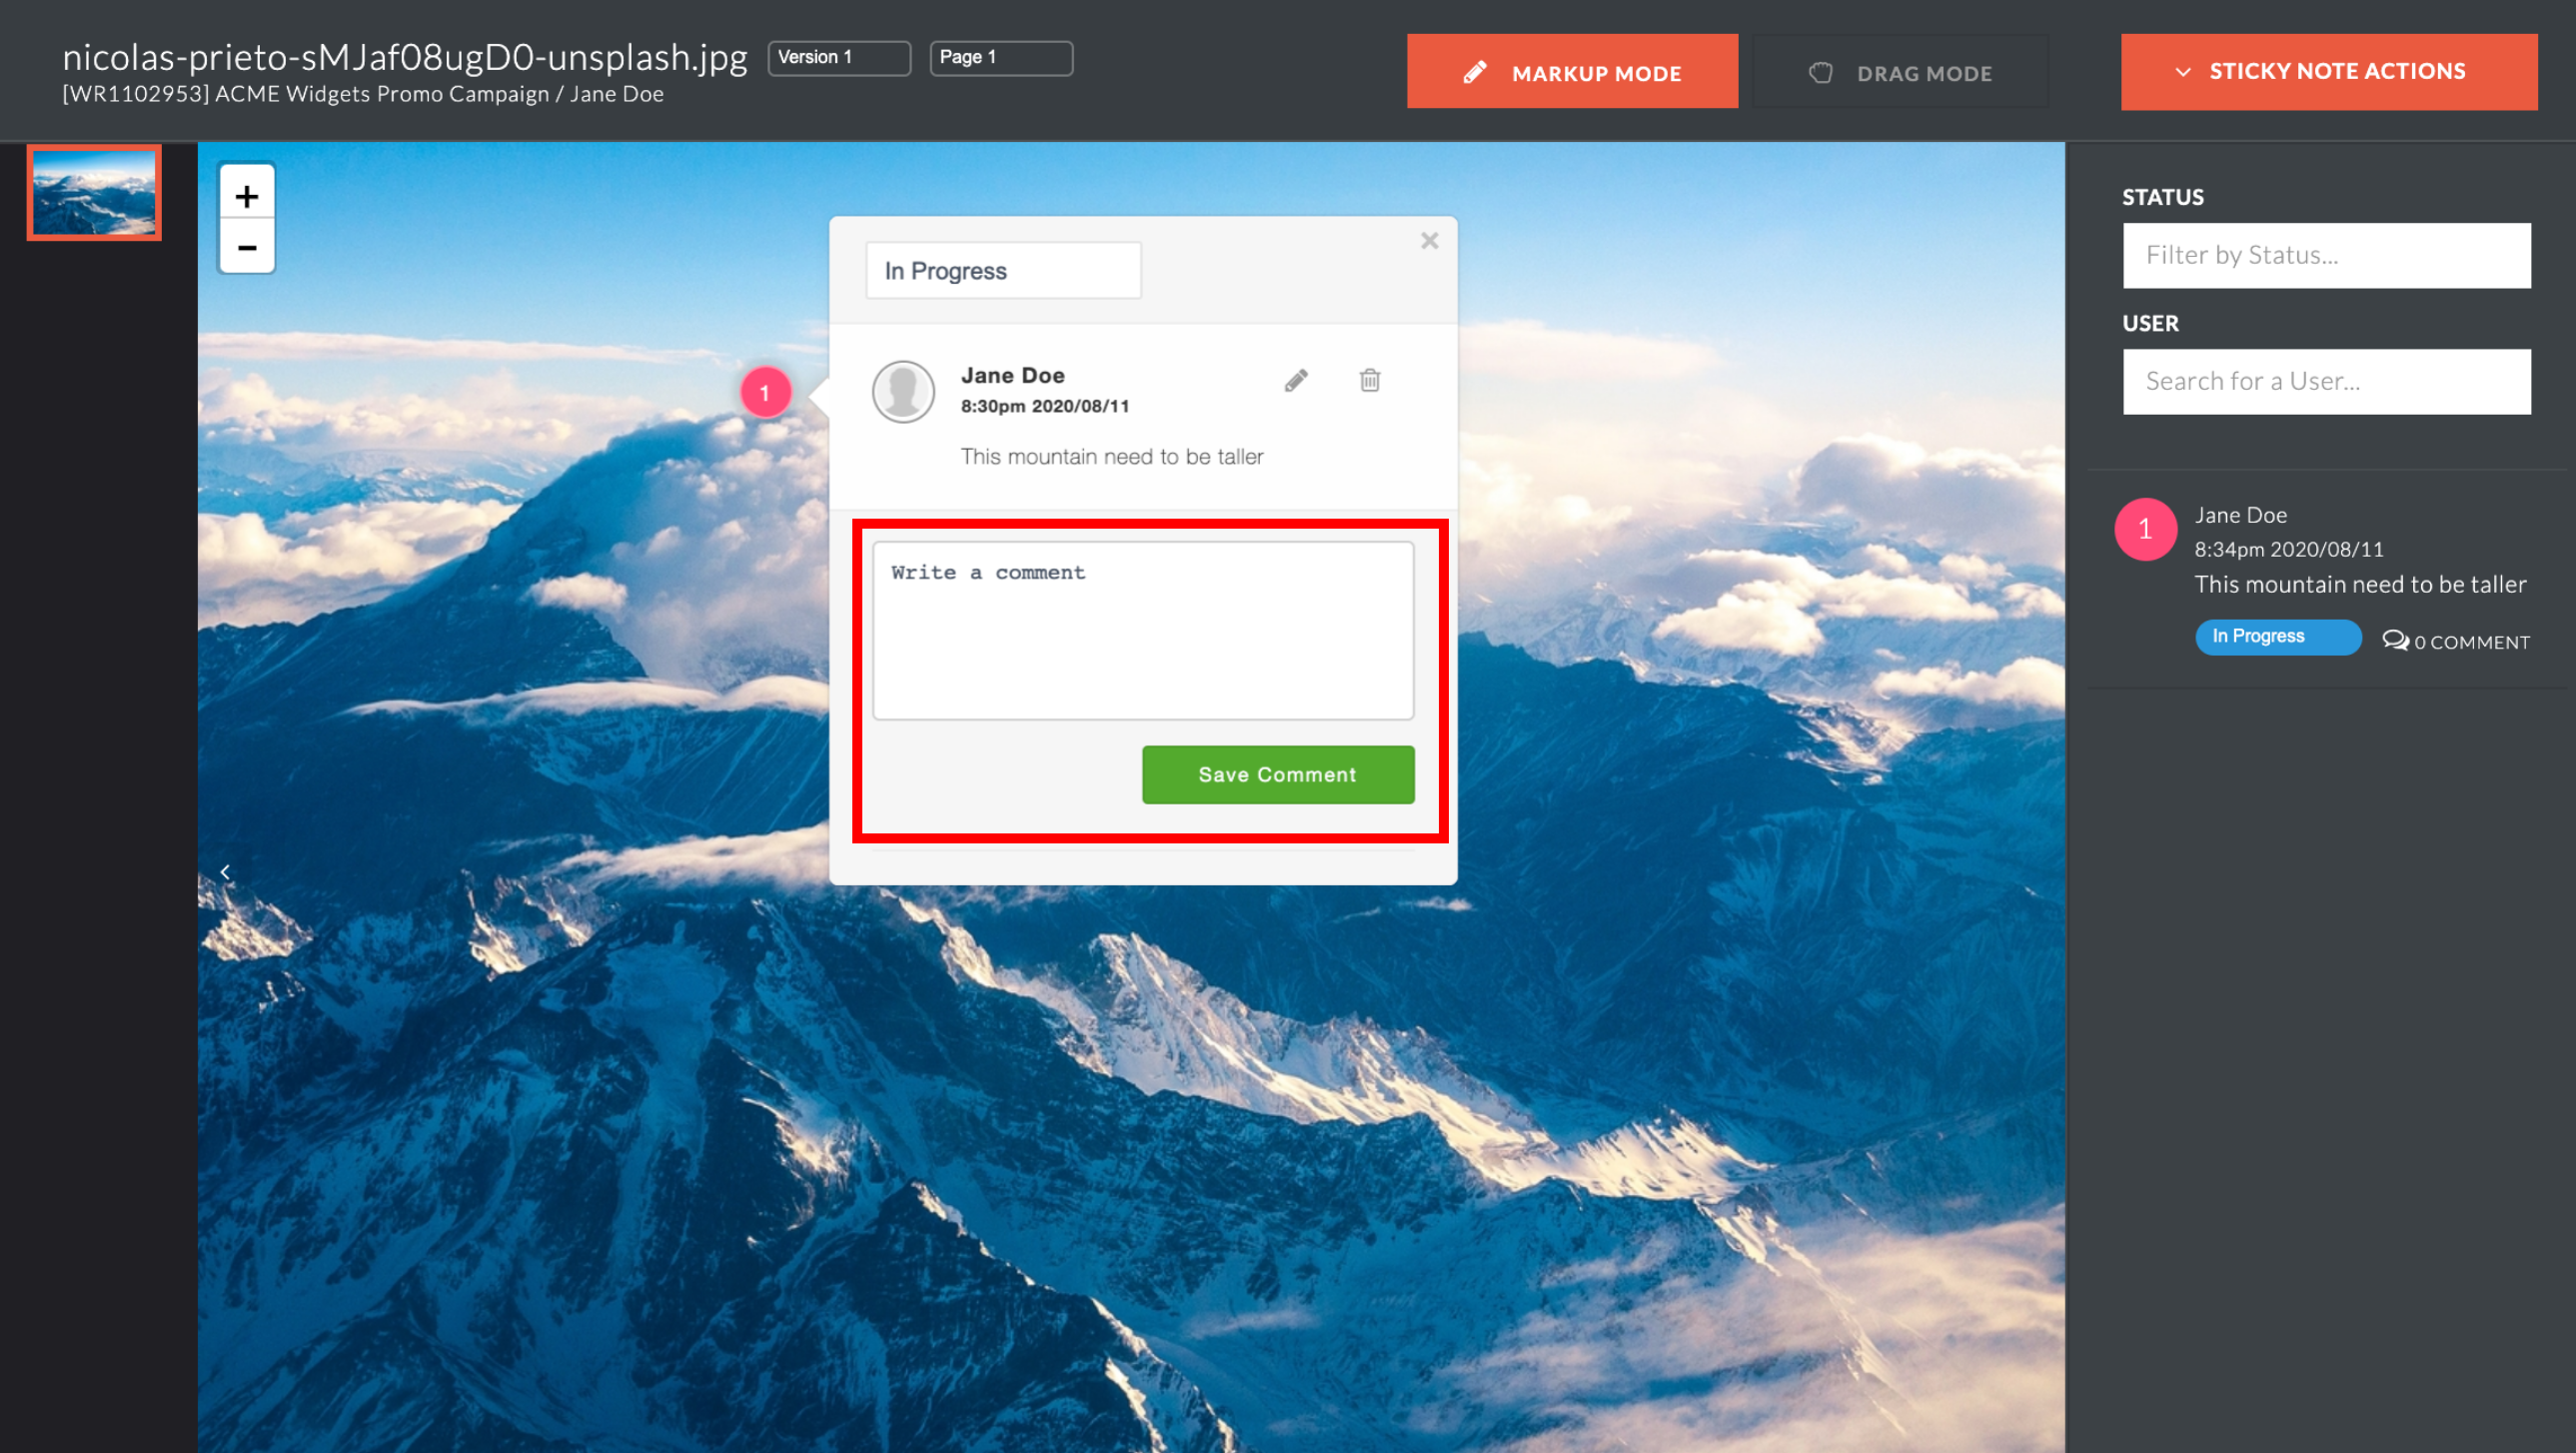
Please note, a full history of edits and deletions is retained.
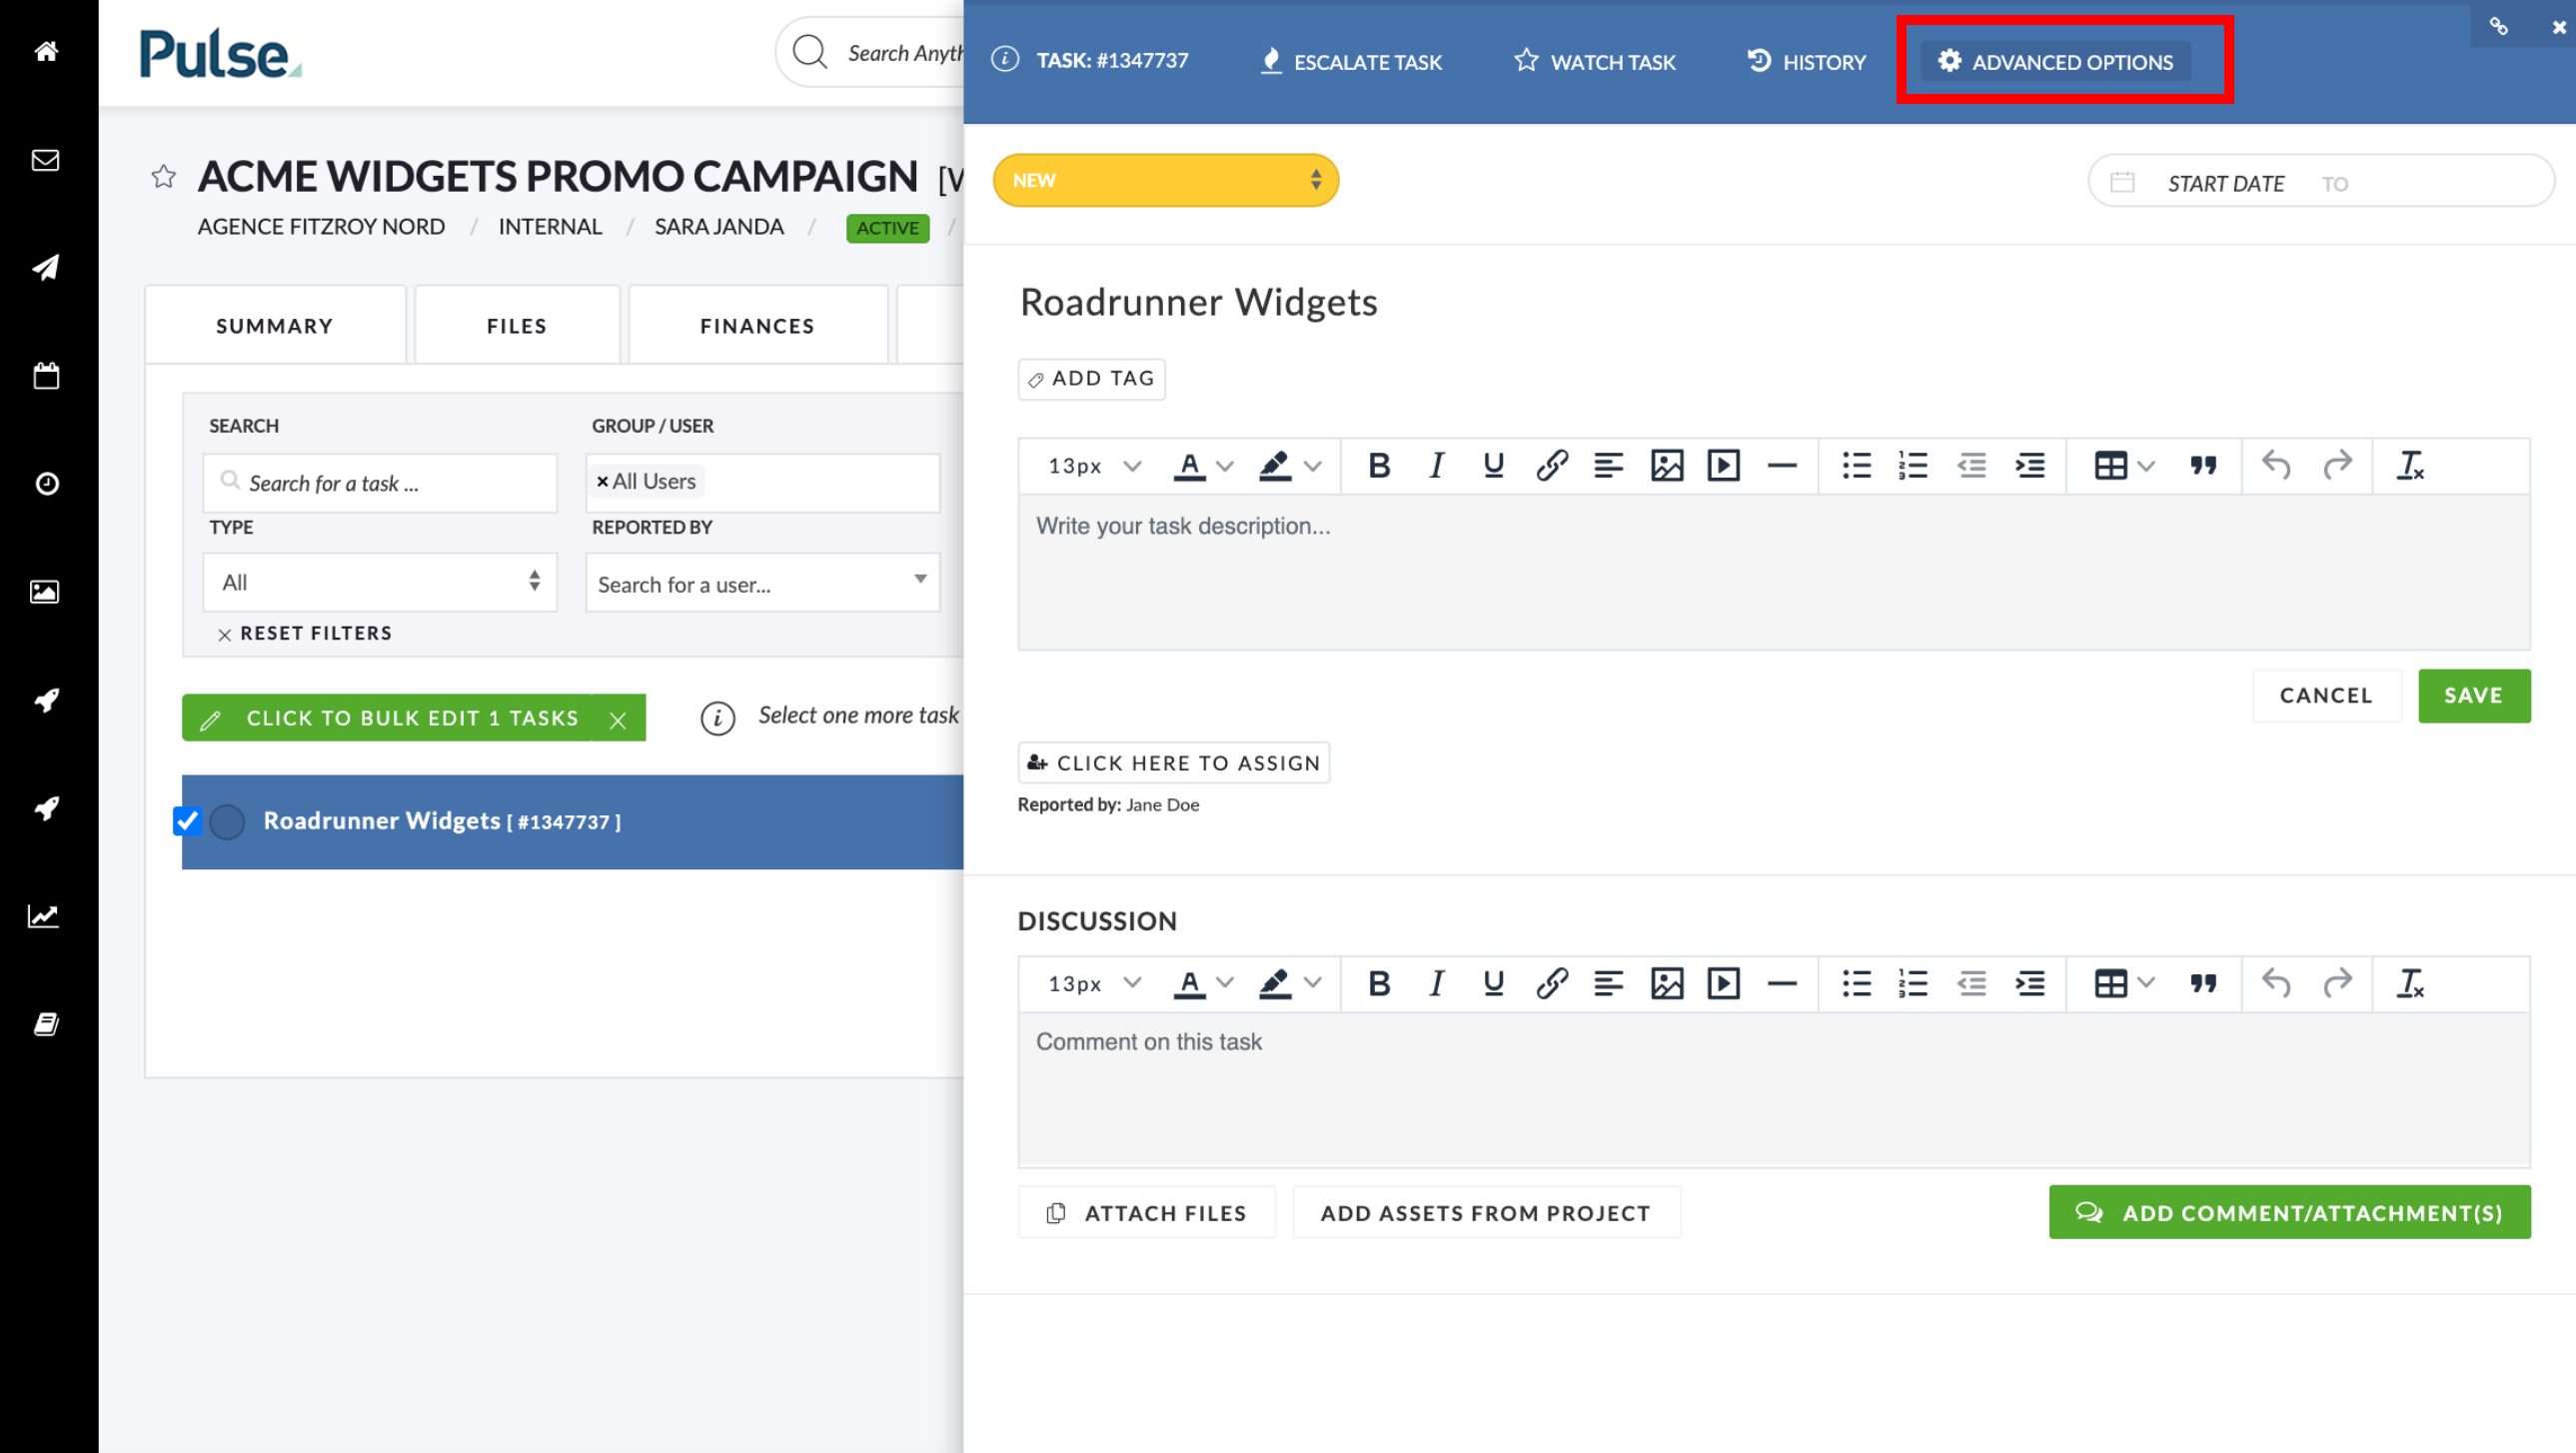
You can now Move Tasks between projects
Users can now move Tasks from one Project to another. This allows users to manage and re-structure their Projects, Tasks and Assets better and more efficiently. When moving a Task, the user may choose to move Comments, Notes, Users and Task Attachments along with the Tasks.
To move a task
1. Click on the Advanced Options Button in the Edit Task pop-over.
2. In the “Other Options” section of Advanced Options, click “Move Task to different project” button
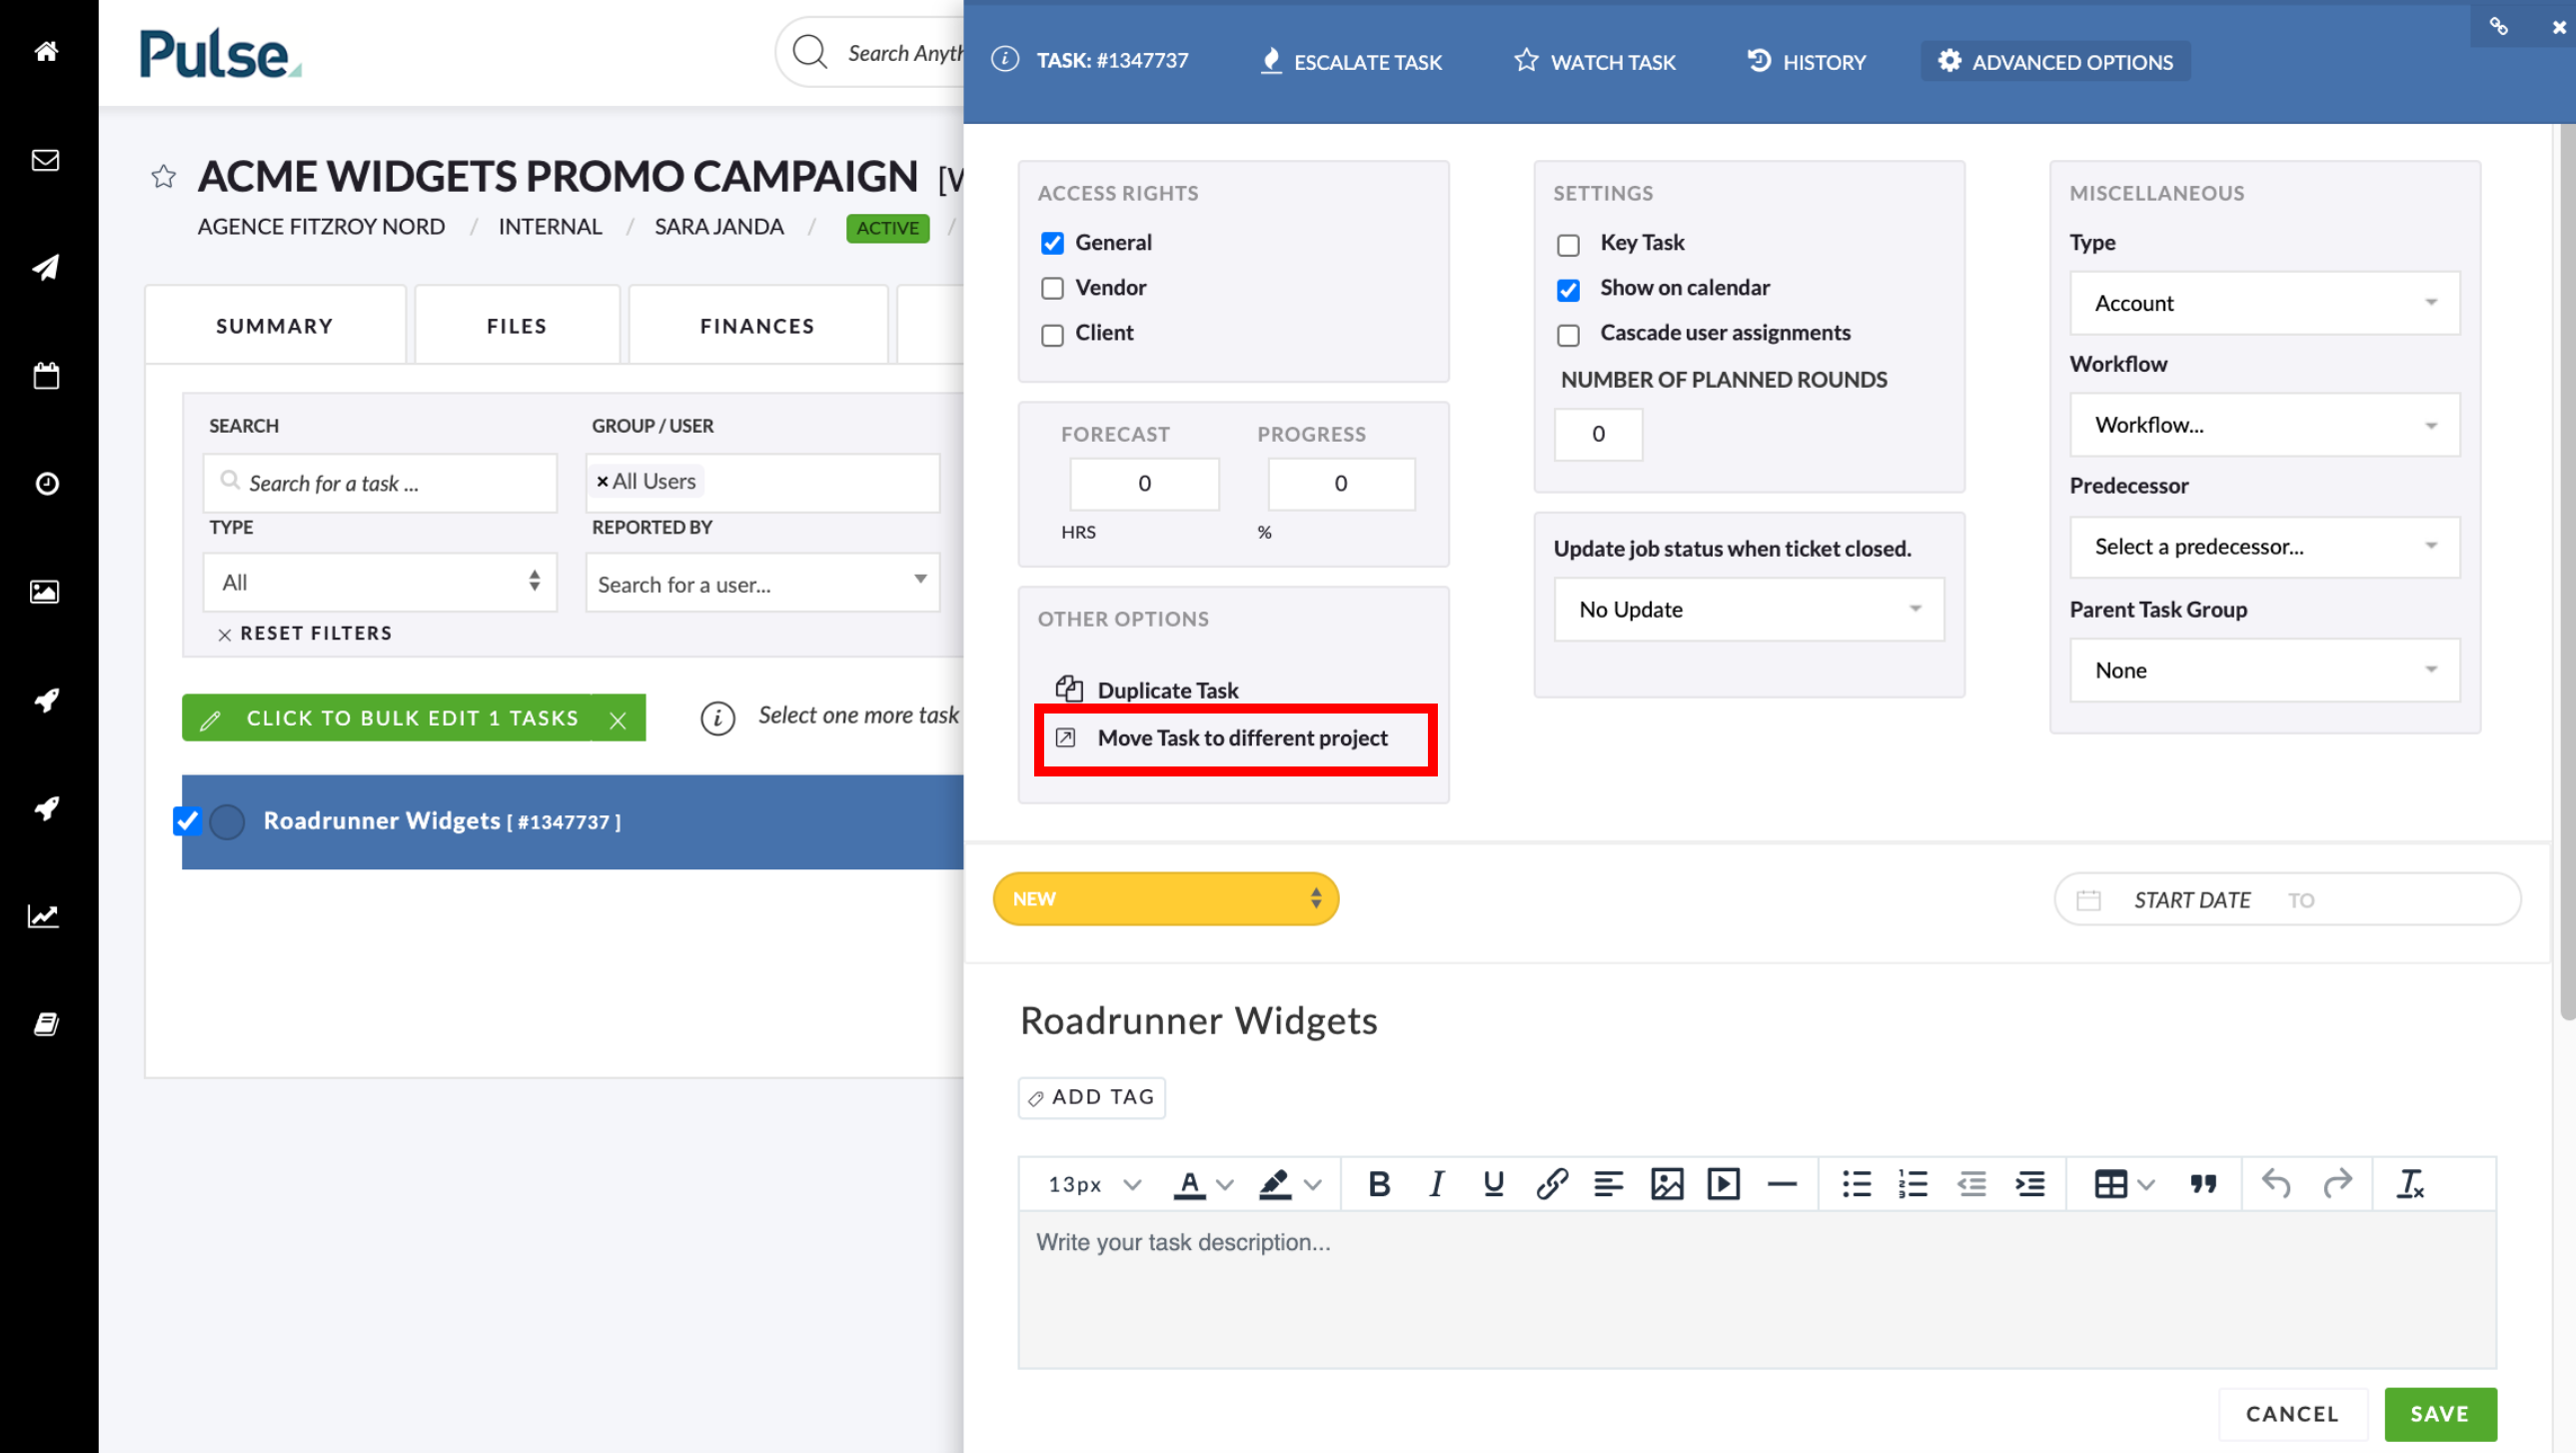
3. This launches the new “Move Task to Project” modal window
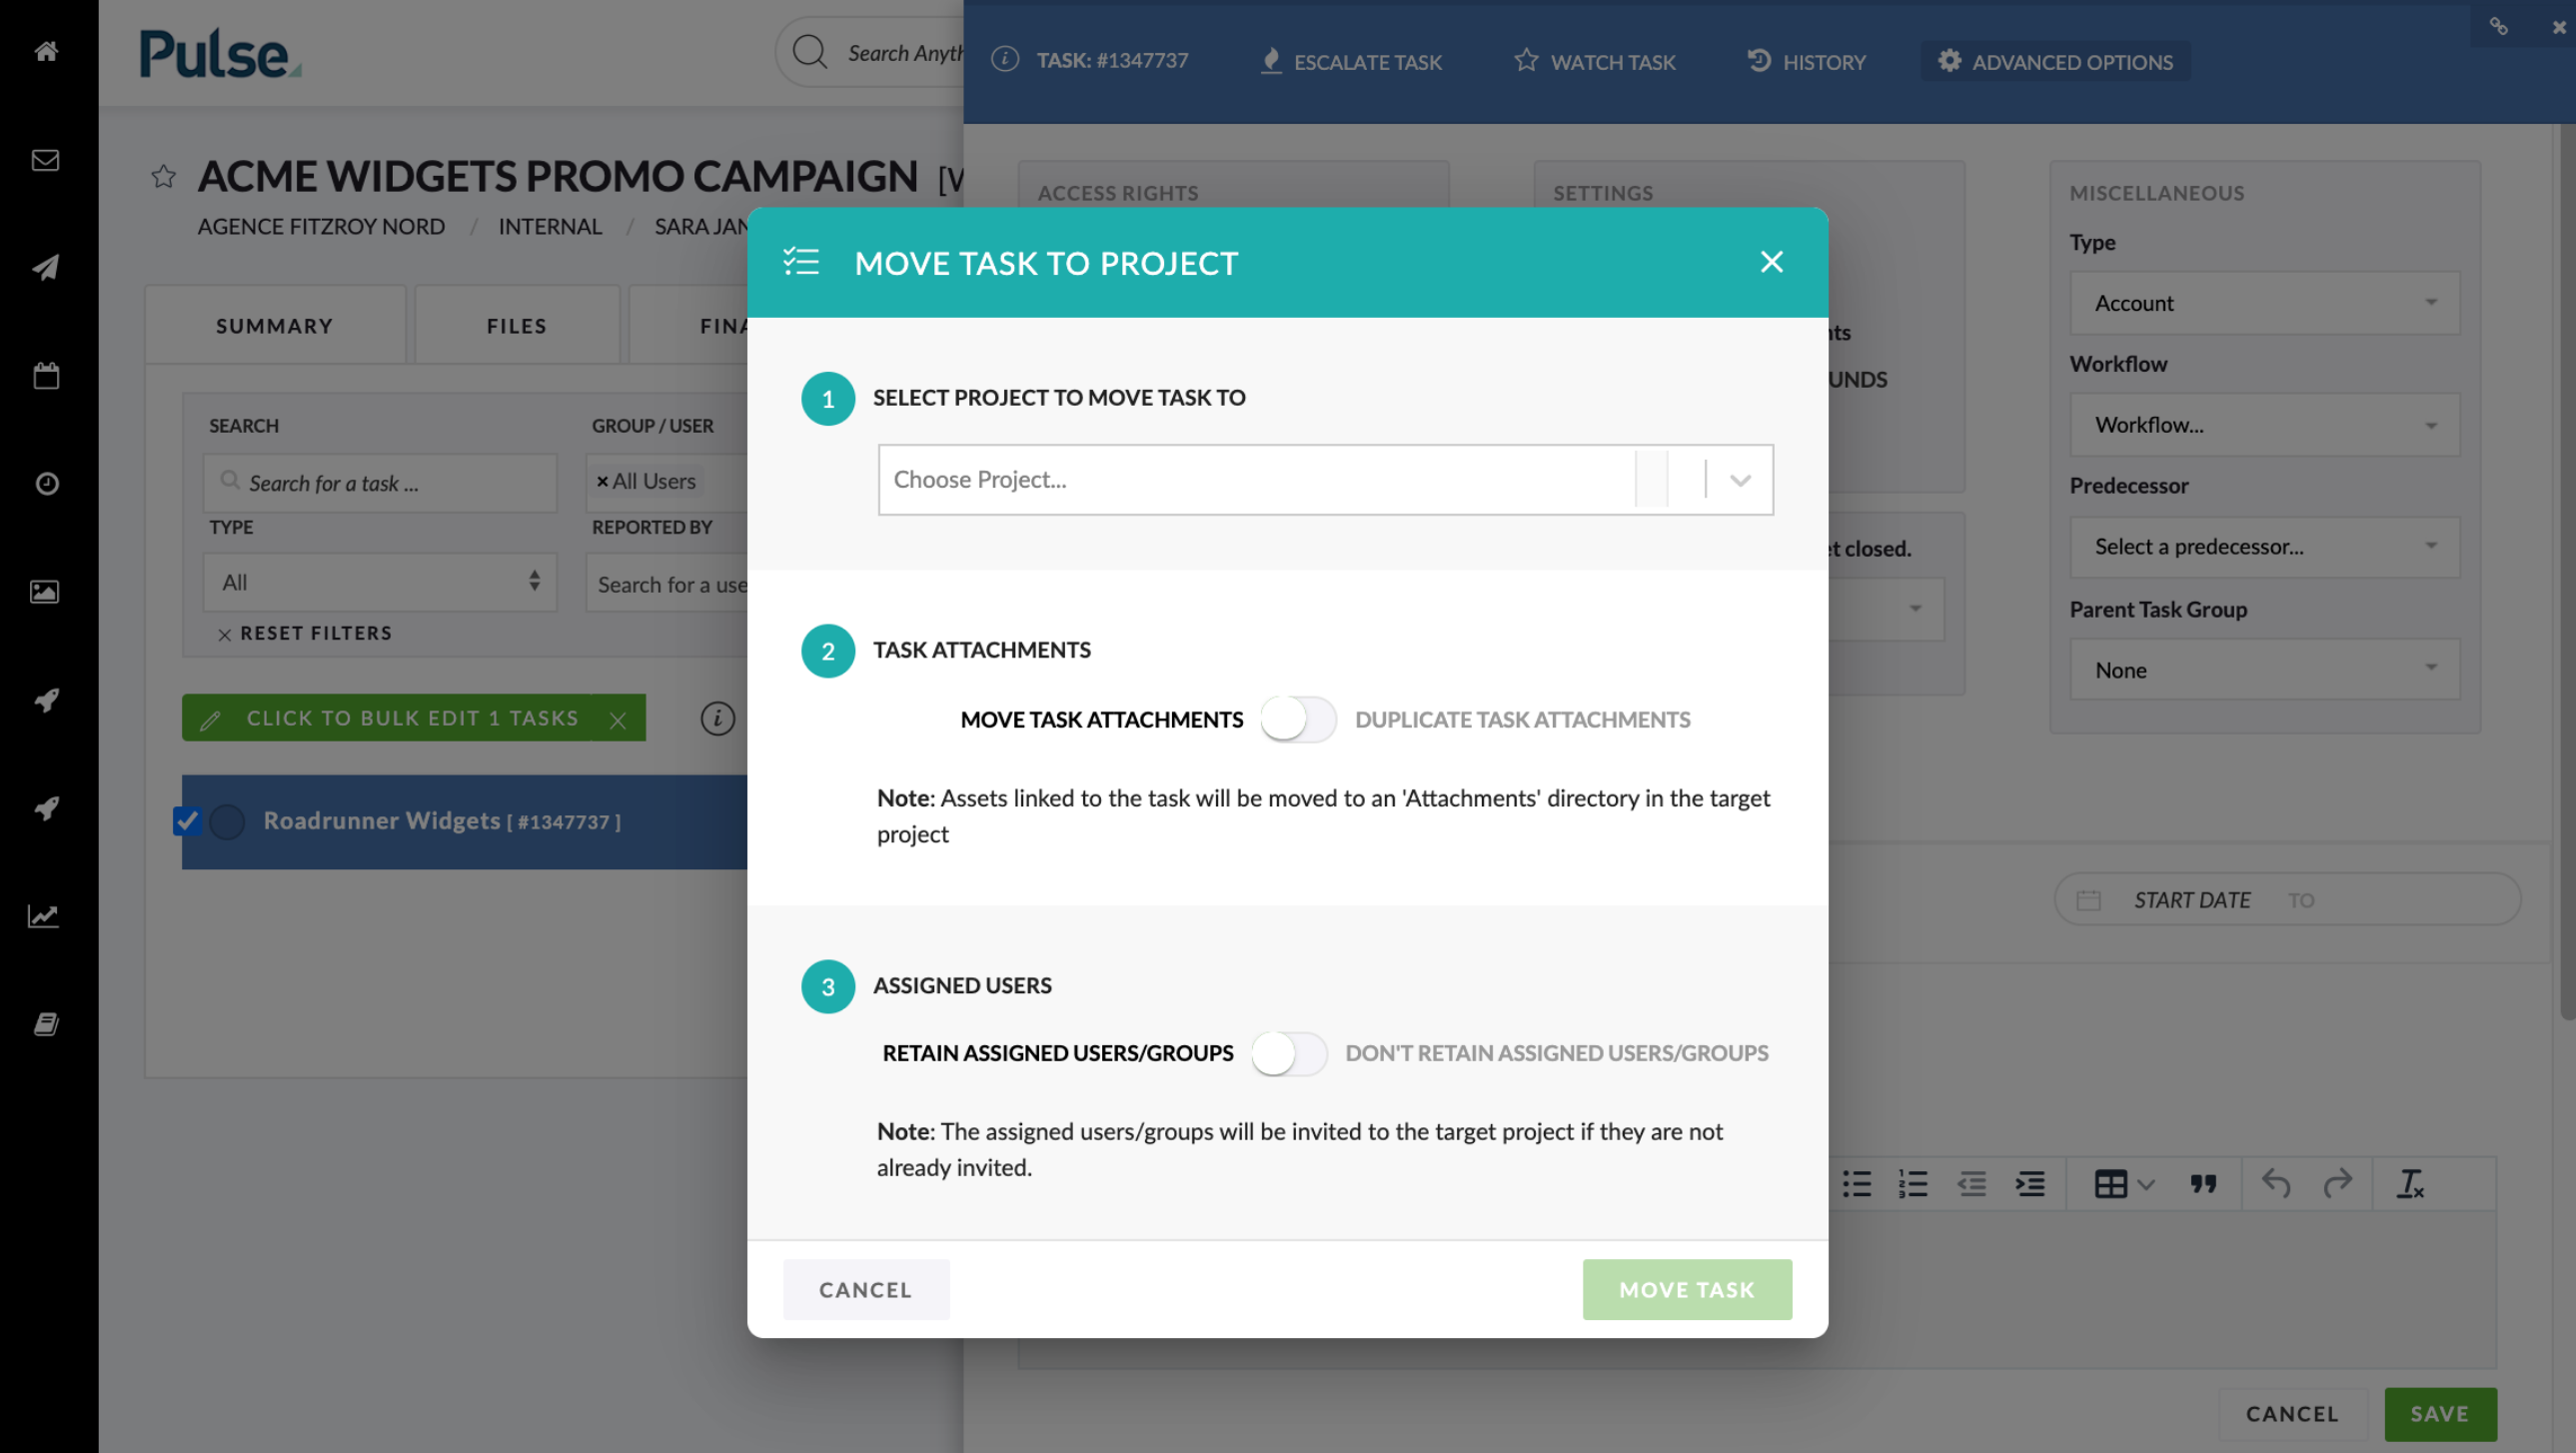
In the modal you can:
- Select the Project that you want to move the Task to from a list of available Projects
- Choose to either move or duplicate the Task’s Attachments. Assets linked to the task are moved to an ‘Attachments’ directory in the target Project.
- Choose to either retain Task assignments or remove them. The assigned users/groups will be invited to the target Project if they are not already invited to that Project.
That’s it! We are very excited about this new feature and hope you are too!
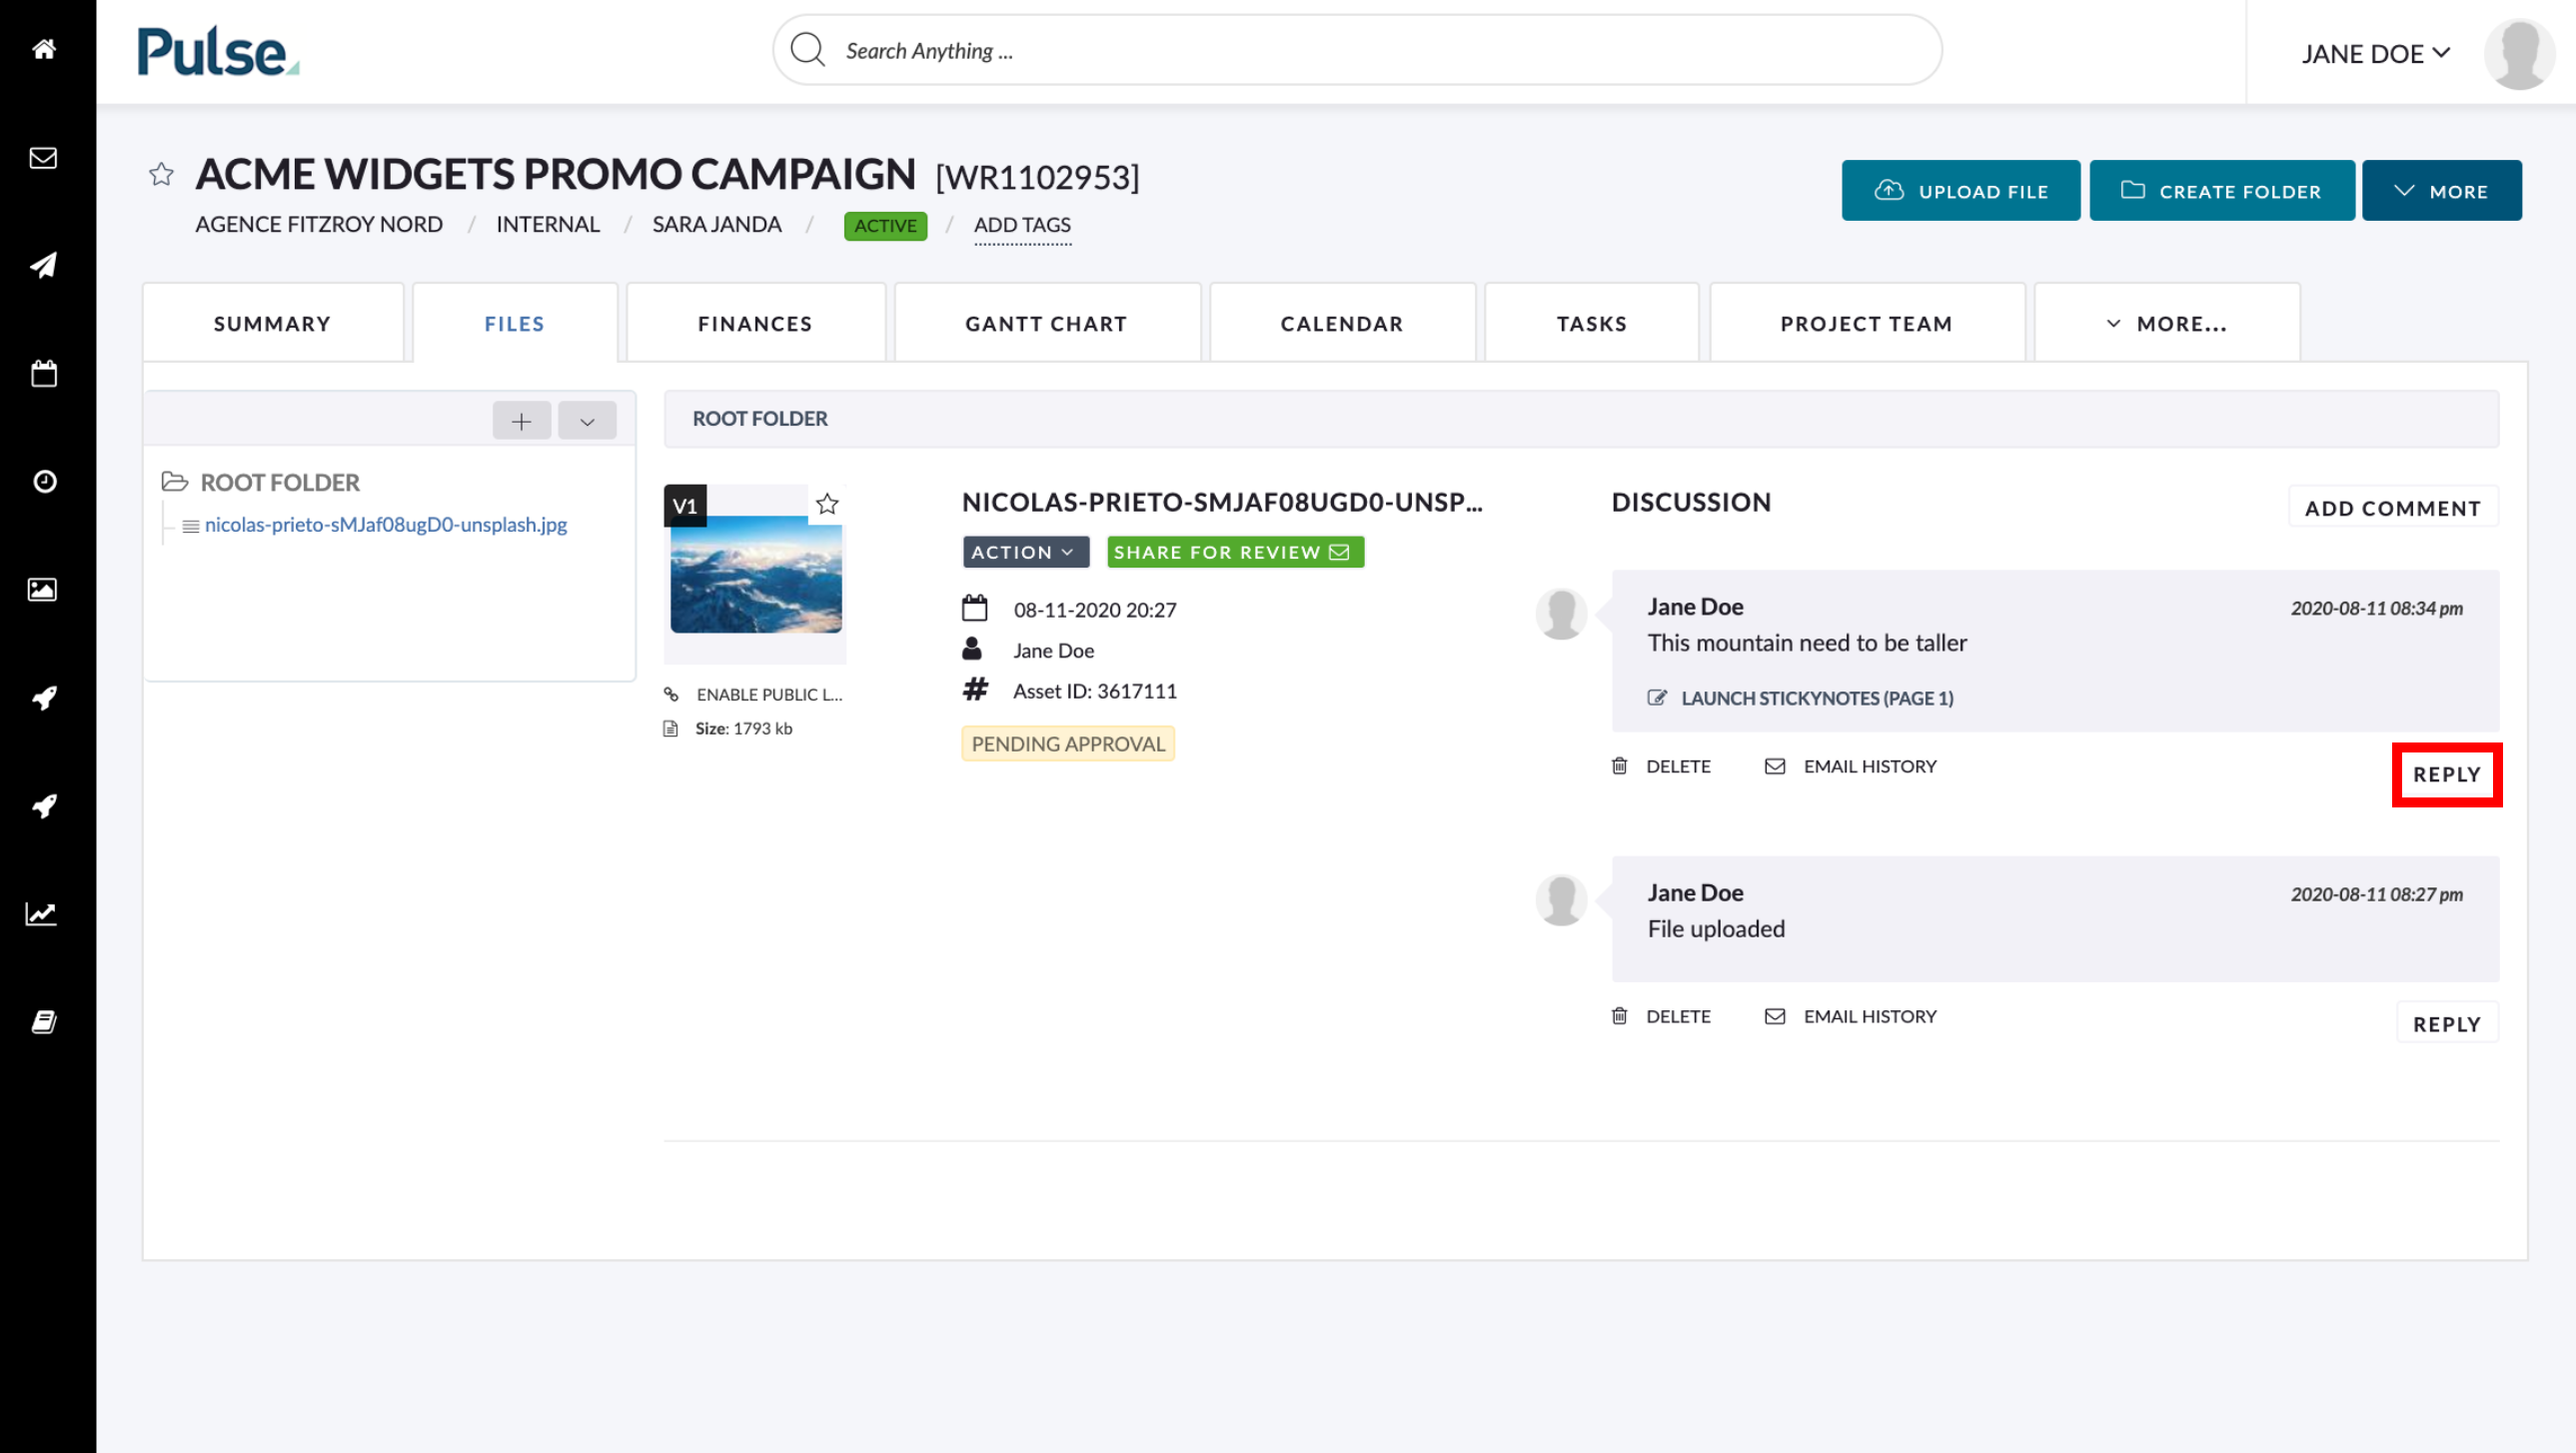
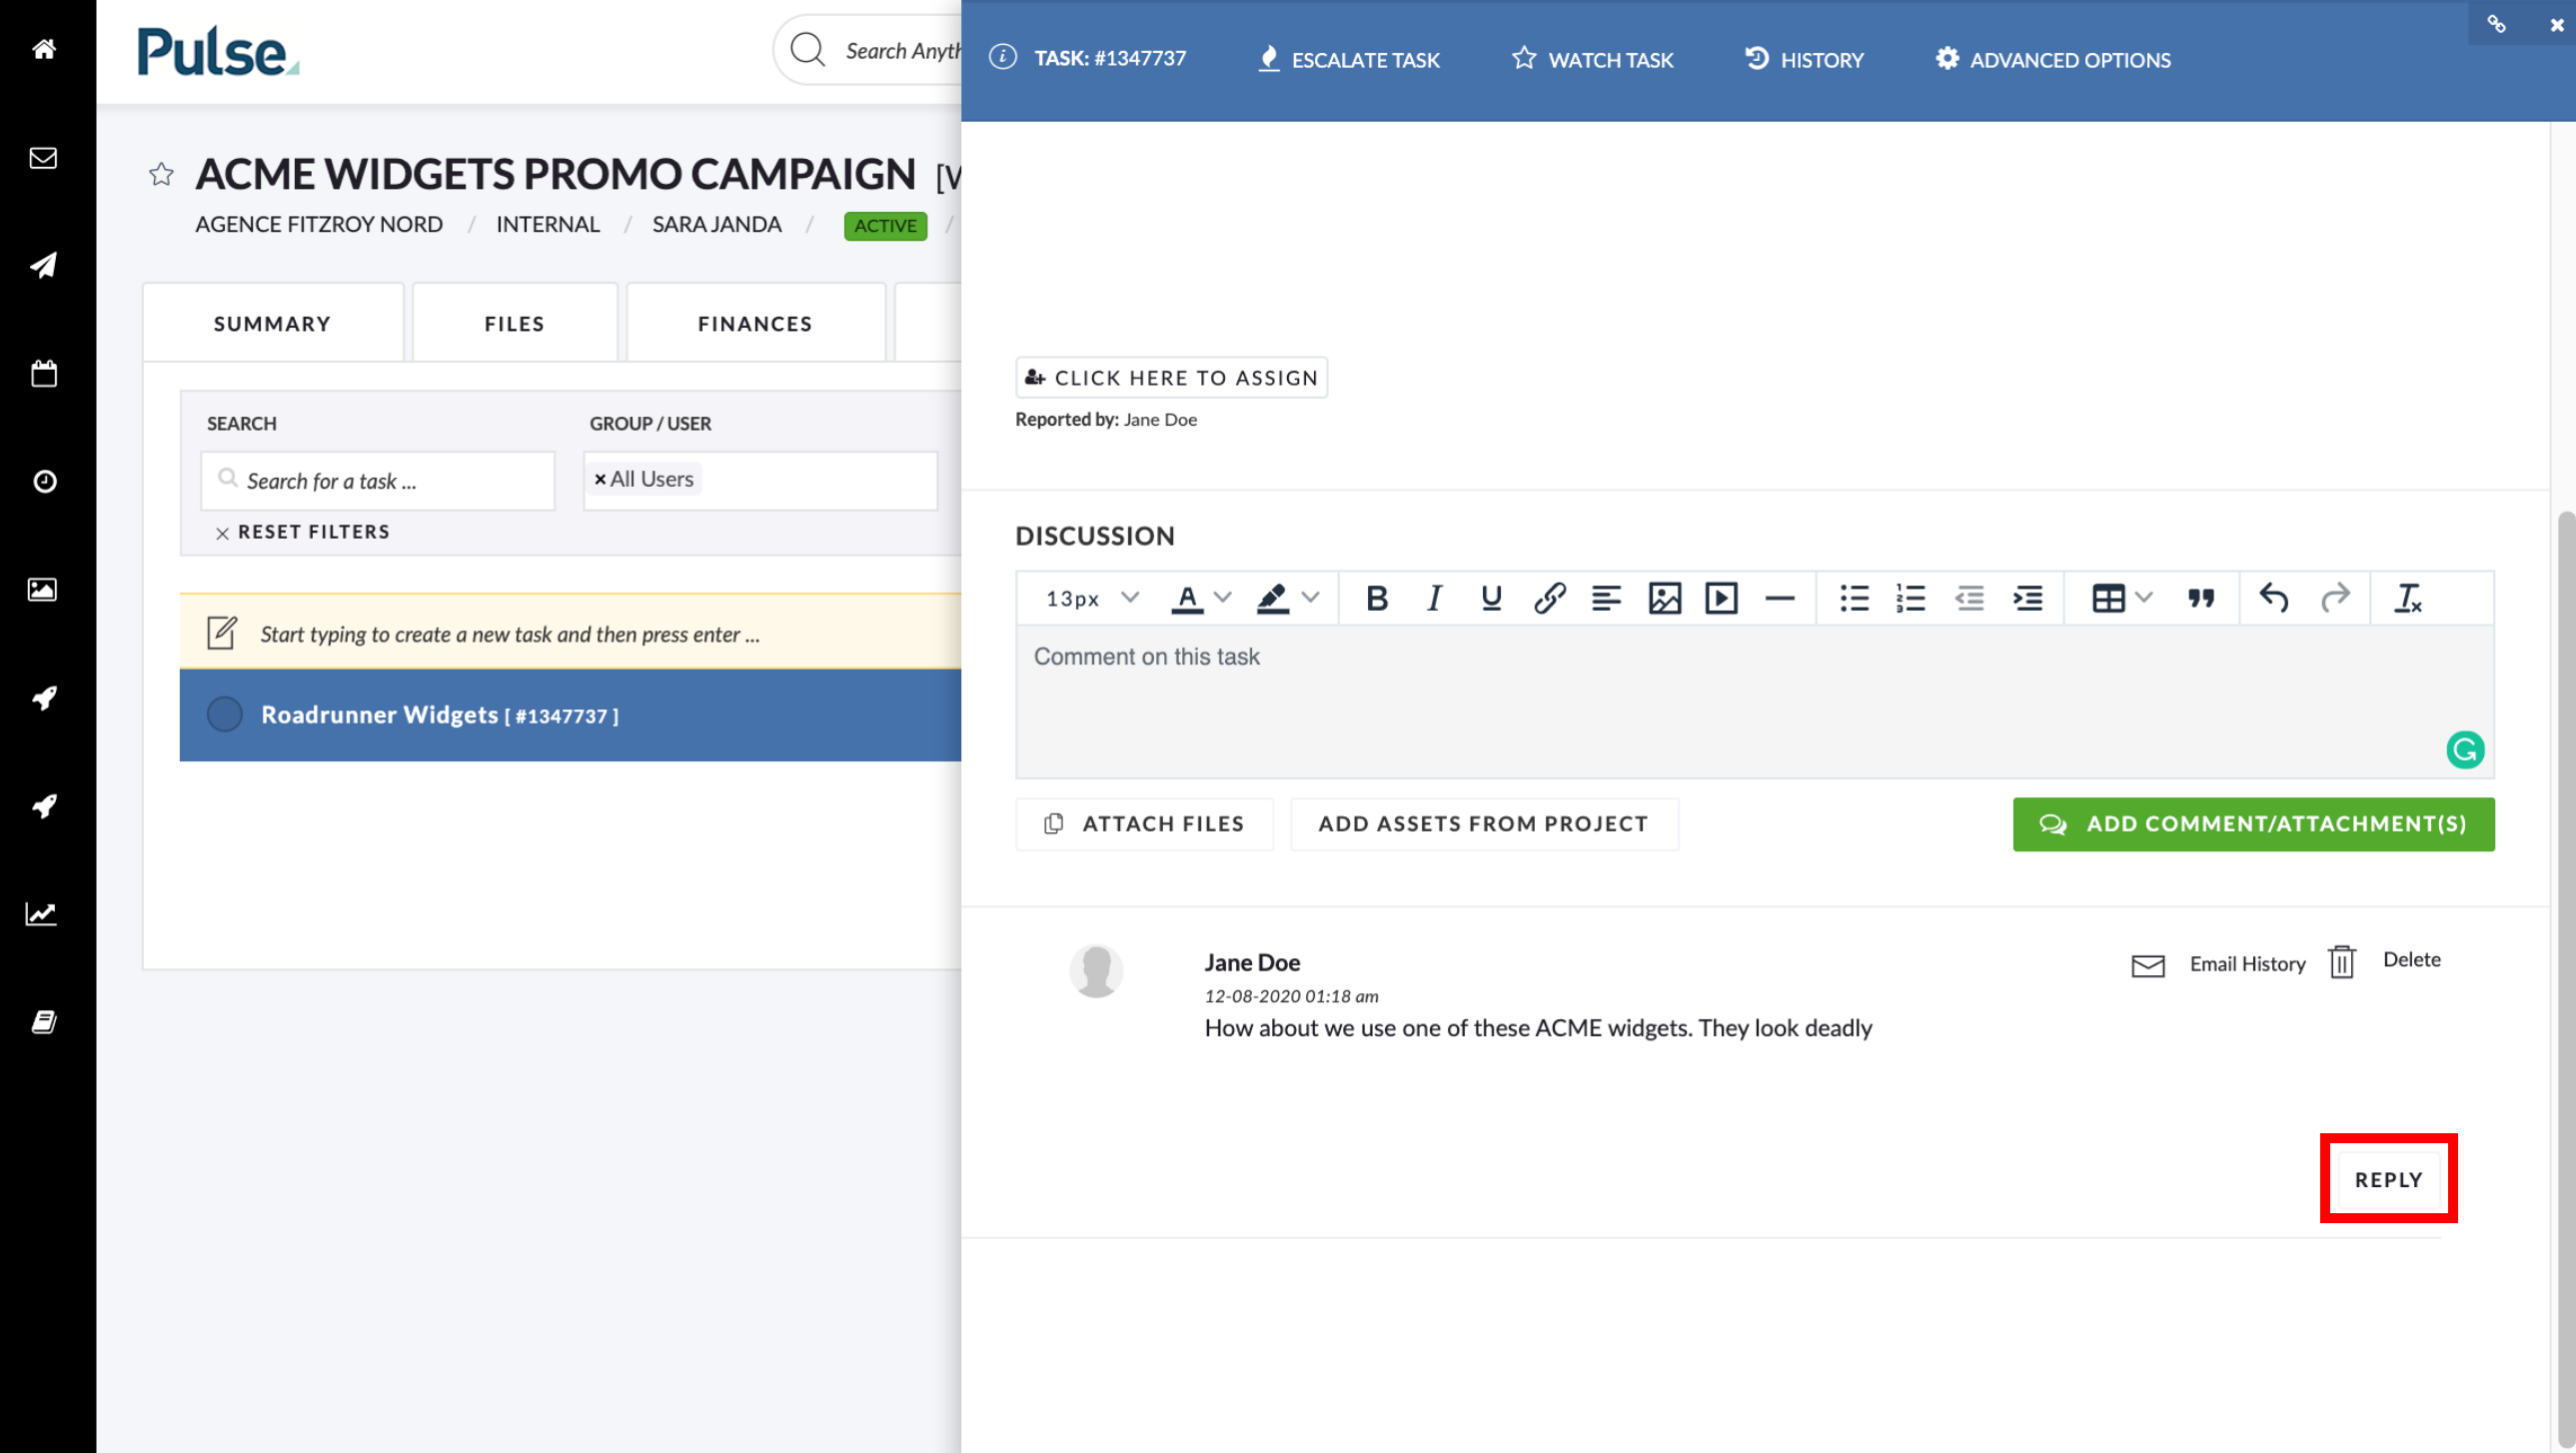
You can now ‘Reply’ to File & Task Comments
Users are now able to reply directly to File and Task comments. Replies appear directly beneath the comment they are a reply to. Like Comments, replies are displayed with newer replies appearing above older replies.
To reply to a File Comment
1. Click the “Reply” button beneath the comment you wish to reply to
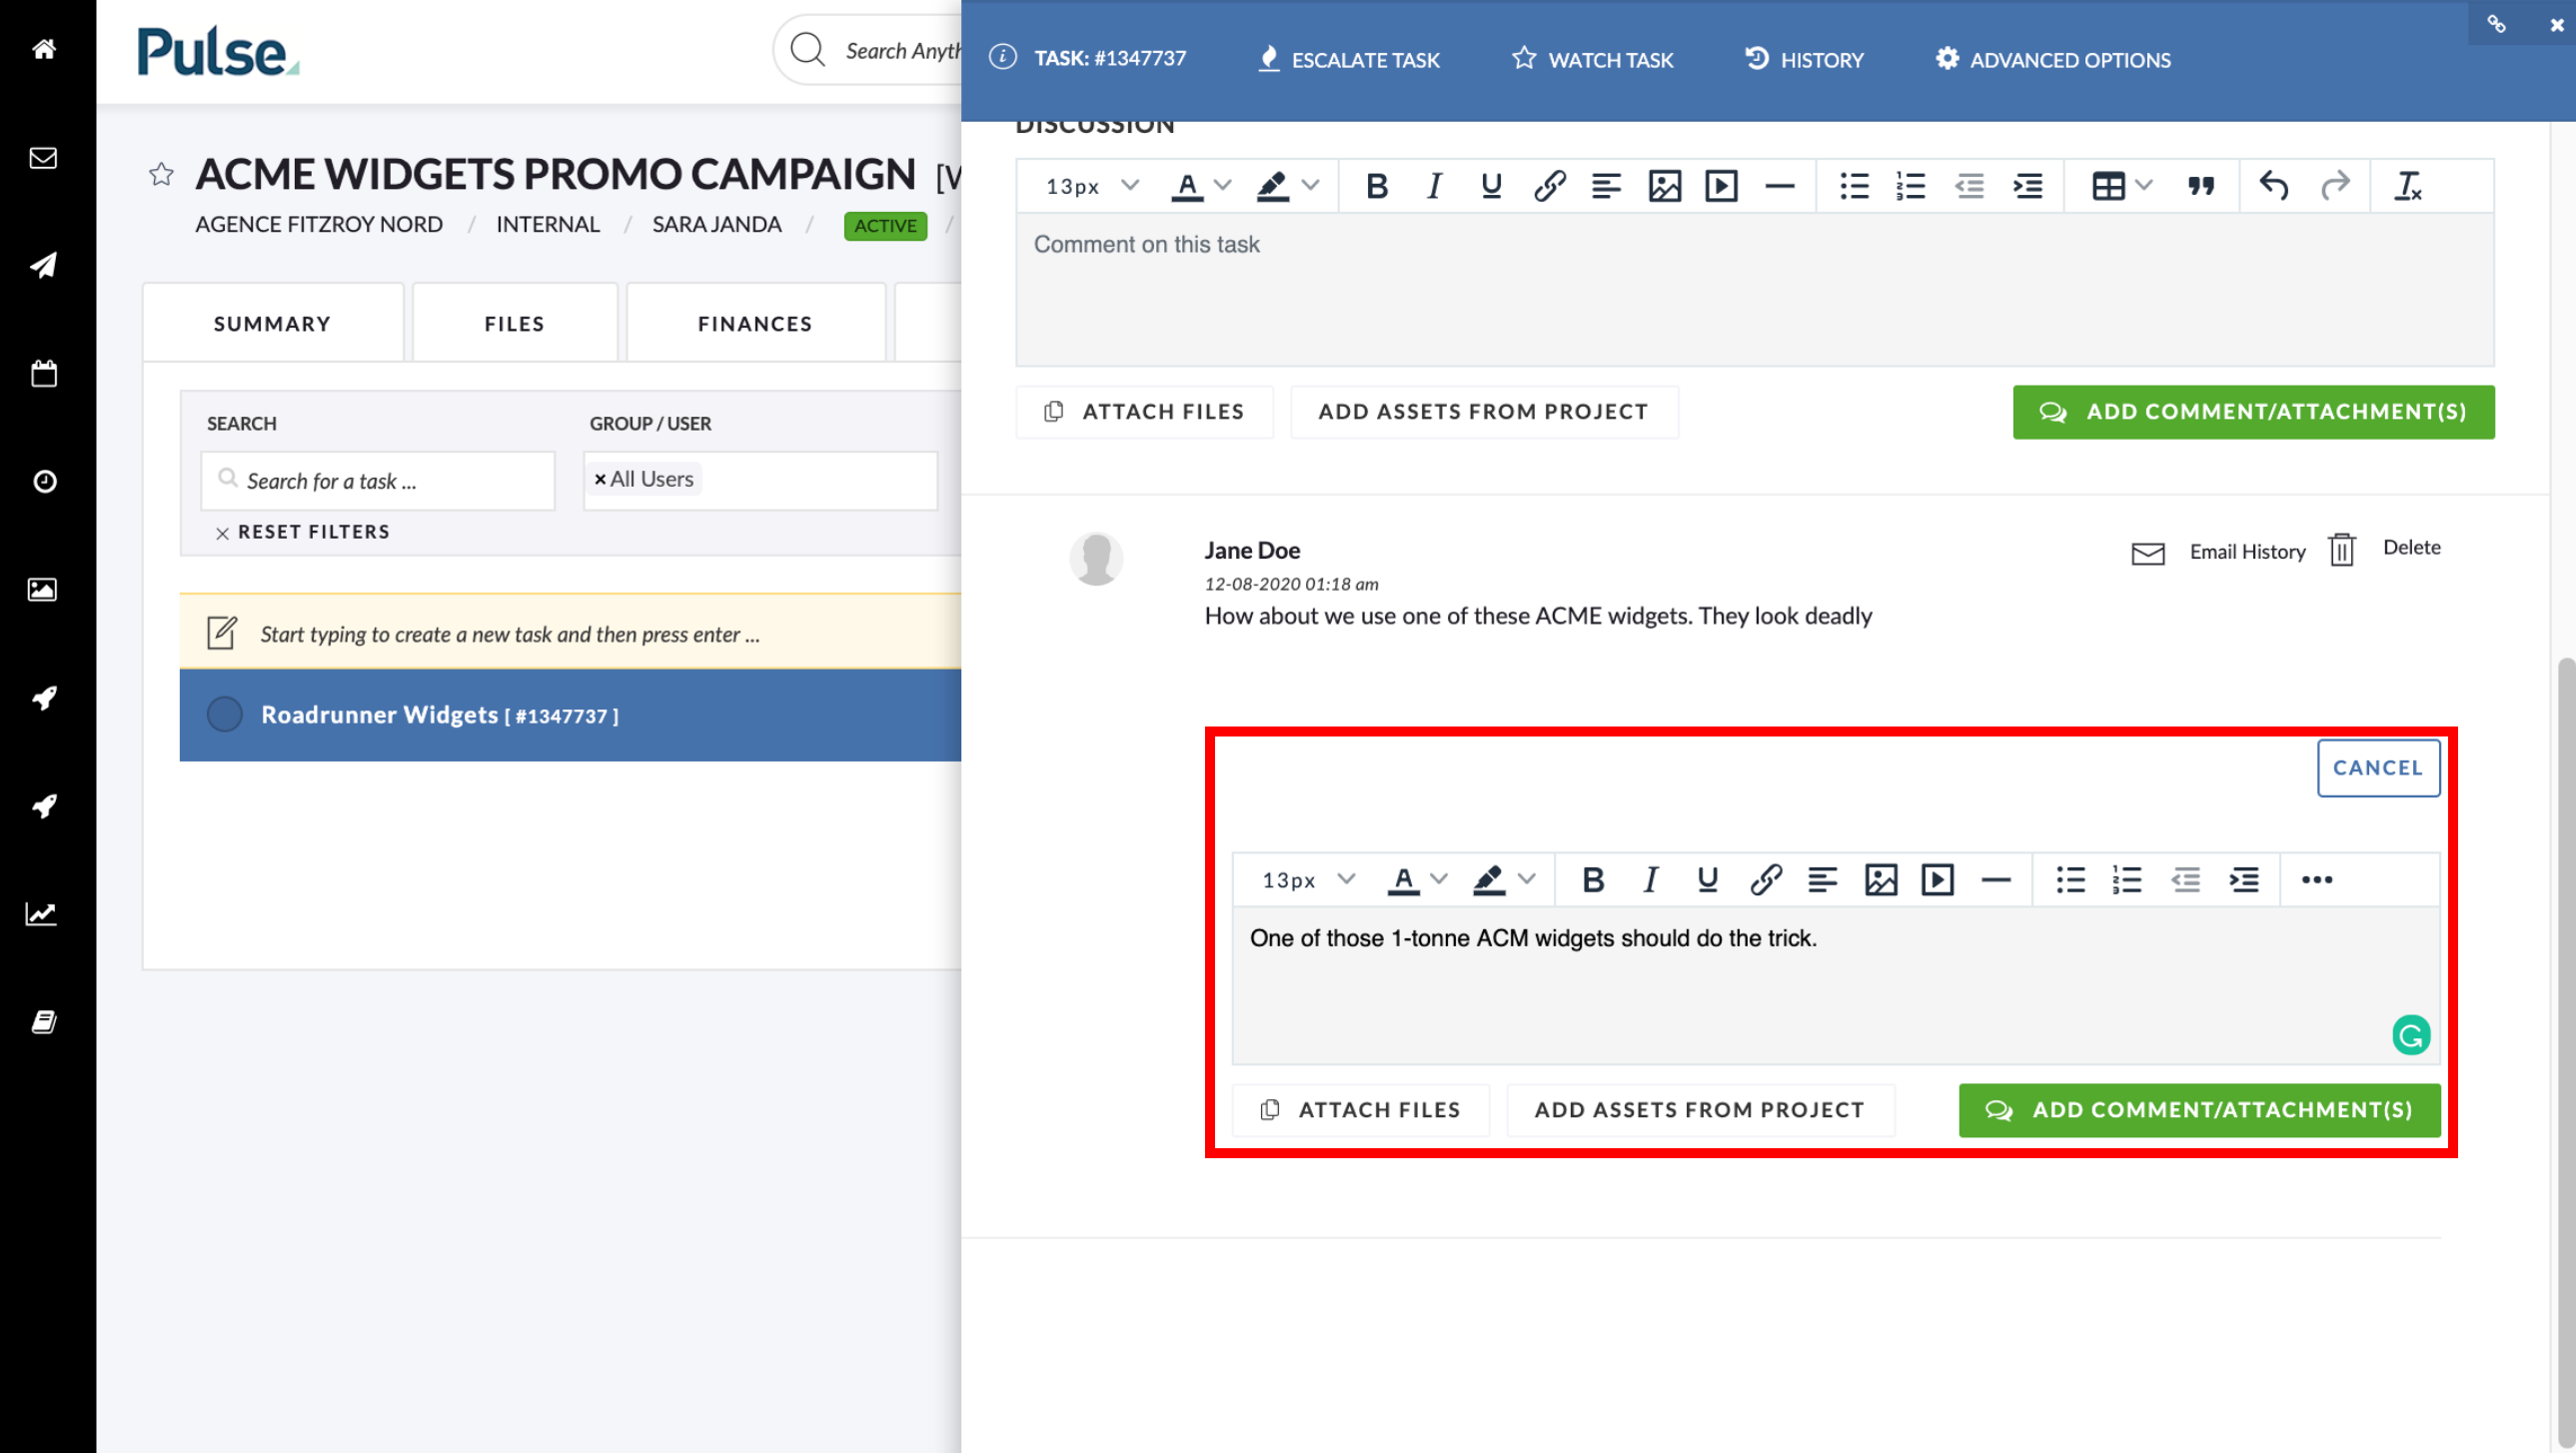
2. Enter your Reply
You can also Attach files in your reply. You can click “Cancel” if you change your mind about your reply.
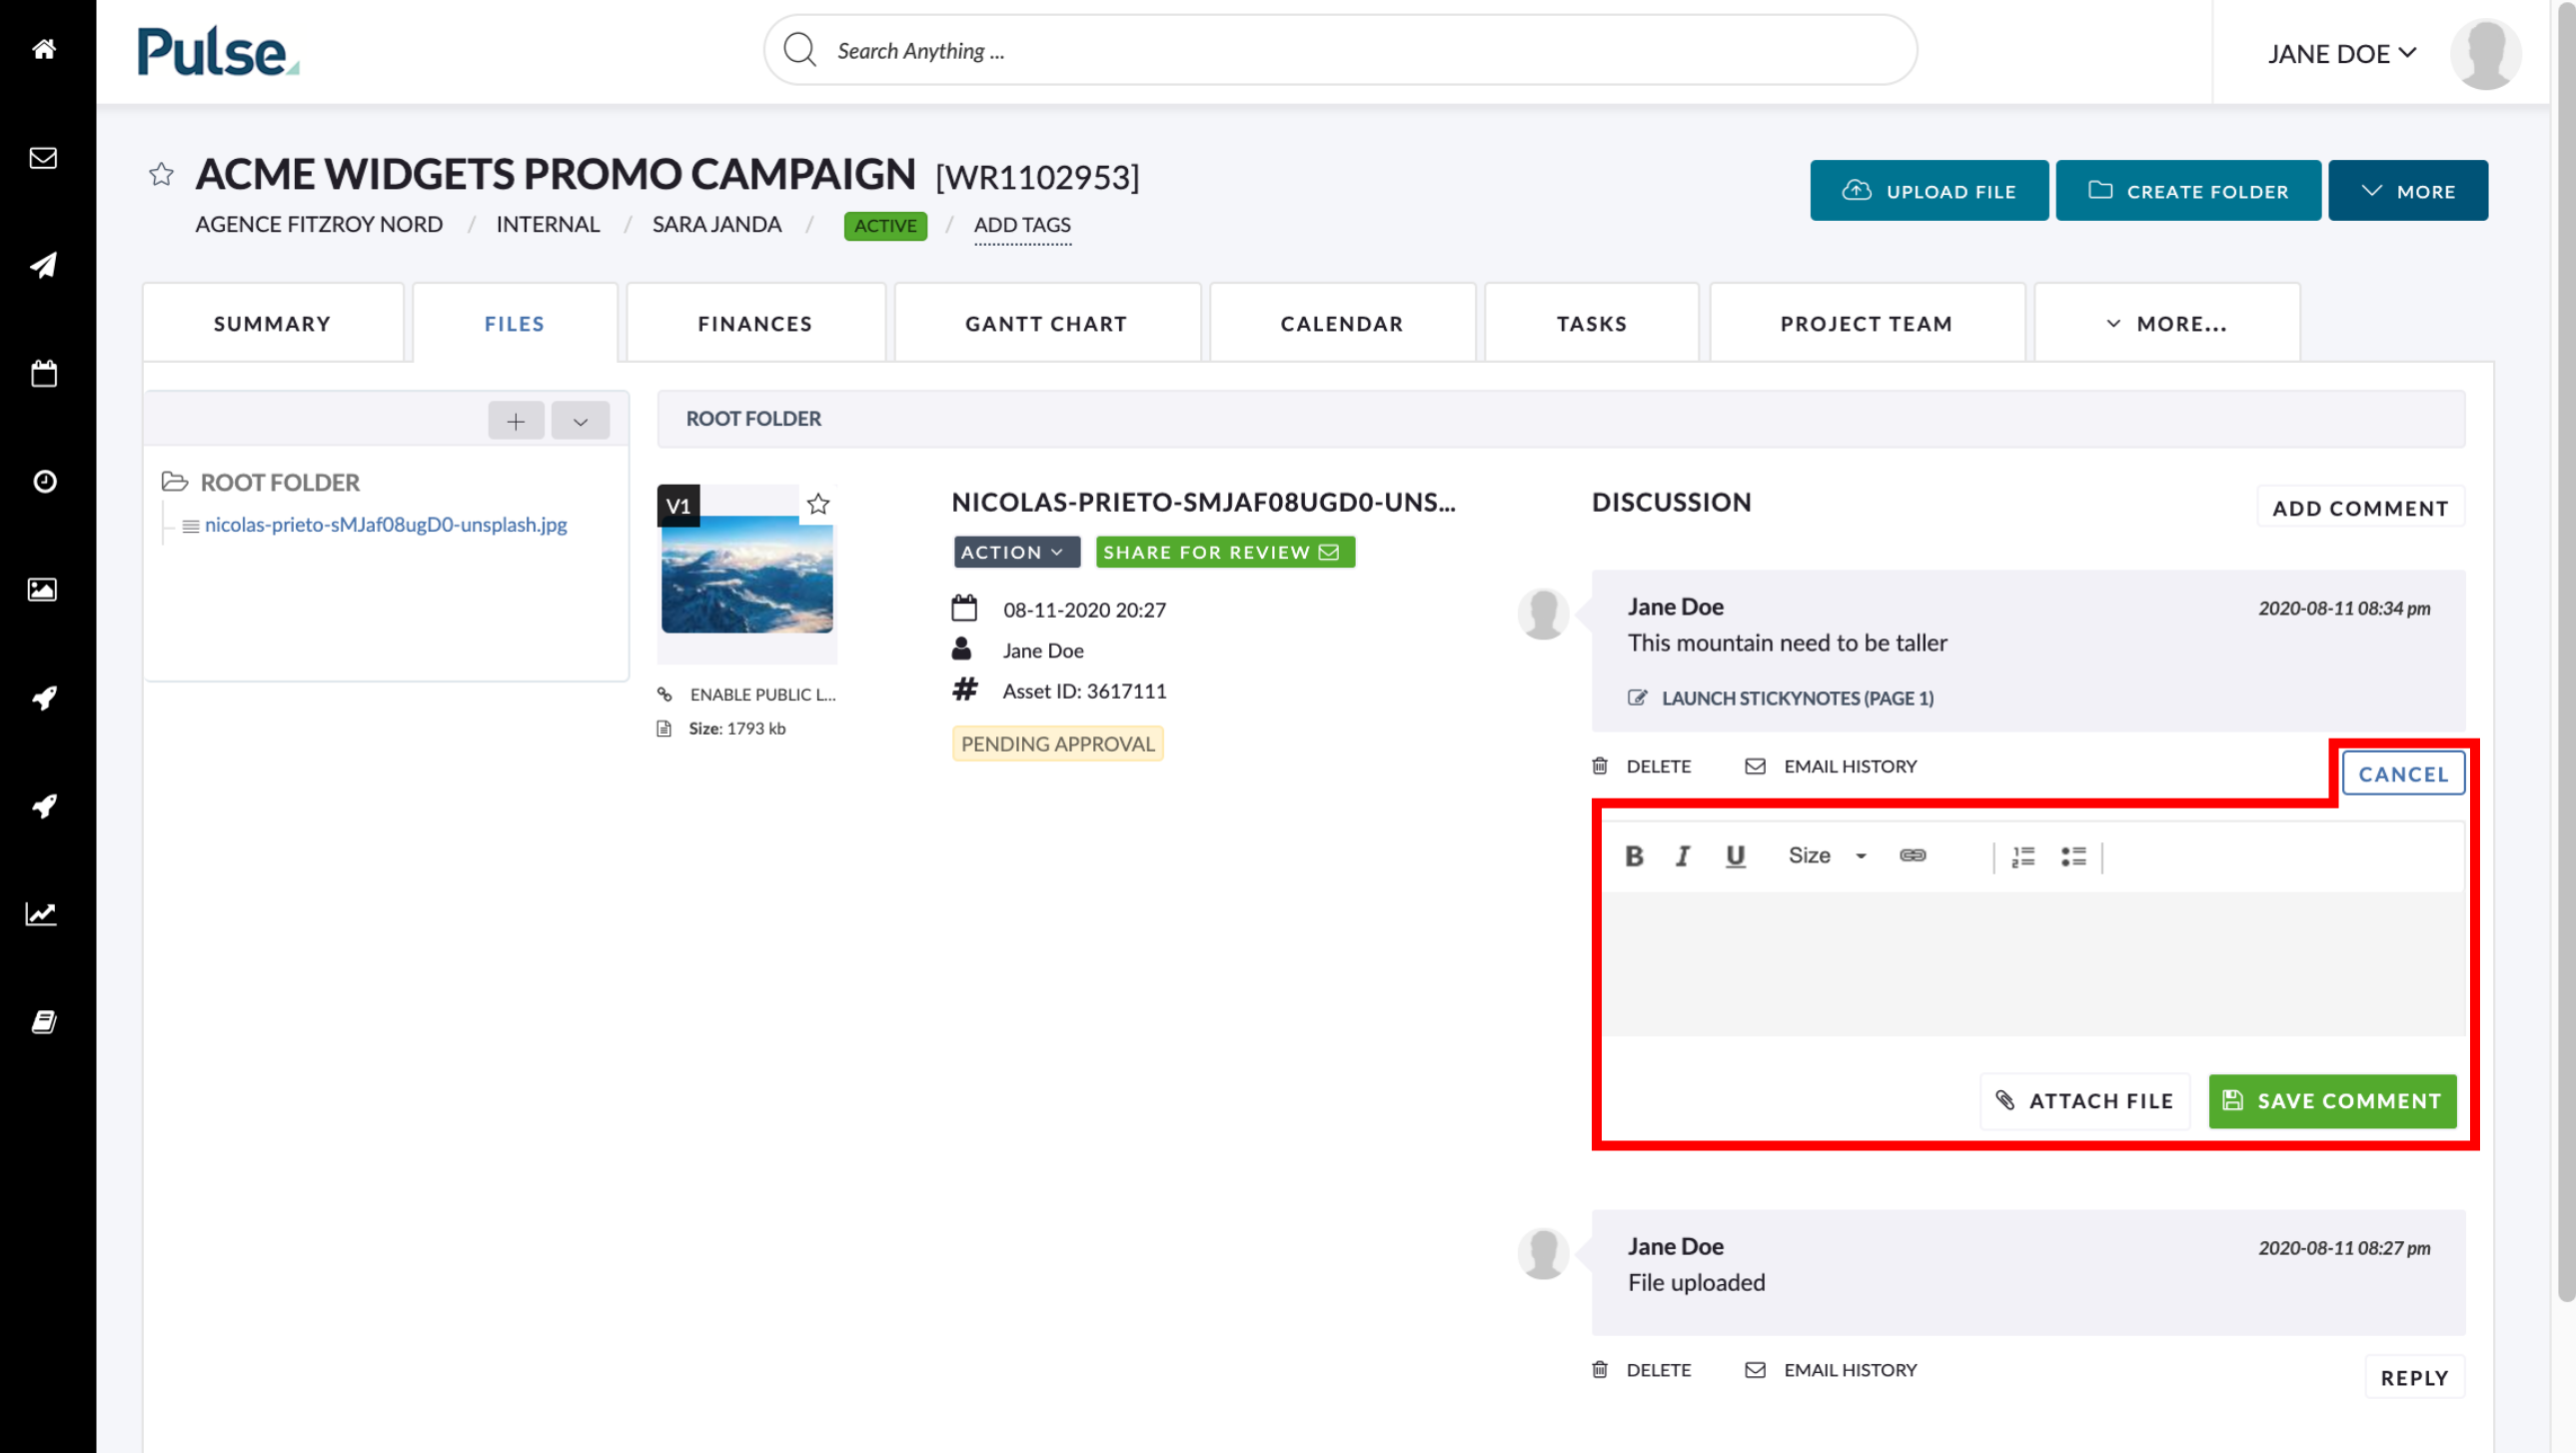
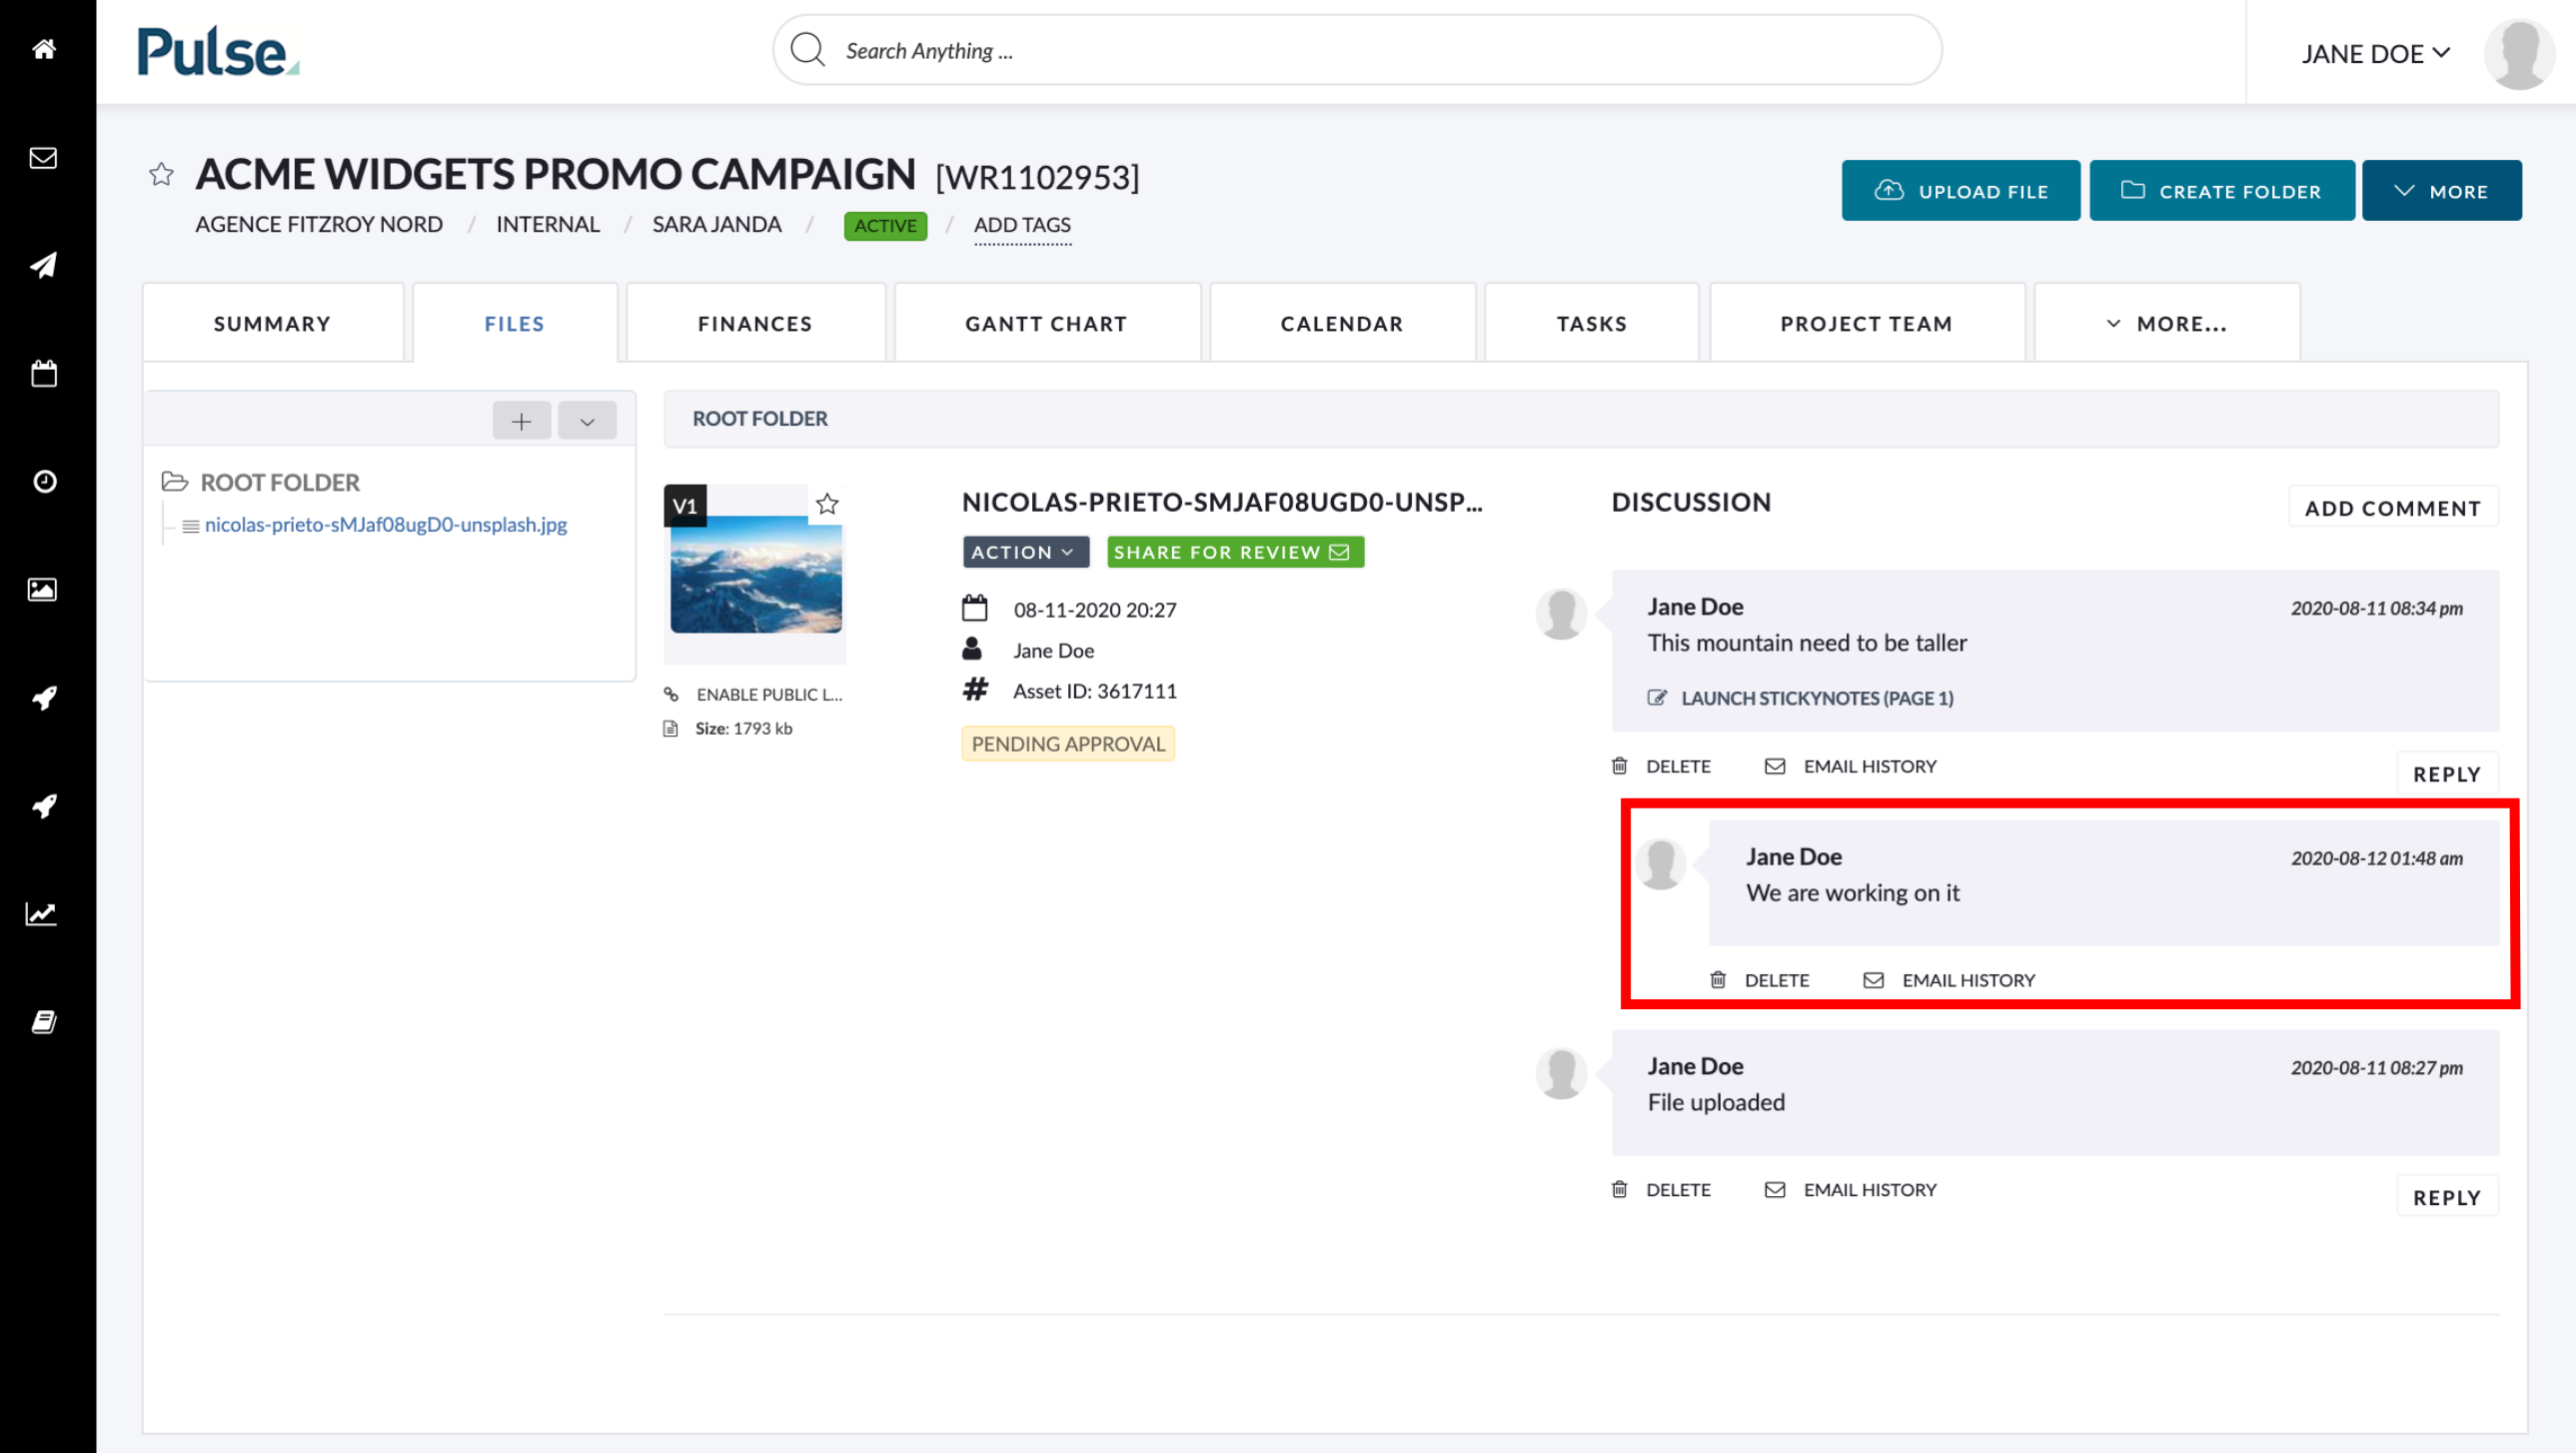
3. Click “Add Comment/Attachment” to publish your reply
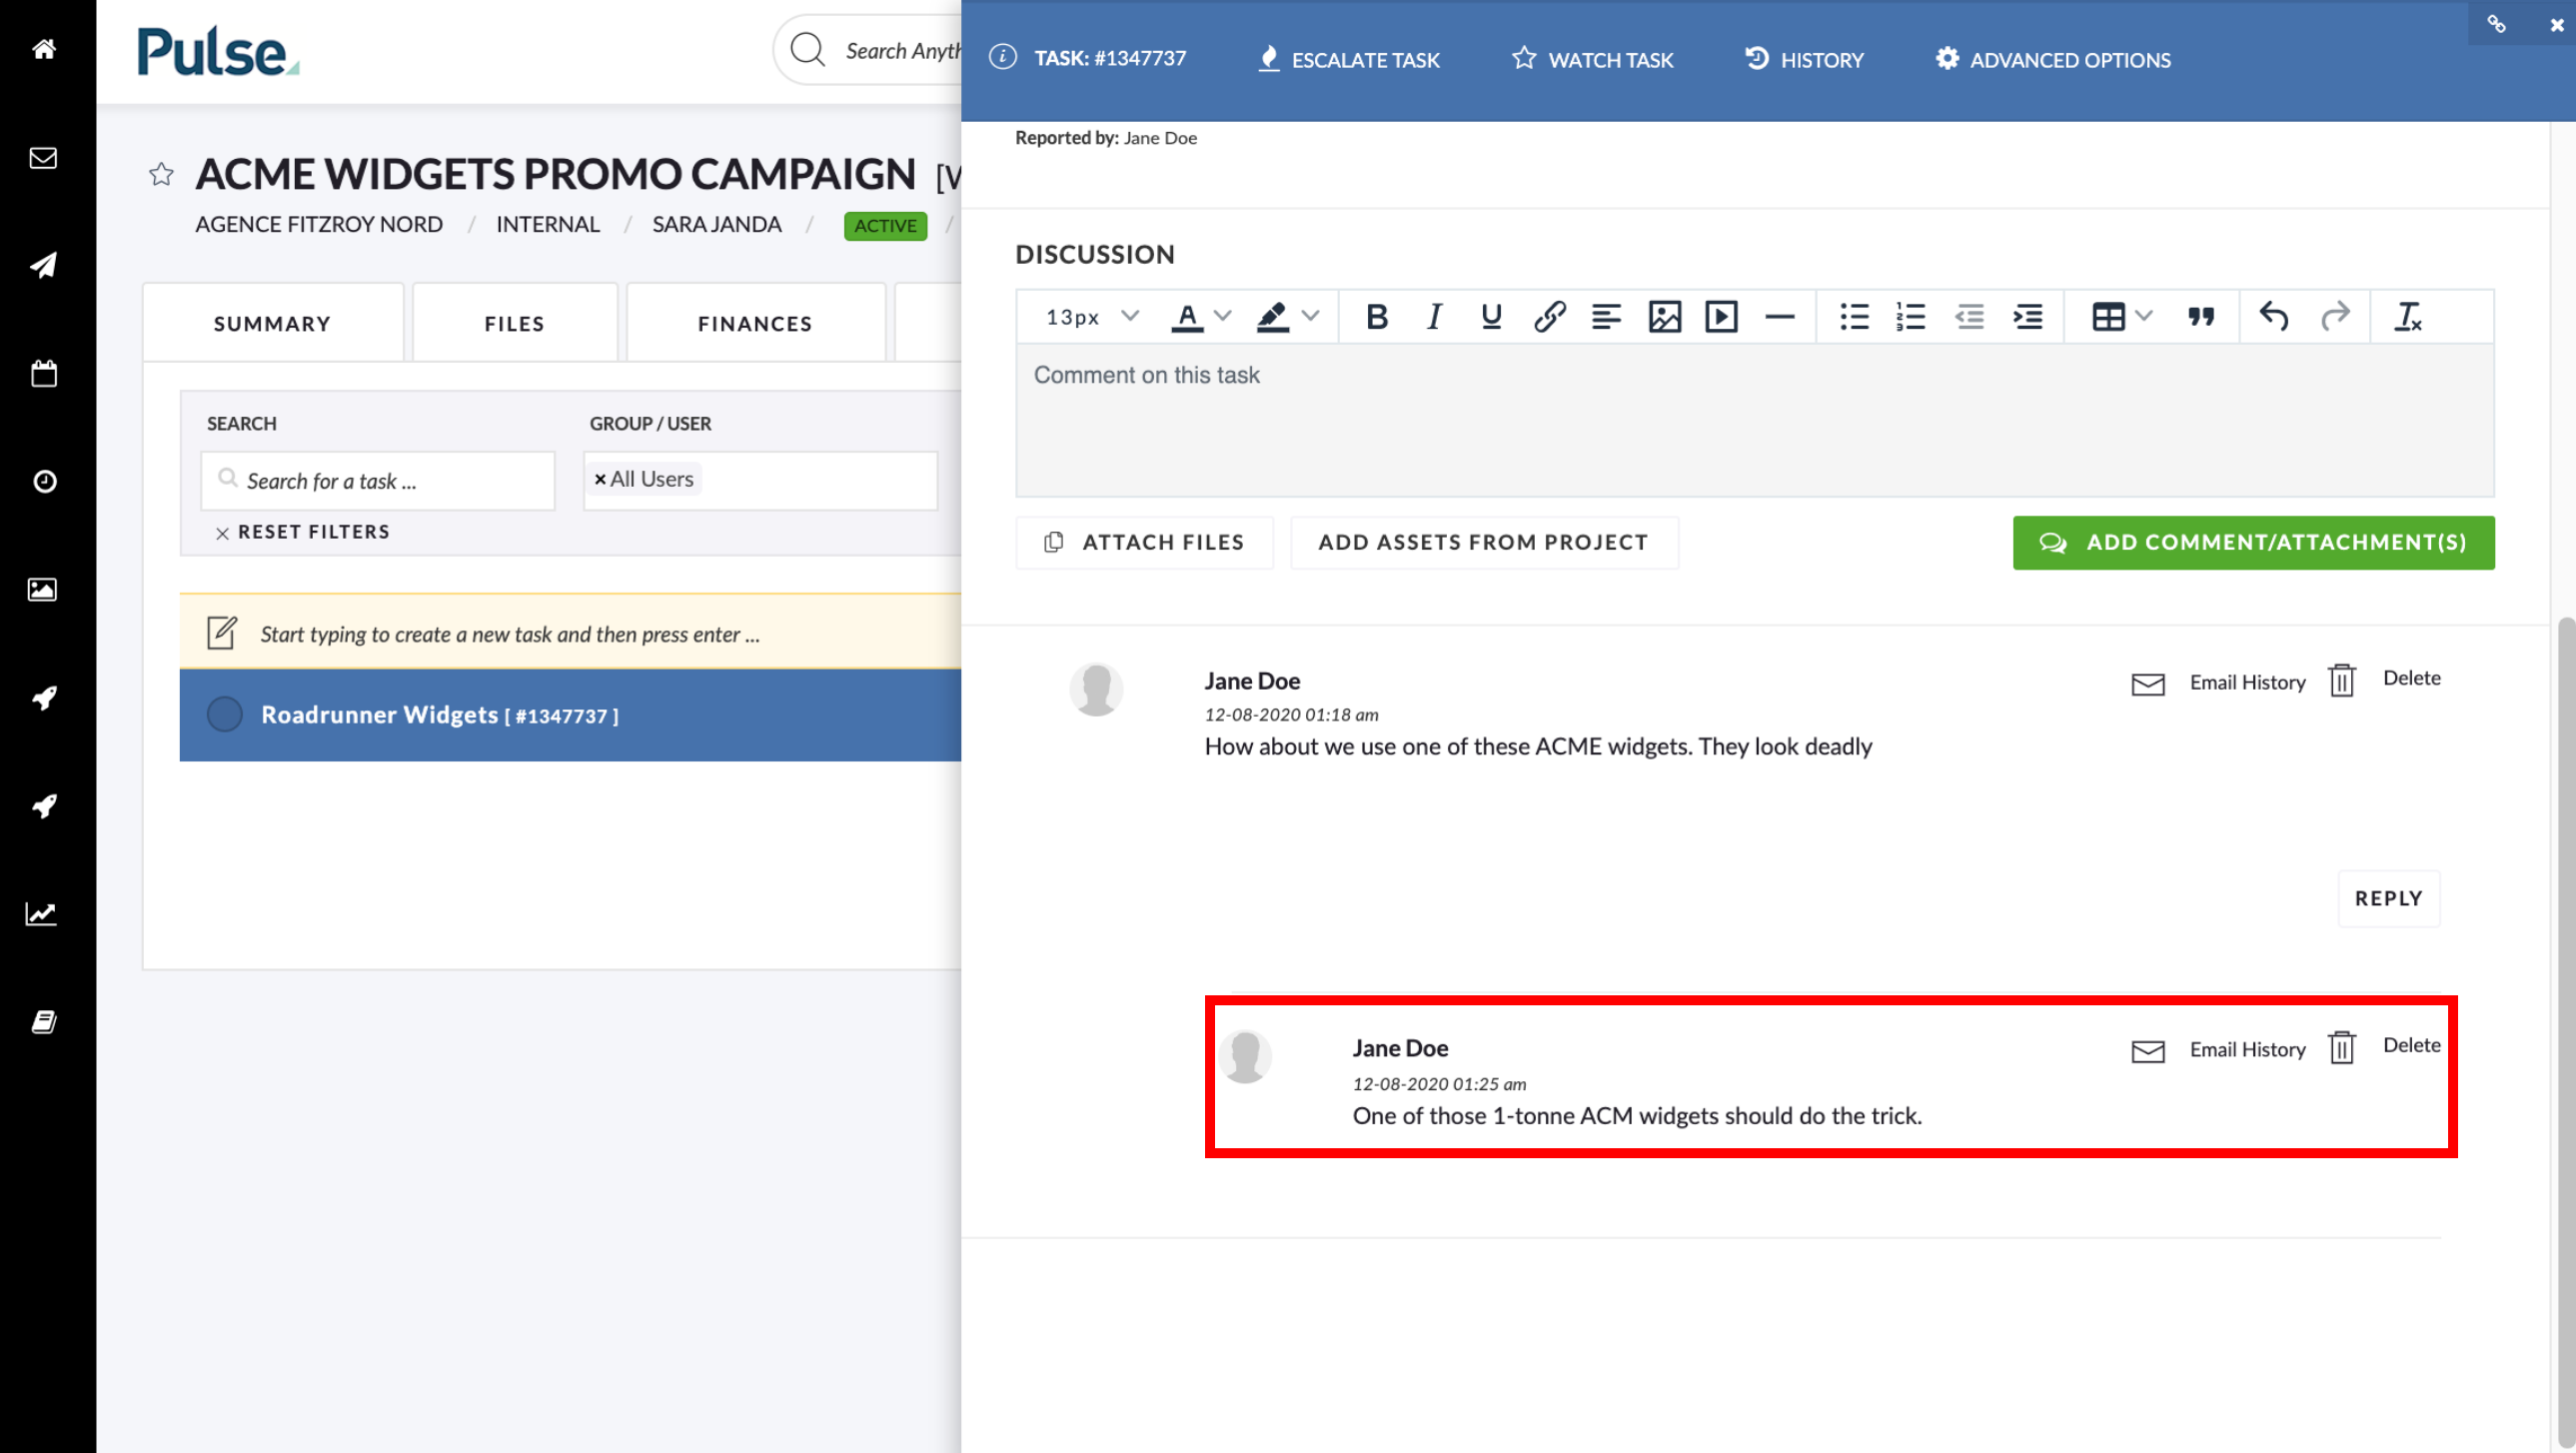
Once Published, your reply will appear directly beneath the Comment you replied to. You will not see a “Reply” button next to your reply Comment as comment nesting is restricted to one-level.
To reply to a Task Comment
1. Click the “Reply” button beneath the comment you wish to reply to
2. Enter your Reply
You can also add Attachments or Assets from the Project in your reply. You can click “Cancel” if you change your mind about your reply.
3. Click “Add Comment/Attachment” to publish your reply
Once Published, your reply will appear directly beneath the Comment you replied to. You will not see a “Reply” button next to your reply Comment as comment nesting is restricted to one-level.
You can add Holidays to Timesheets
Office Holidays are now shown on Timesheets. This will reduce timesheet amendments on the Office level in cases where a user mistakenly reports time on bank holidays and other days-off.
You can identify public holidays by their ‘teal coloured’ background and the holiday’s name beneath the date.
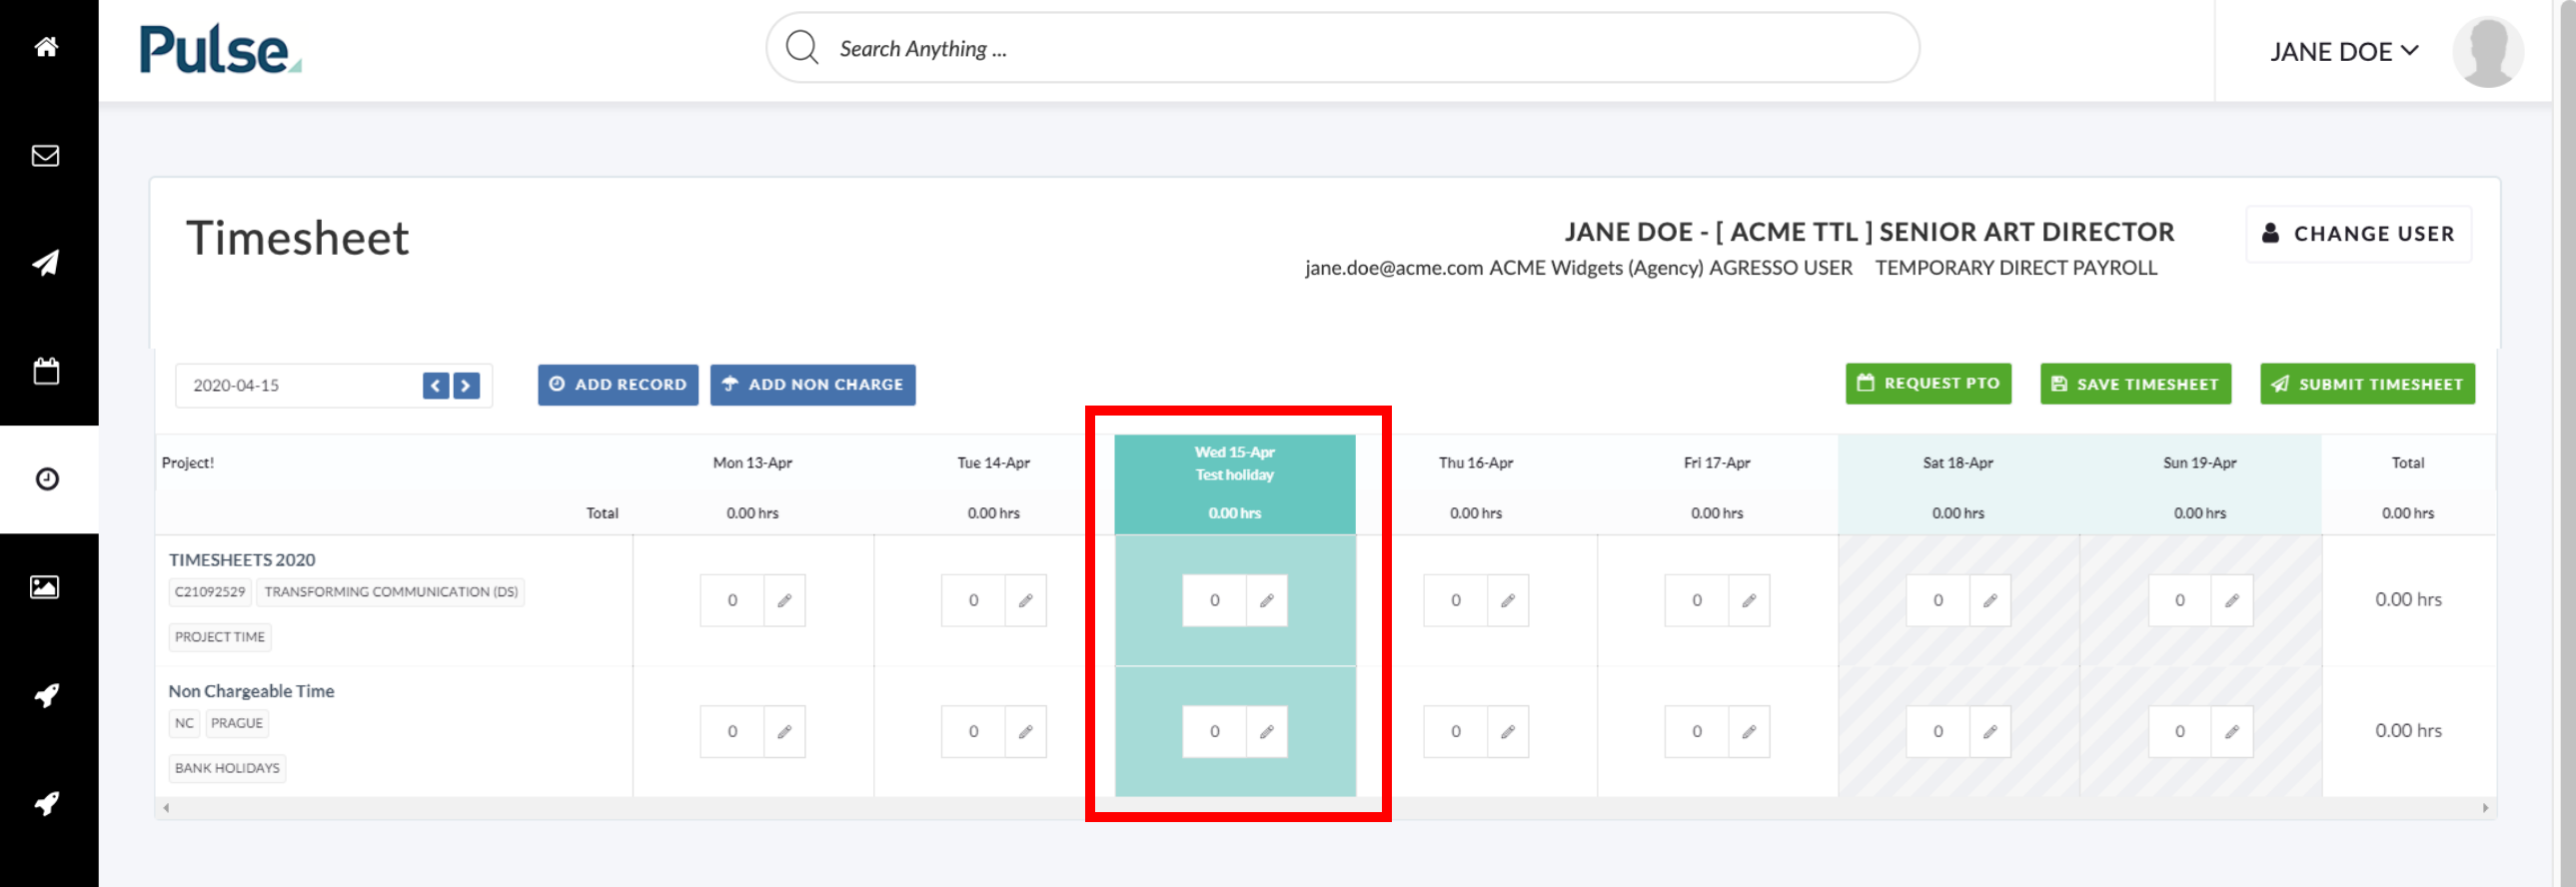
Weekends are indicated by a ‘striped-grey’ background.
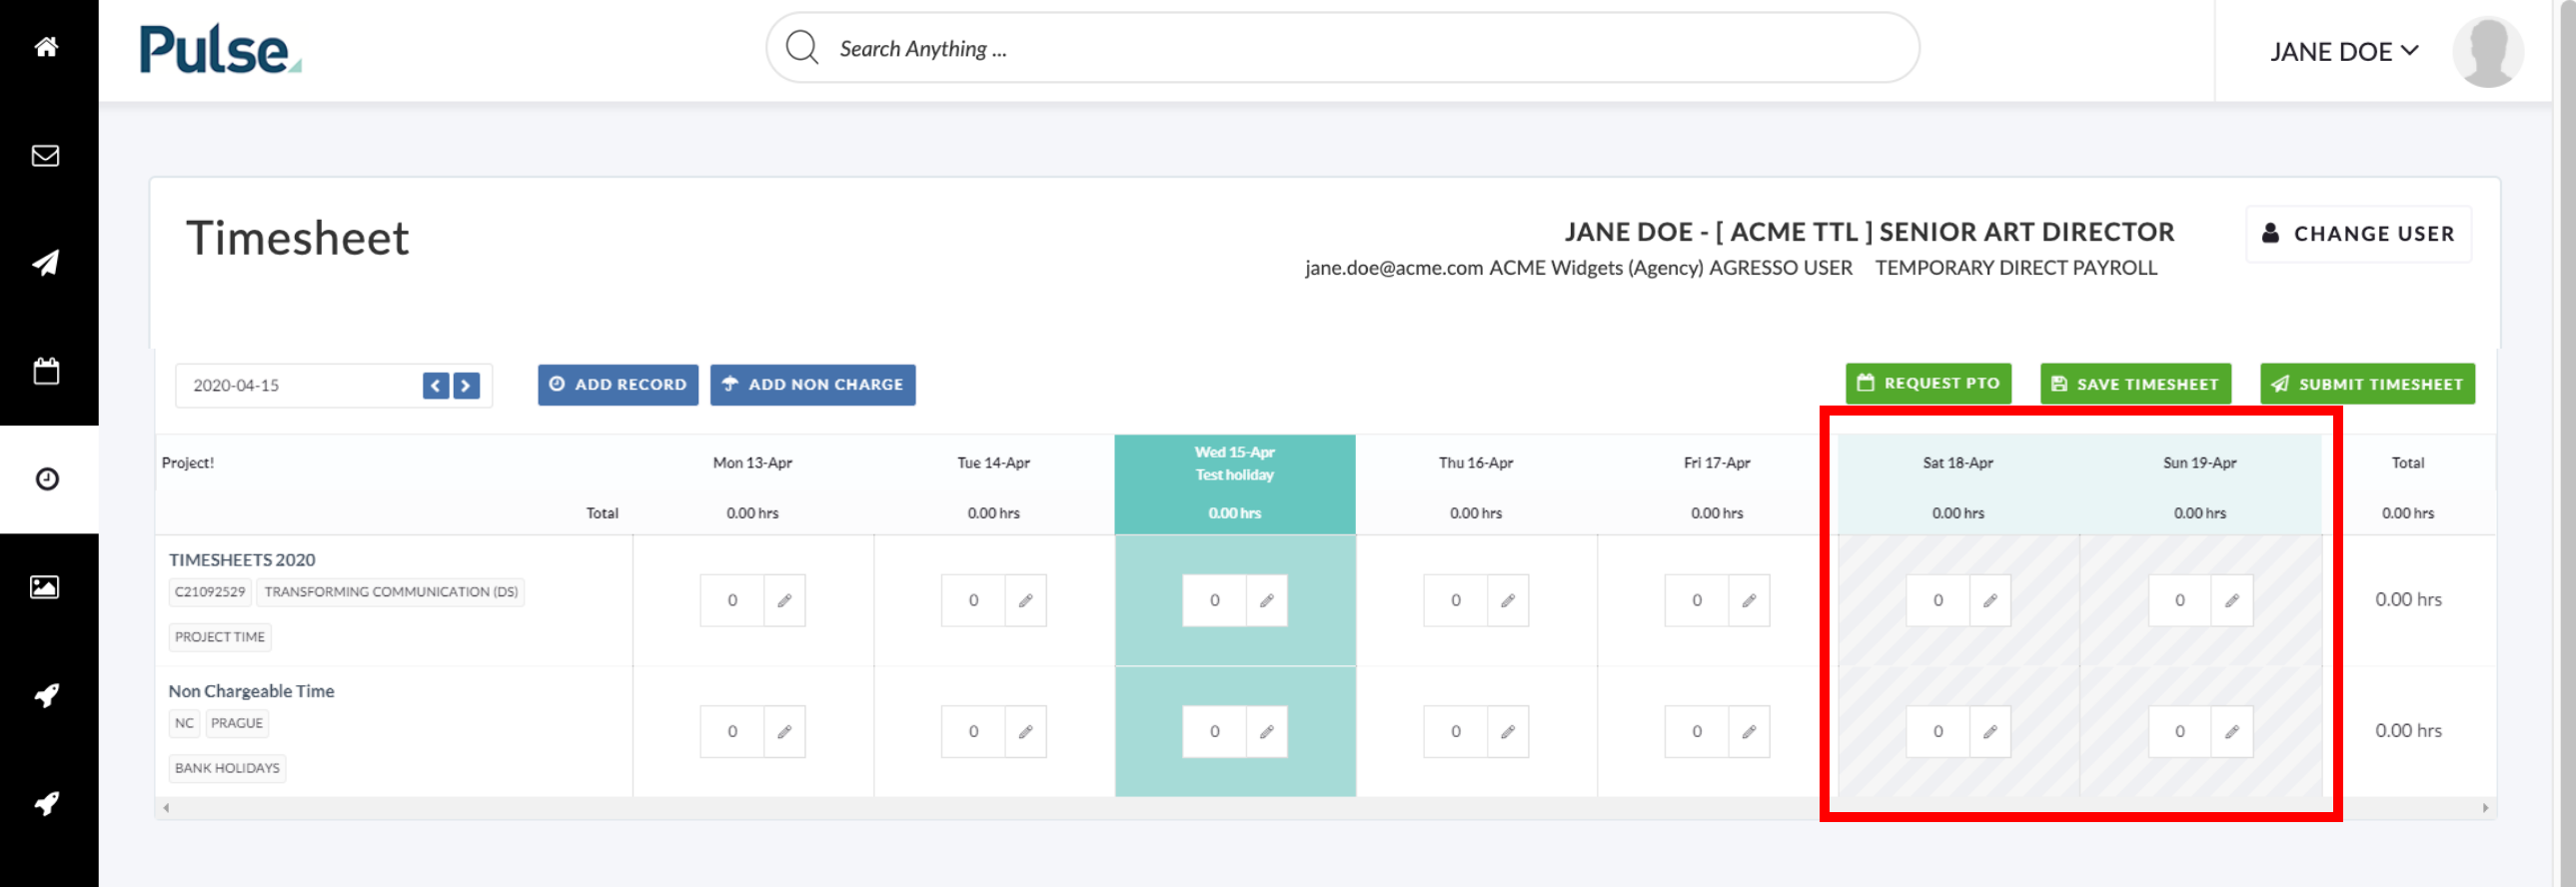
Please note: Holidays can be created, deleted and modified for an Office (aka Agency) by going to Address Book> Office > Holidays tab and launching Holiday Options in a new window.
FIXES
![]()
![]()
![]()
Bug: Linking timesheet hours with rates in Timesheet Activity in Non-Agresso Office
Fix – For non-Agresso Offices, hourly rates set for Timesheet activities in Manage Finance Item Types were not being utilised in the Timesheets section of the Finance Tab when calculating cost totals. This issue did not affect Agresso Offices because in their case these rates are set in Agresso.
Bug: Time Approver SAYT not working
Fix – The SAYT (search-as-you-type) functionality on the ‘Time Approver’ field was not working correctly on the Summary Actions > Edit Project Details page. It now correctly filters for results that match your input as you type.
Bug: Task notes added using the Bulk Editing tool do not save
Fix – The bulk editing tool was not working correctly when using the ‘Add Note’ feature to add a Note to multiple Tasks.
Bug: Issues saving nested lists in Task Descriptions and Comments
Fix – In both the Task Description and Task Comments, nested bullet-lists (unordered lists) that went deeper than two levels down were not saved correctly. After saving bullet lists with sub-levels in the Task Description, all list-items nested below the second level were moved up to the second level. In Task Comments, nesting was ignored, and all list items were moved to the highest level.
Bug: Description showing twice in Editor
Fix – Task Descriptions were inadvertently being shown twice in the editor.
FEATURES & ENHANCEMENTS
![]()
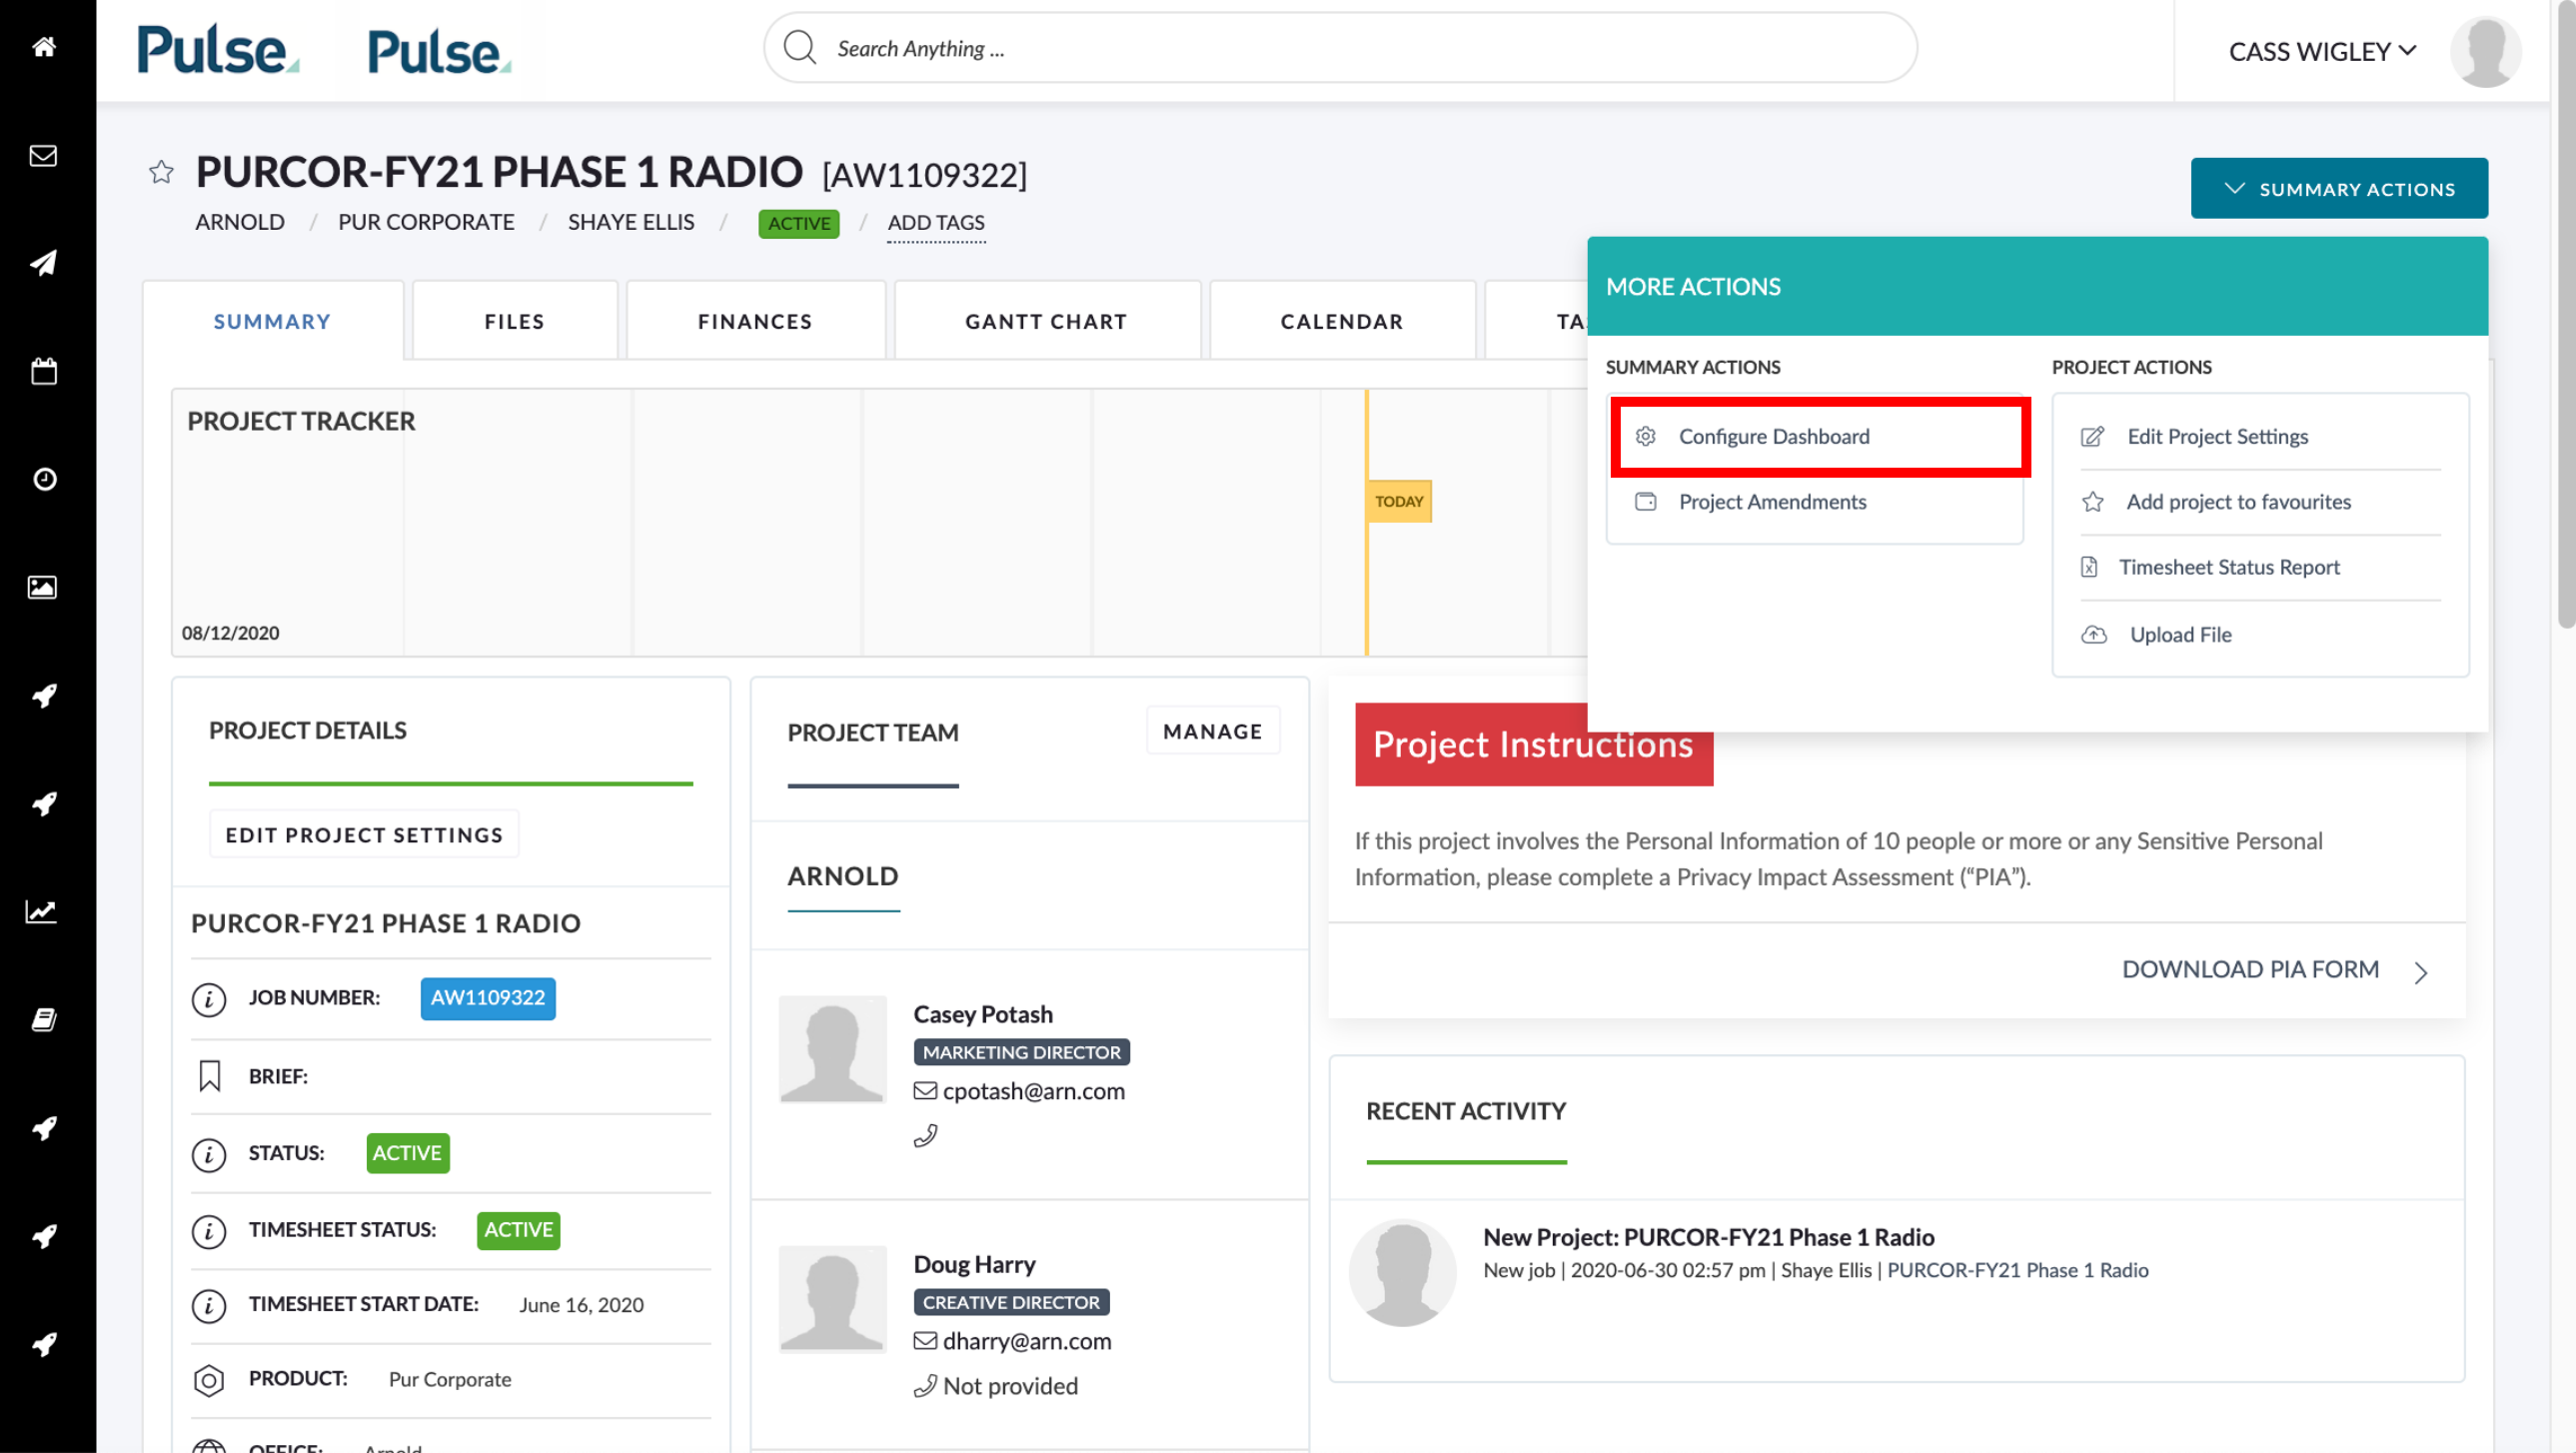
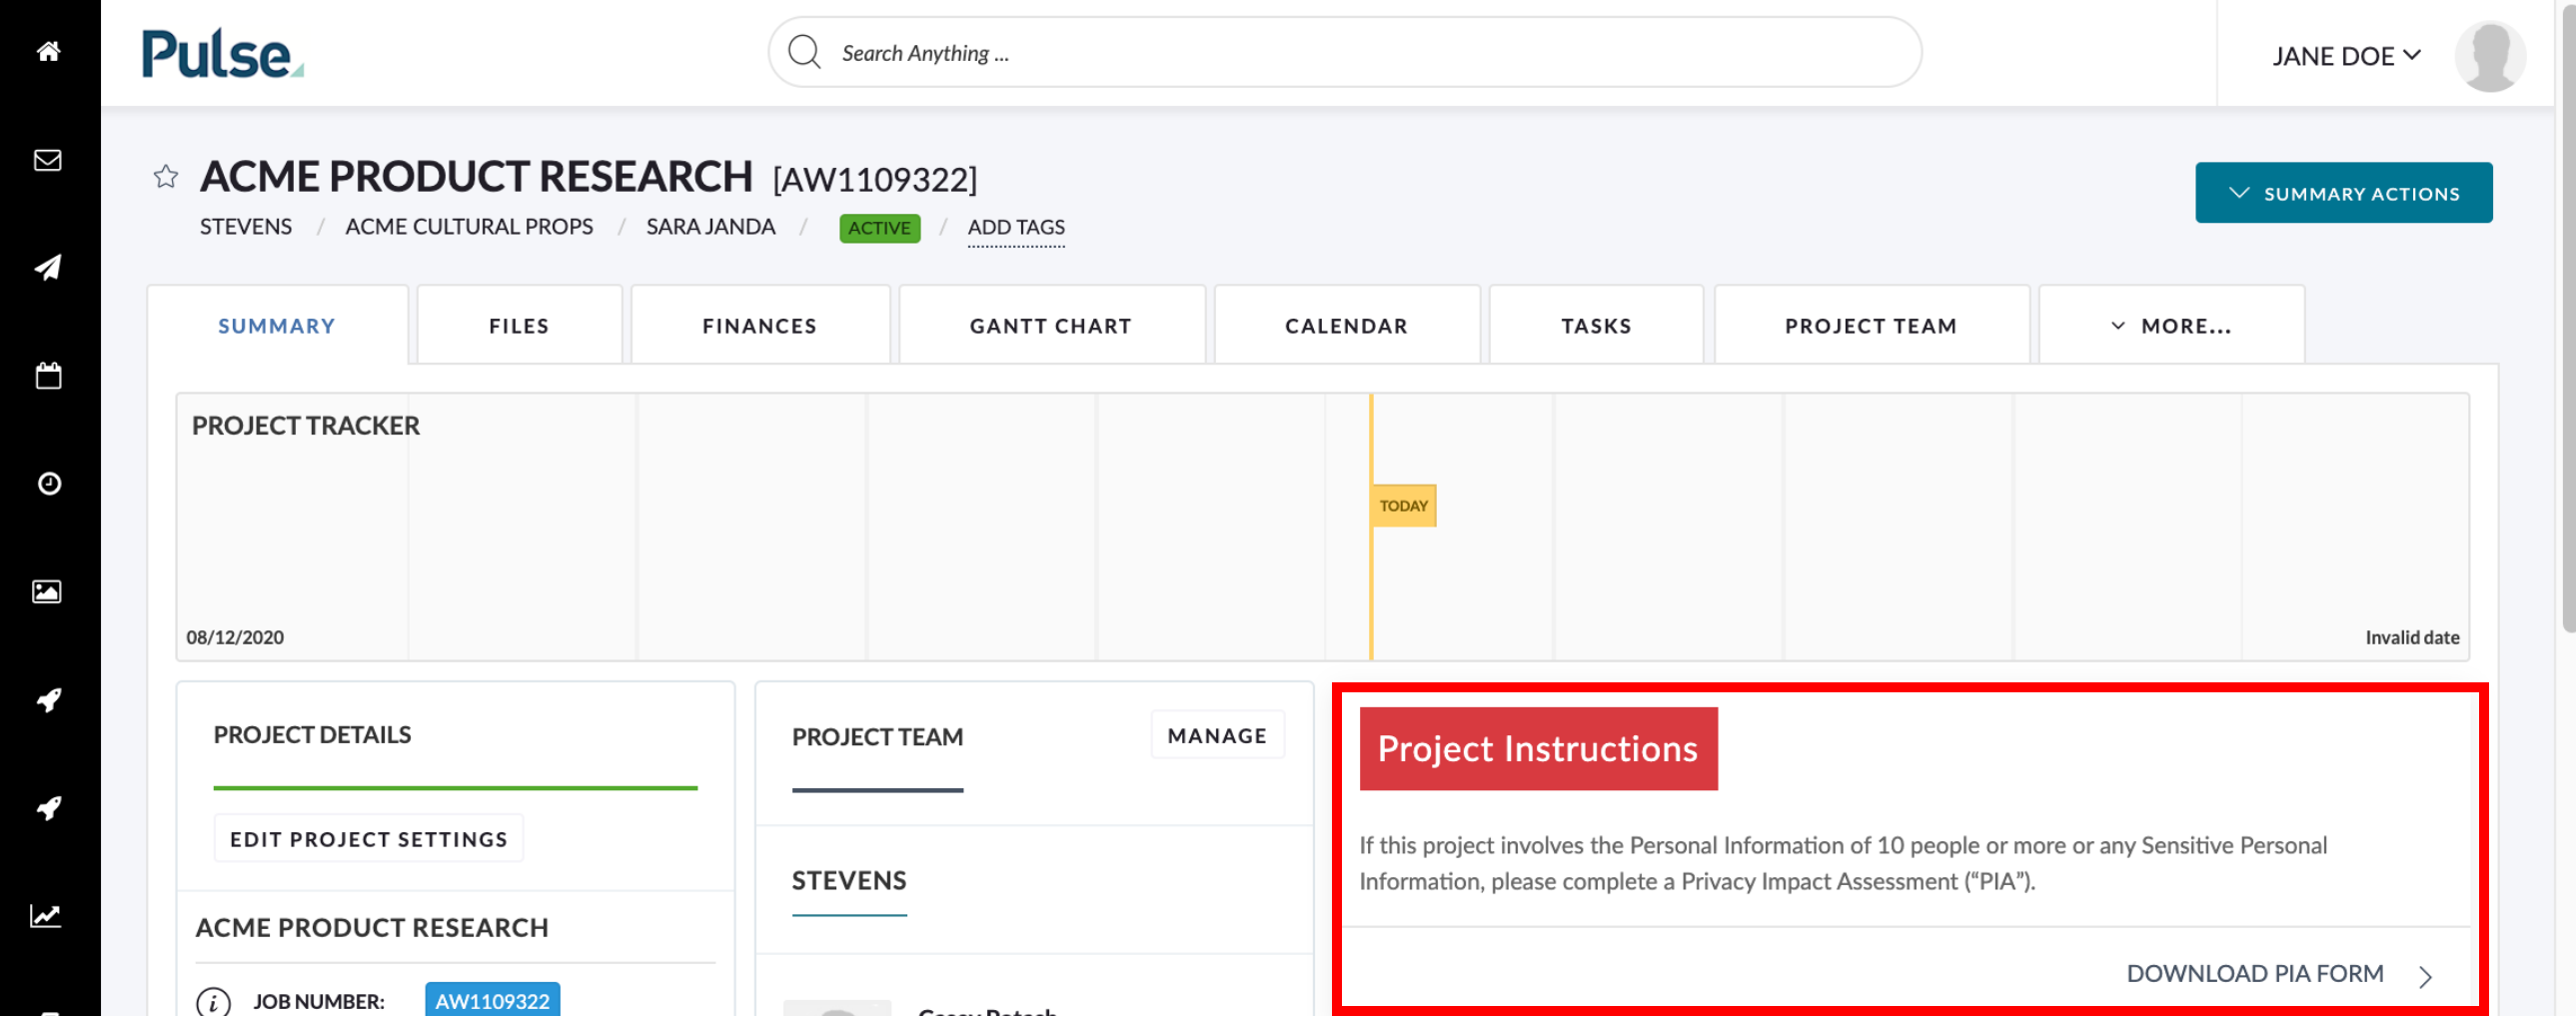
New Passport Template with PIA Dashboard widget for Havas Health
We have added a new Passport Template that adds a Privacy Impact Assessment (PIA) widget to the Project Passport (aka Summary tab). The PIA widget contains instructions of when a PIA is required and a button linking to the PIA form. It appears above the Recent Activity widget, replacing the Rounds widget.
To apply the new PIA template to a Project Passport:
1. Go to Summary Actions > Configure Dashboard
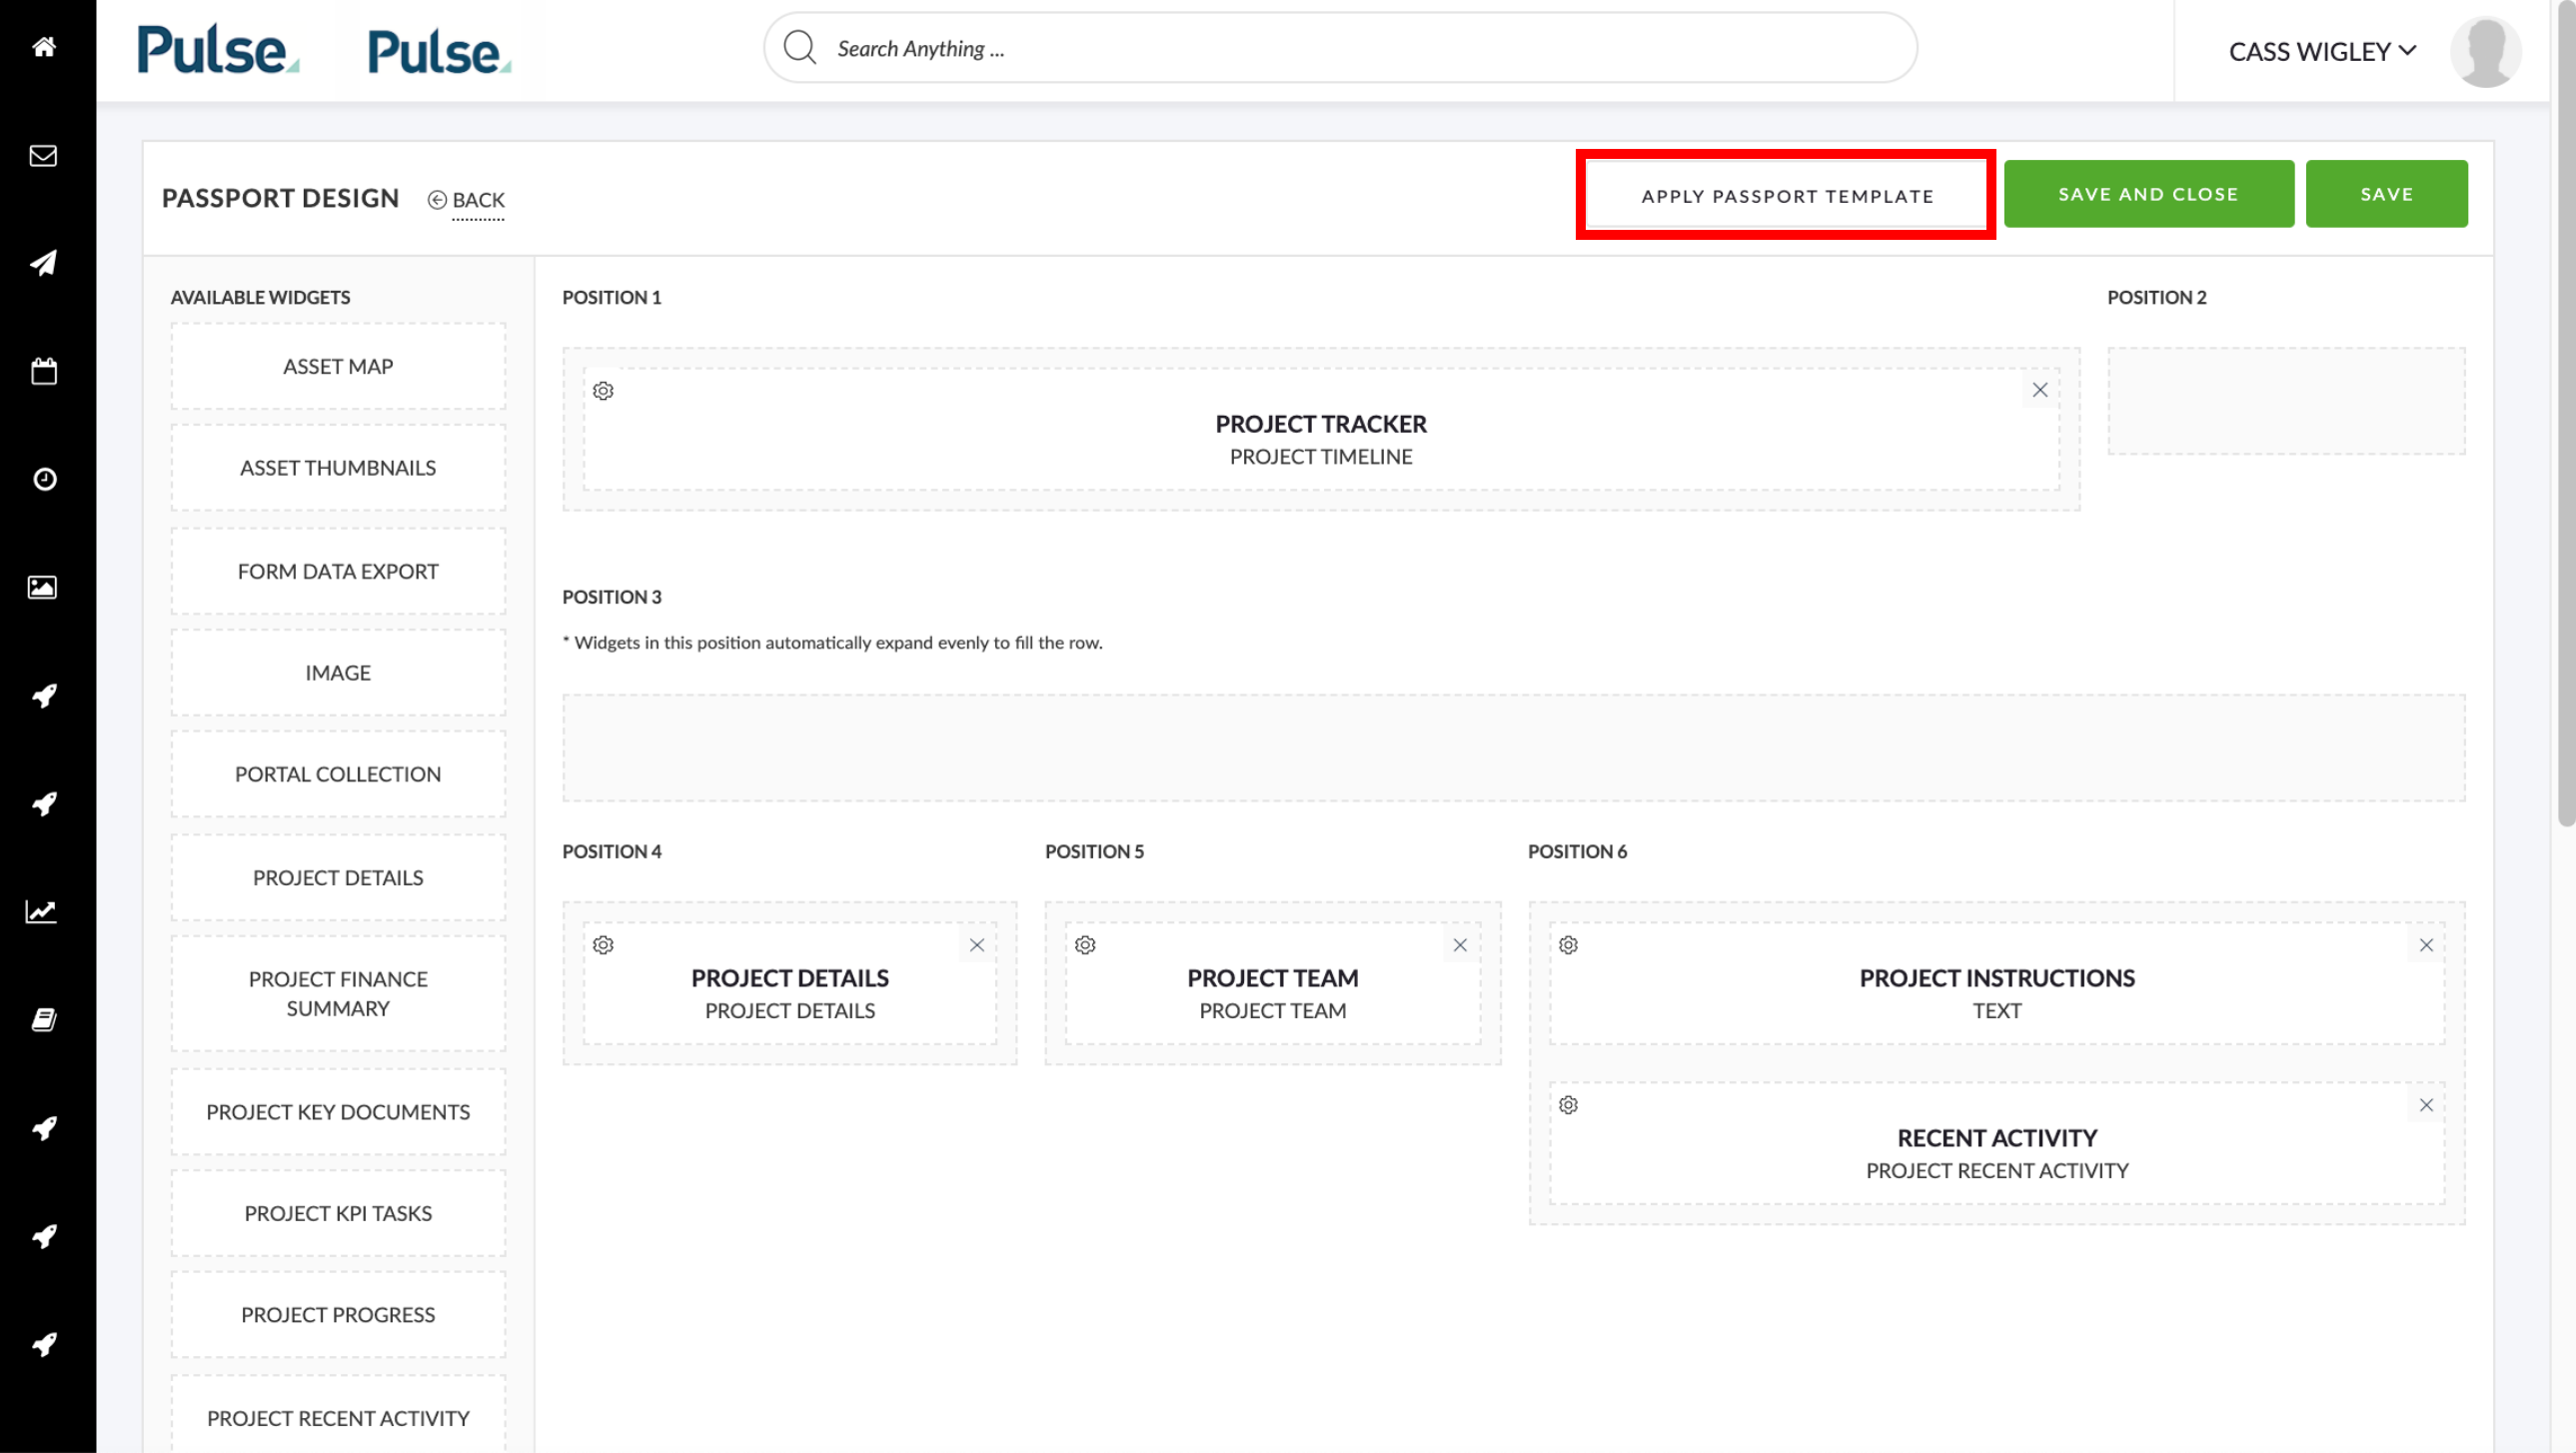
3. On the ‘Passport Design’ page, click ‘Apply Passport Template’
4. Select ‘PIA Template’ from the list of available layouts and click ‘Apply Selected Layout’
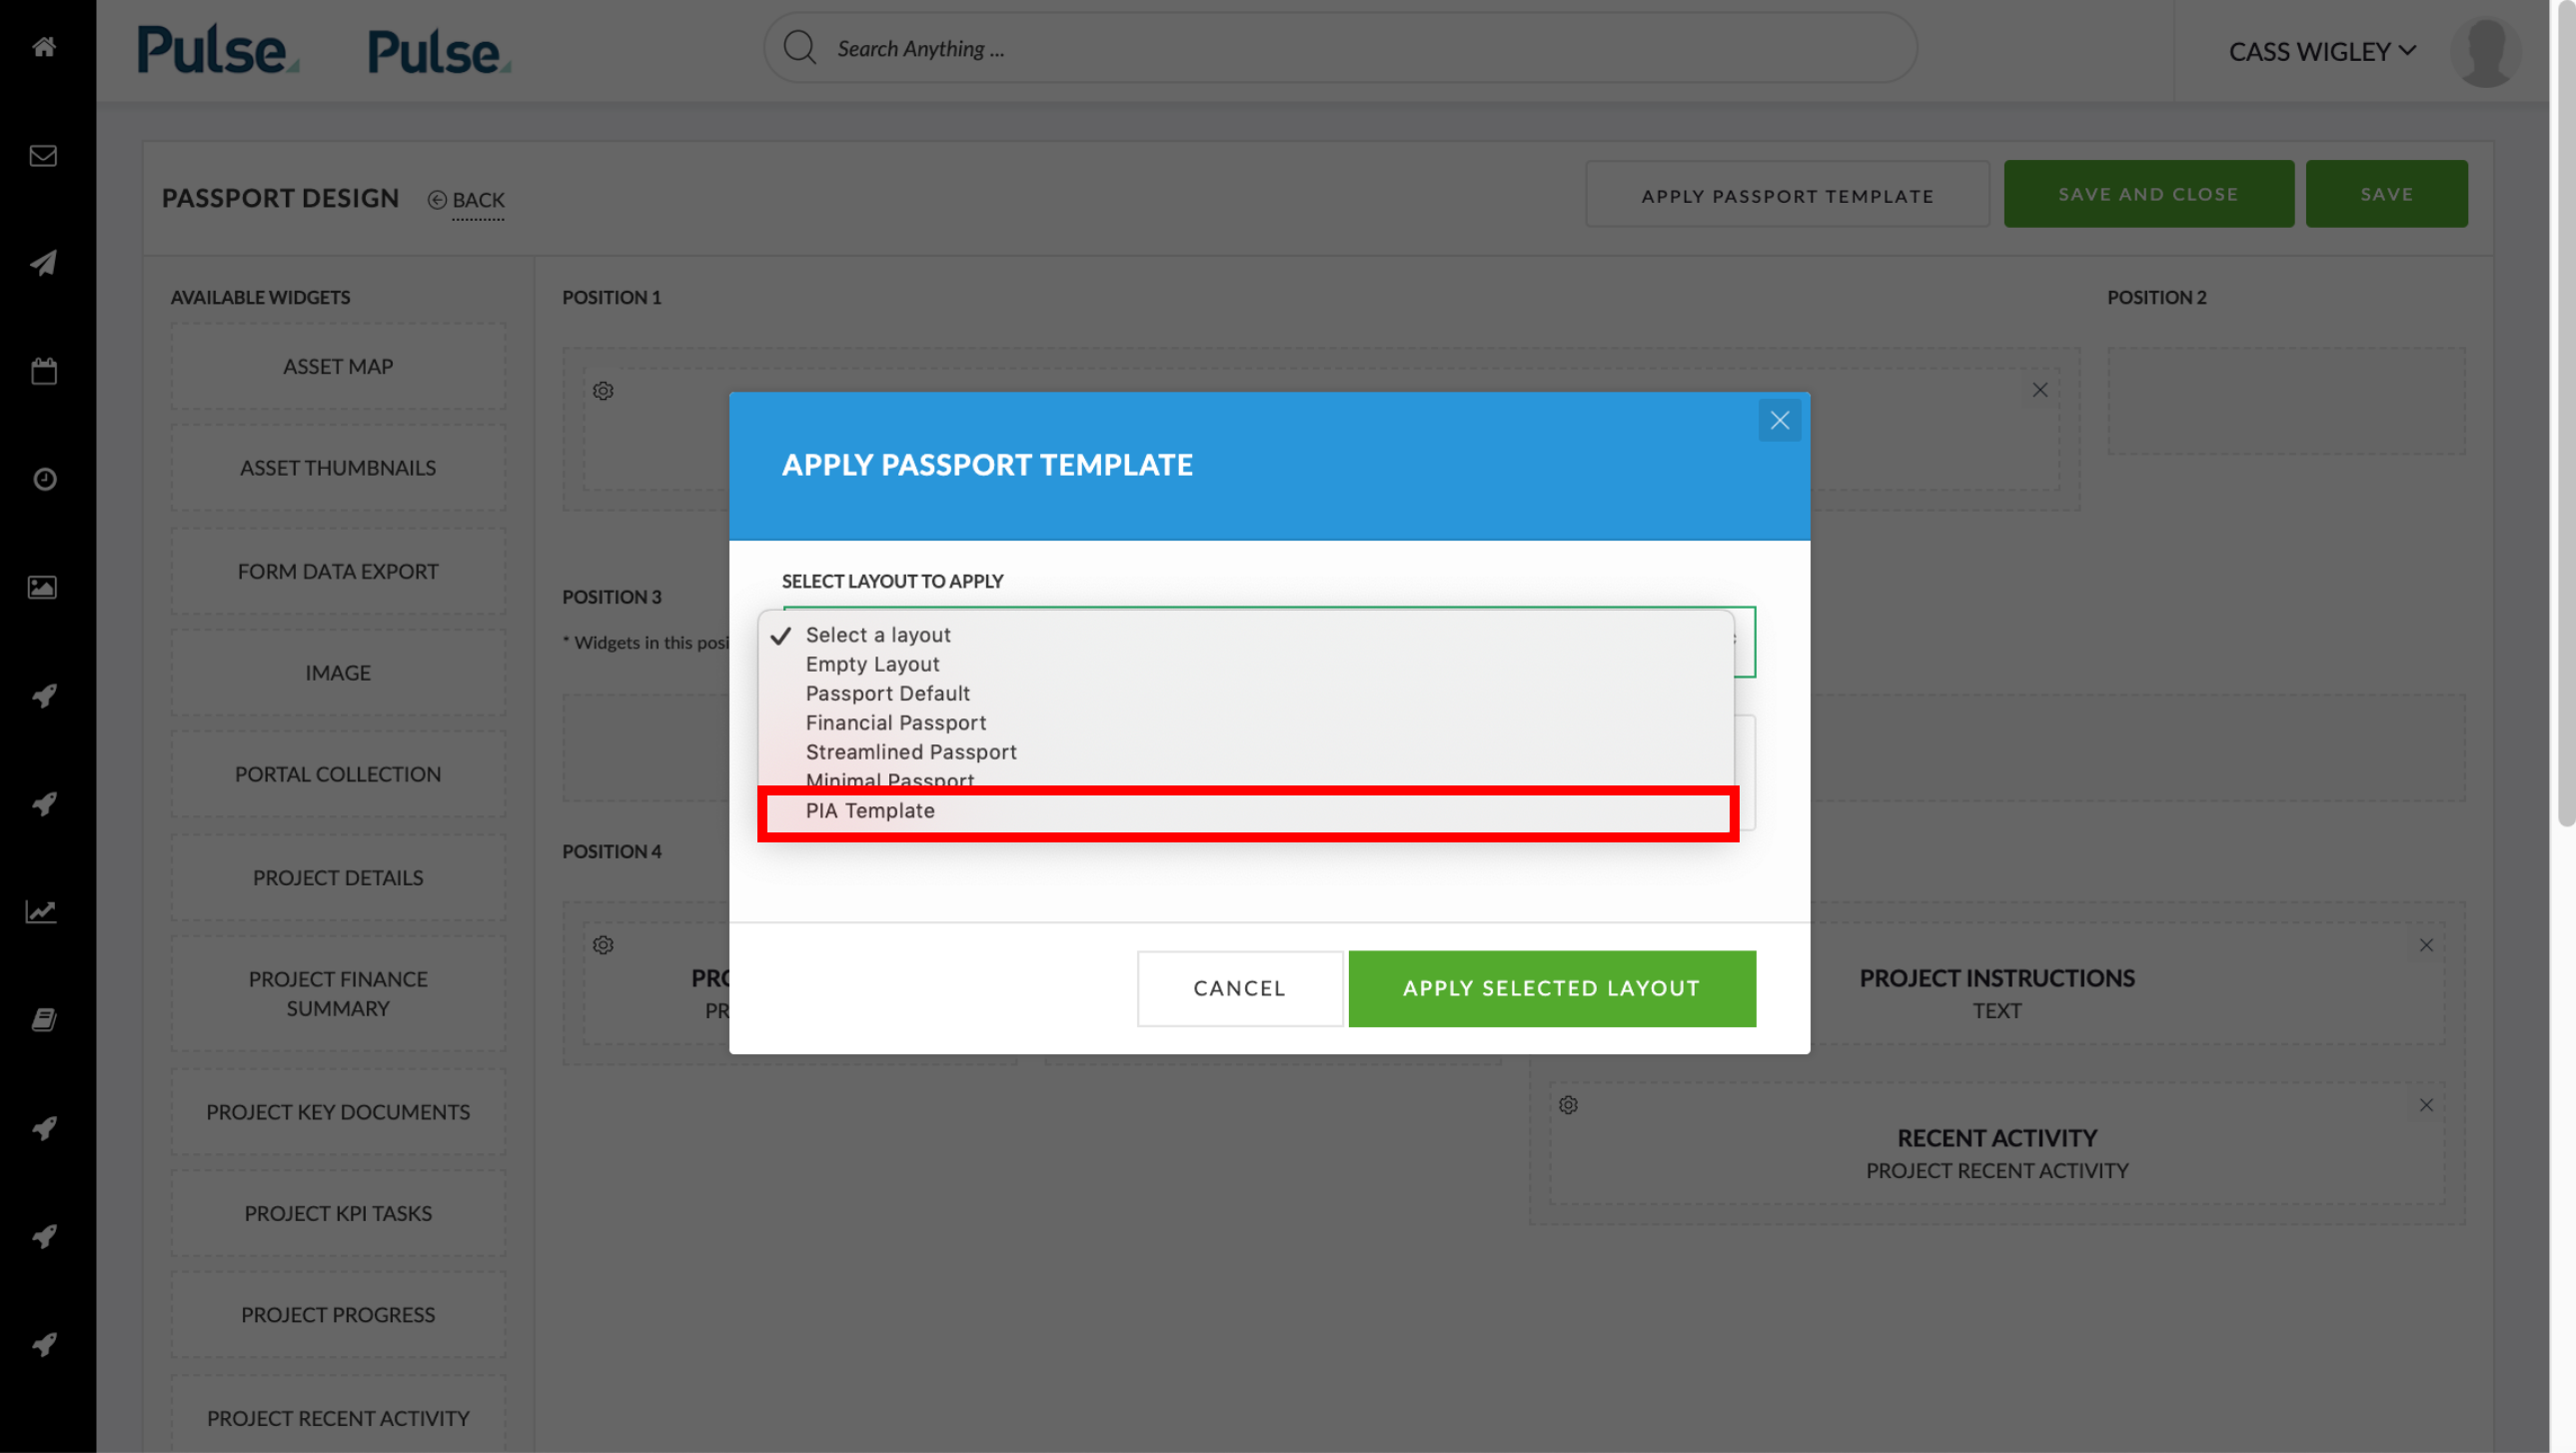
5. The PIA widget will now appear on the Project Passport page above the Recent Activity widget
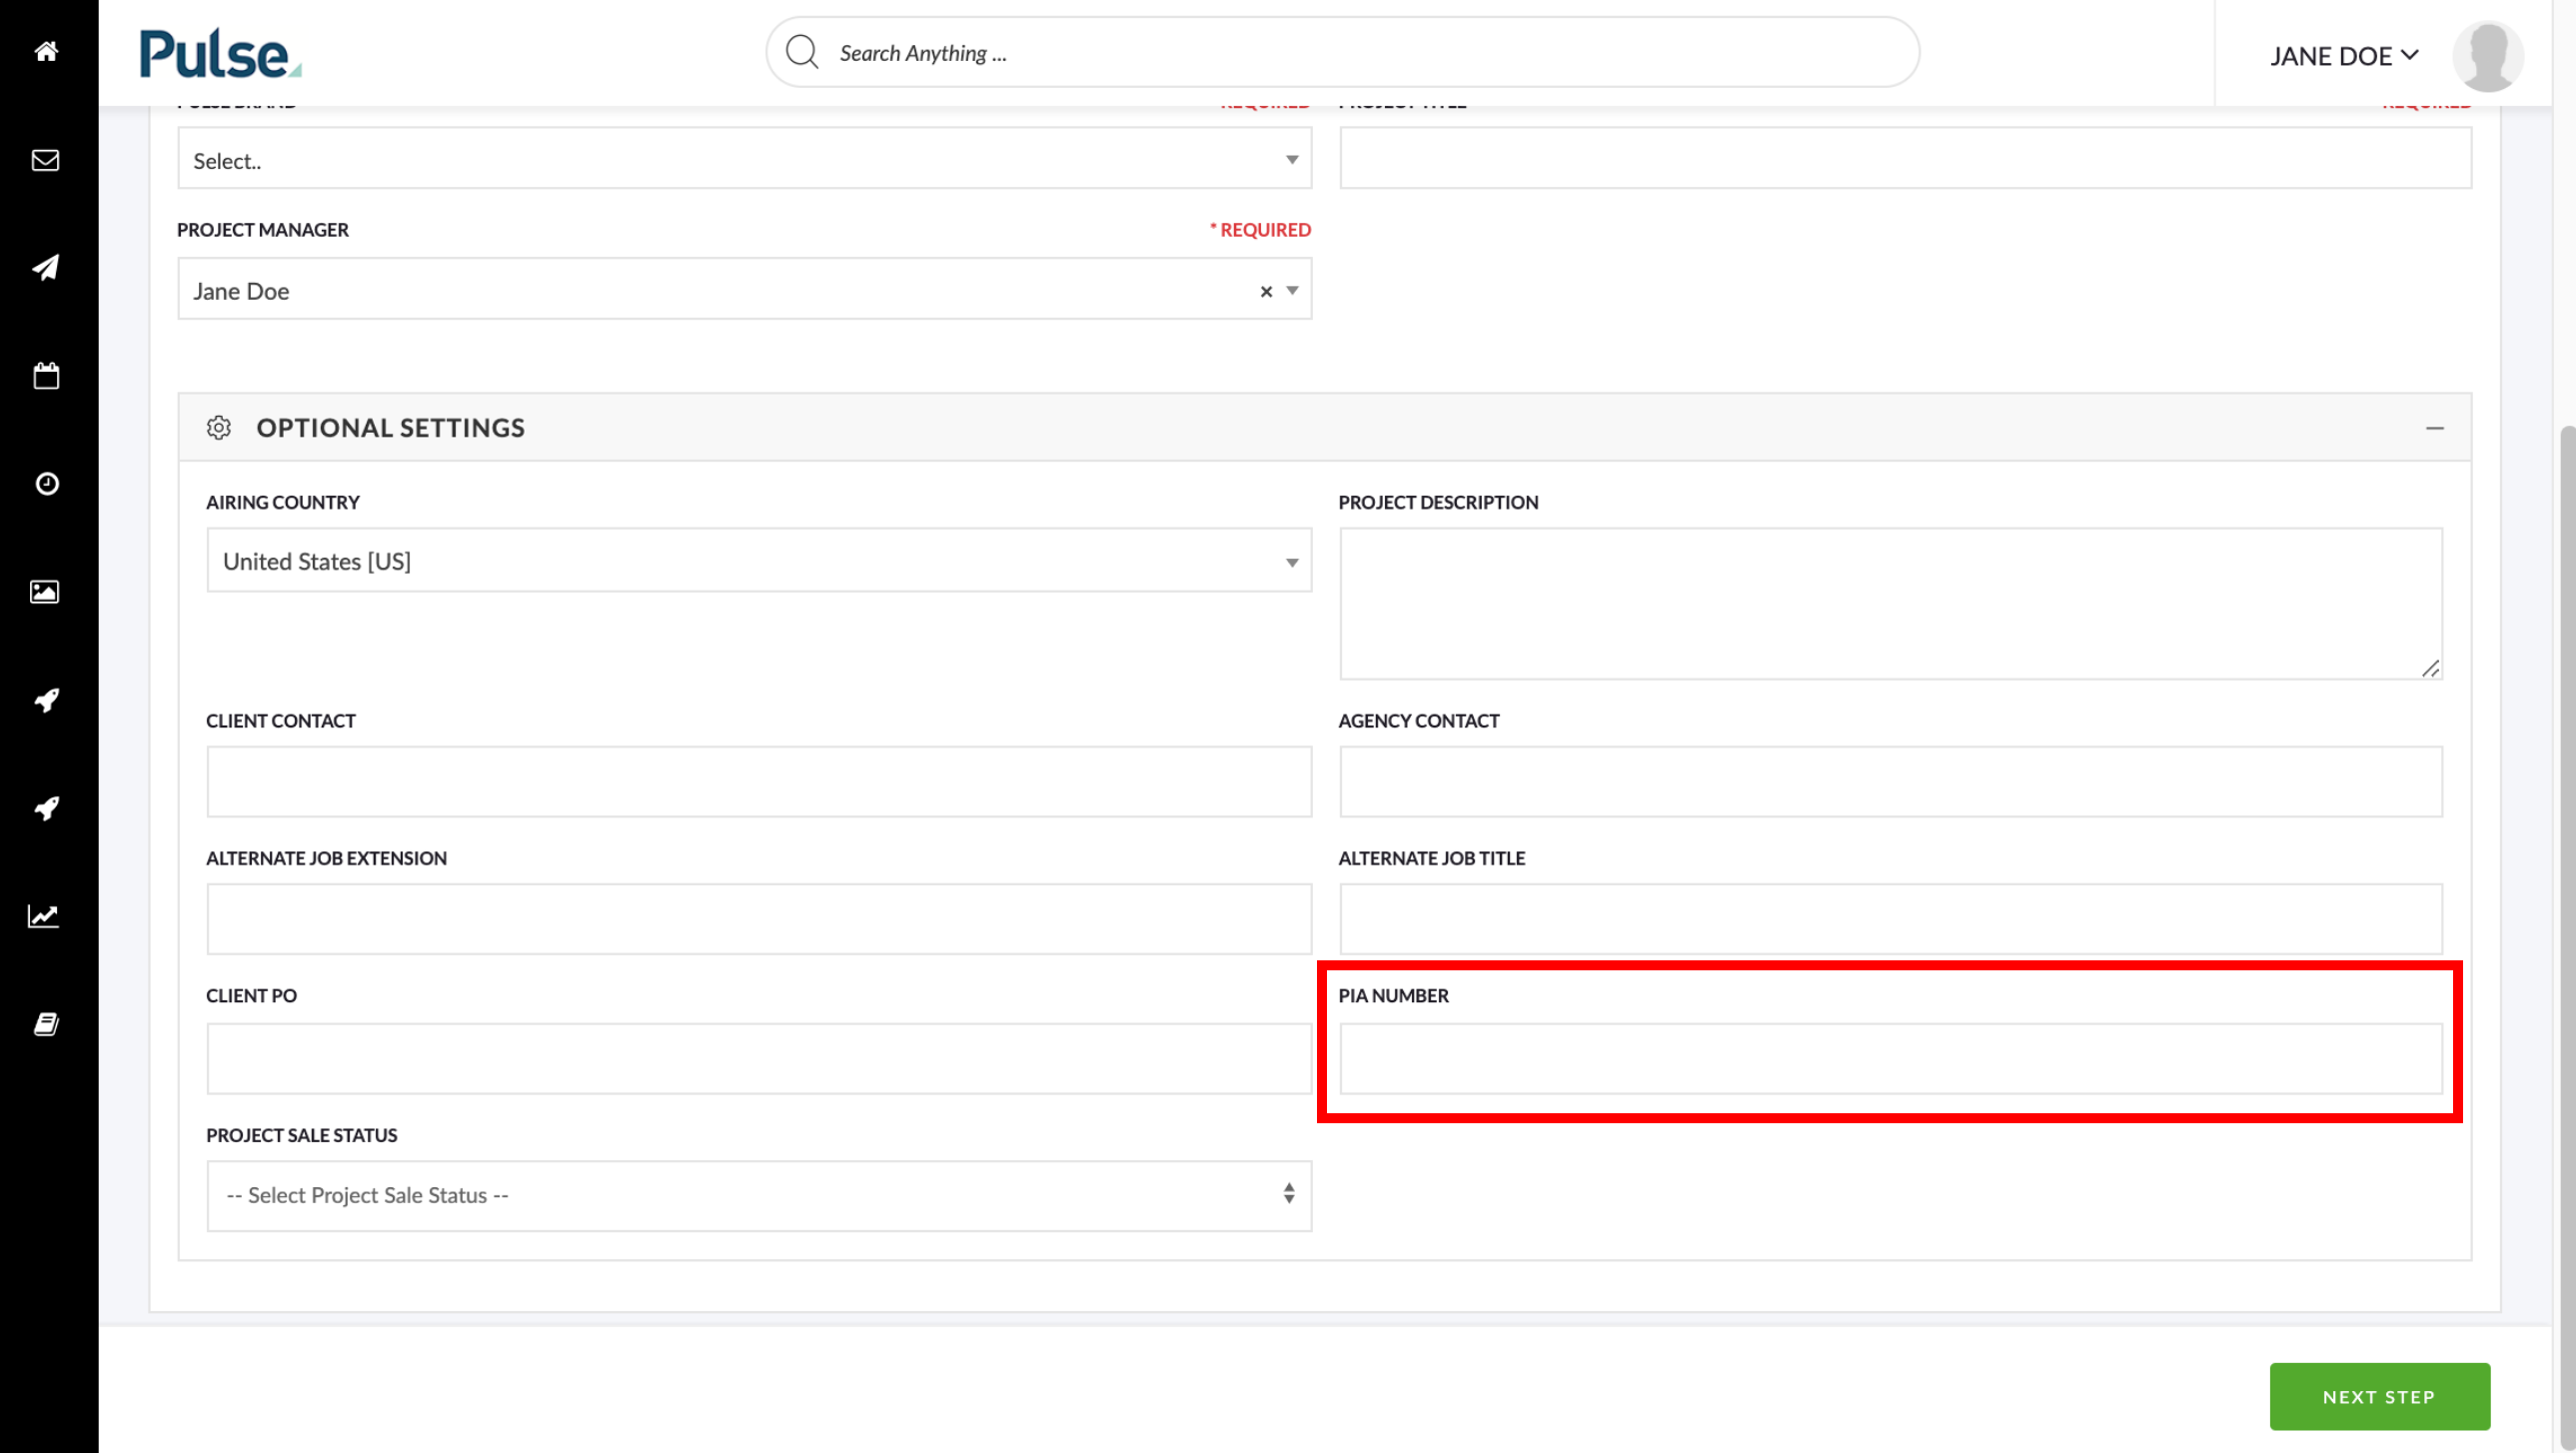
New Custom Field ‘PIA Number’ for Projects that require a PIA
To support Projects that require Privacy Impact Assessment (PIA) we have added a new custom field to store the PIA value.
The PIA value can be entered when creating a Project with the Project Wizard:
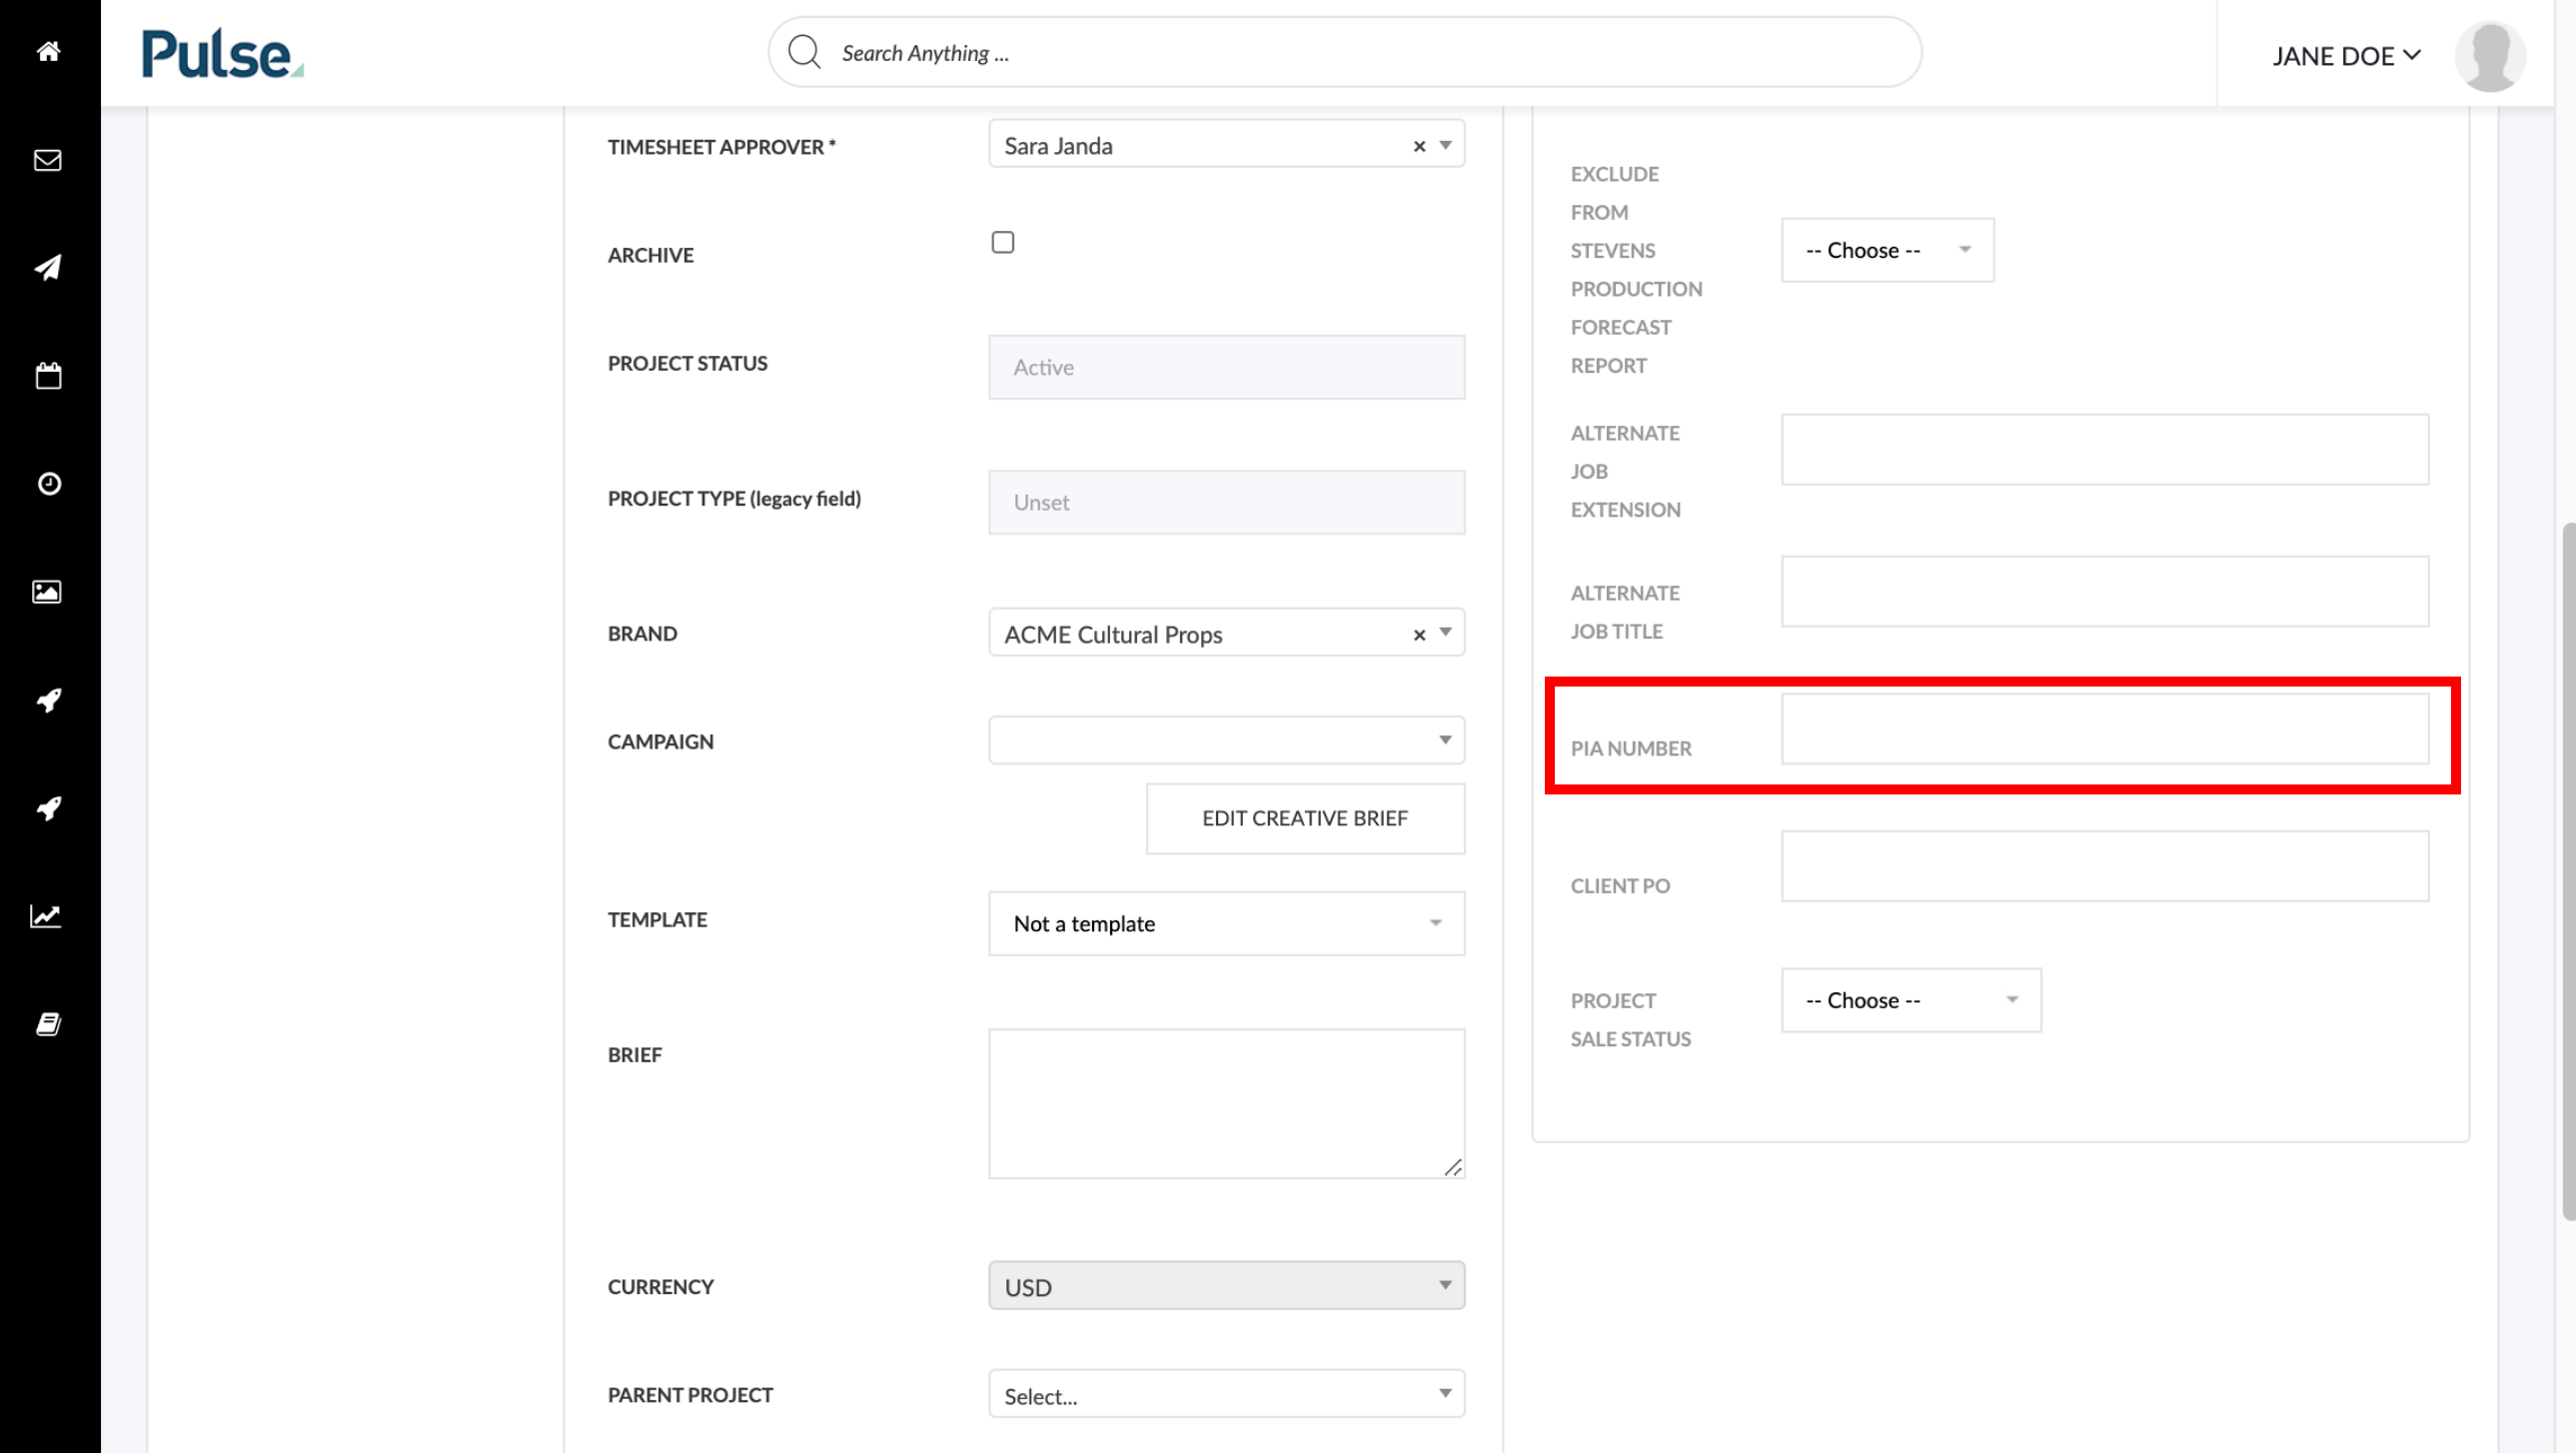
The PIA number can also be added to existing Projects by going to Summary Actions > Edit Project Settings:
FEATURES & ENHANCEMENTS
![]()
![]()
Default option to “Share with original asset name” when creating Public links in the JDE Mine
For Assets shared in the JDE mine we have added the option to “Share with original asset name” instead of the name that is generated by Pulse when the file is uploaded. This option is only available for members of a new group called “JDE Original Asset Name Sharing Permission”. Members of this group are presented with an option to share with the original filename as default or share with the generated name.
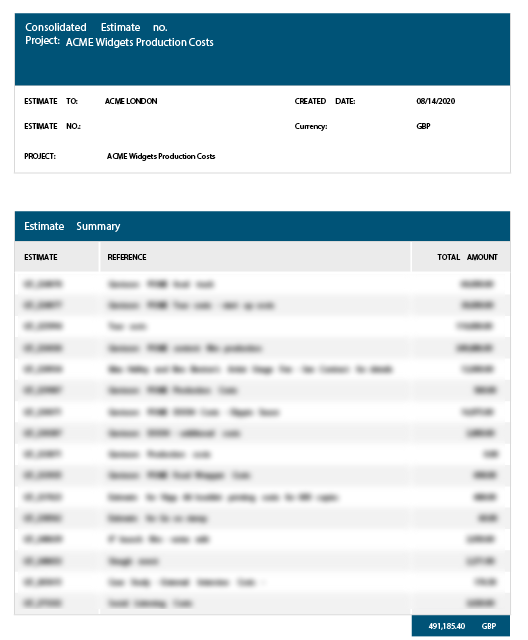
Refinements to the Consolidated Estimate Layout and Formatting
We have revised and refined the layout of the Consolidated Estimate that is available in a Project’s Finances tab in the Estimates section.
To Create a Consolidated Estimate:
1. Go to the Estimates section of the Finances tab and Click “Create Consolidated Estimate”
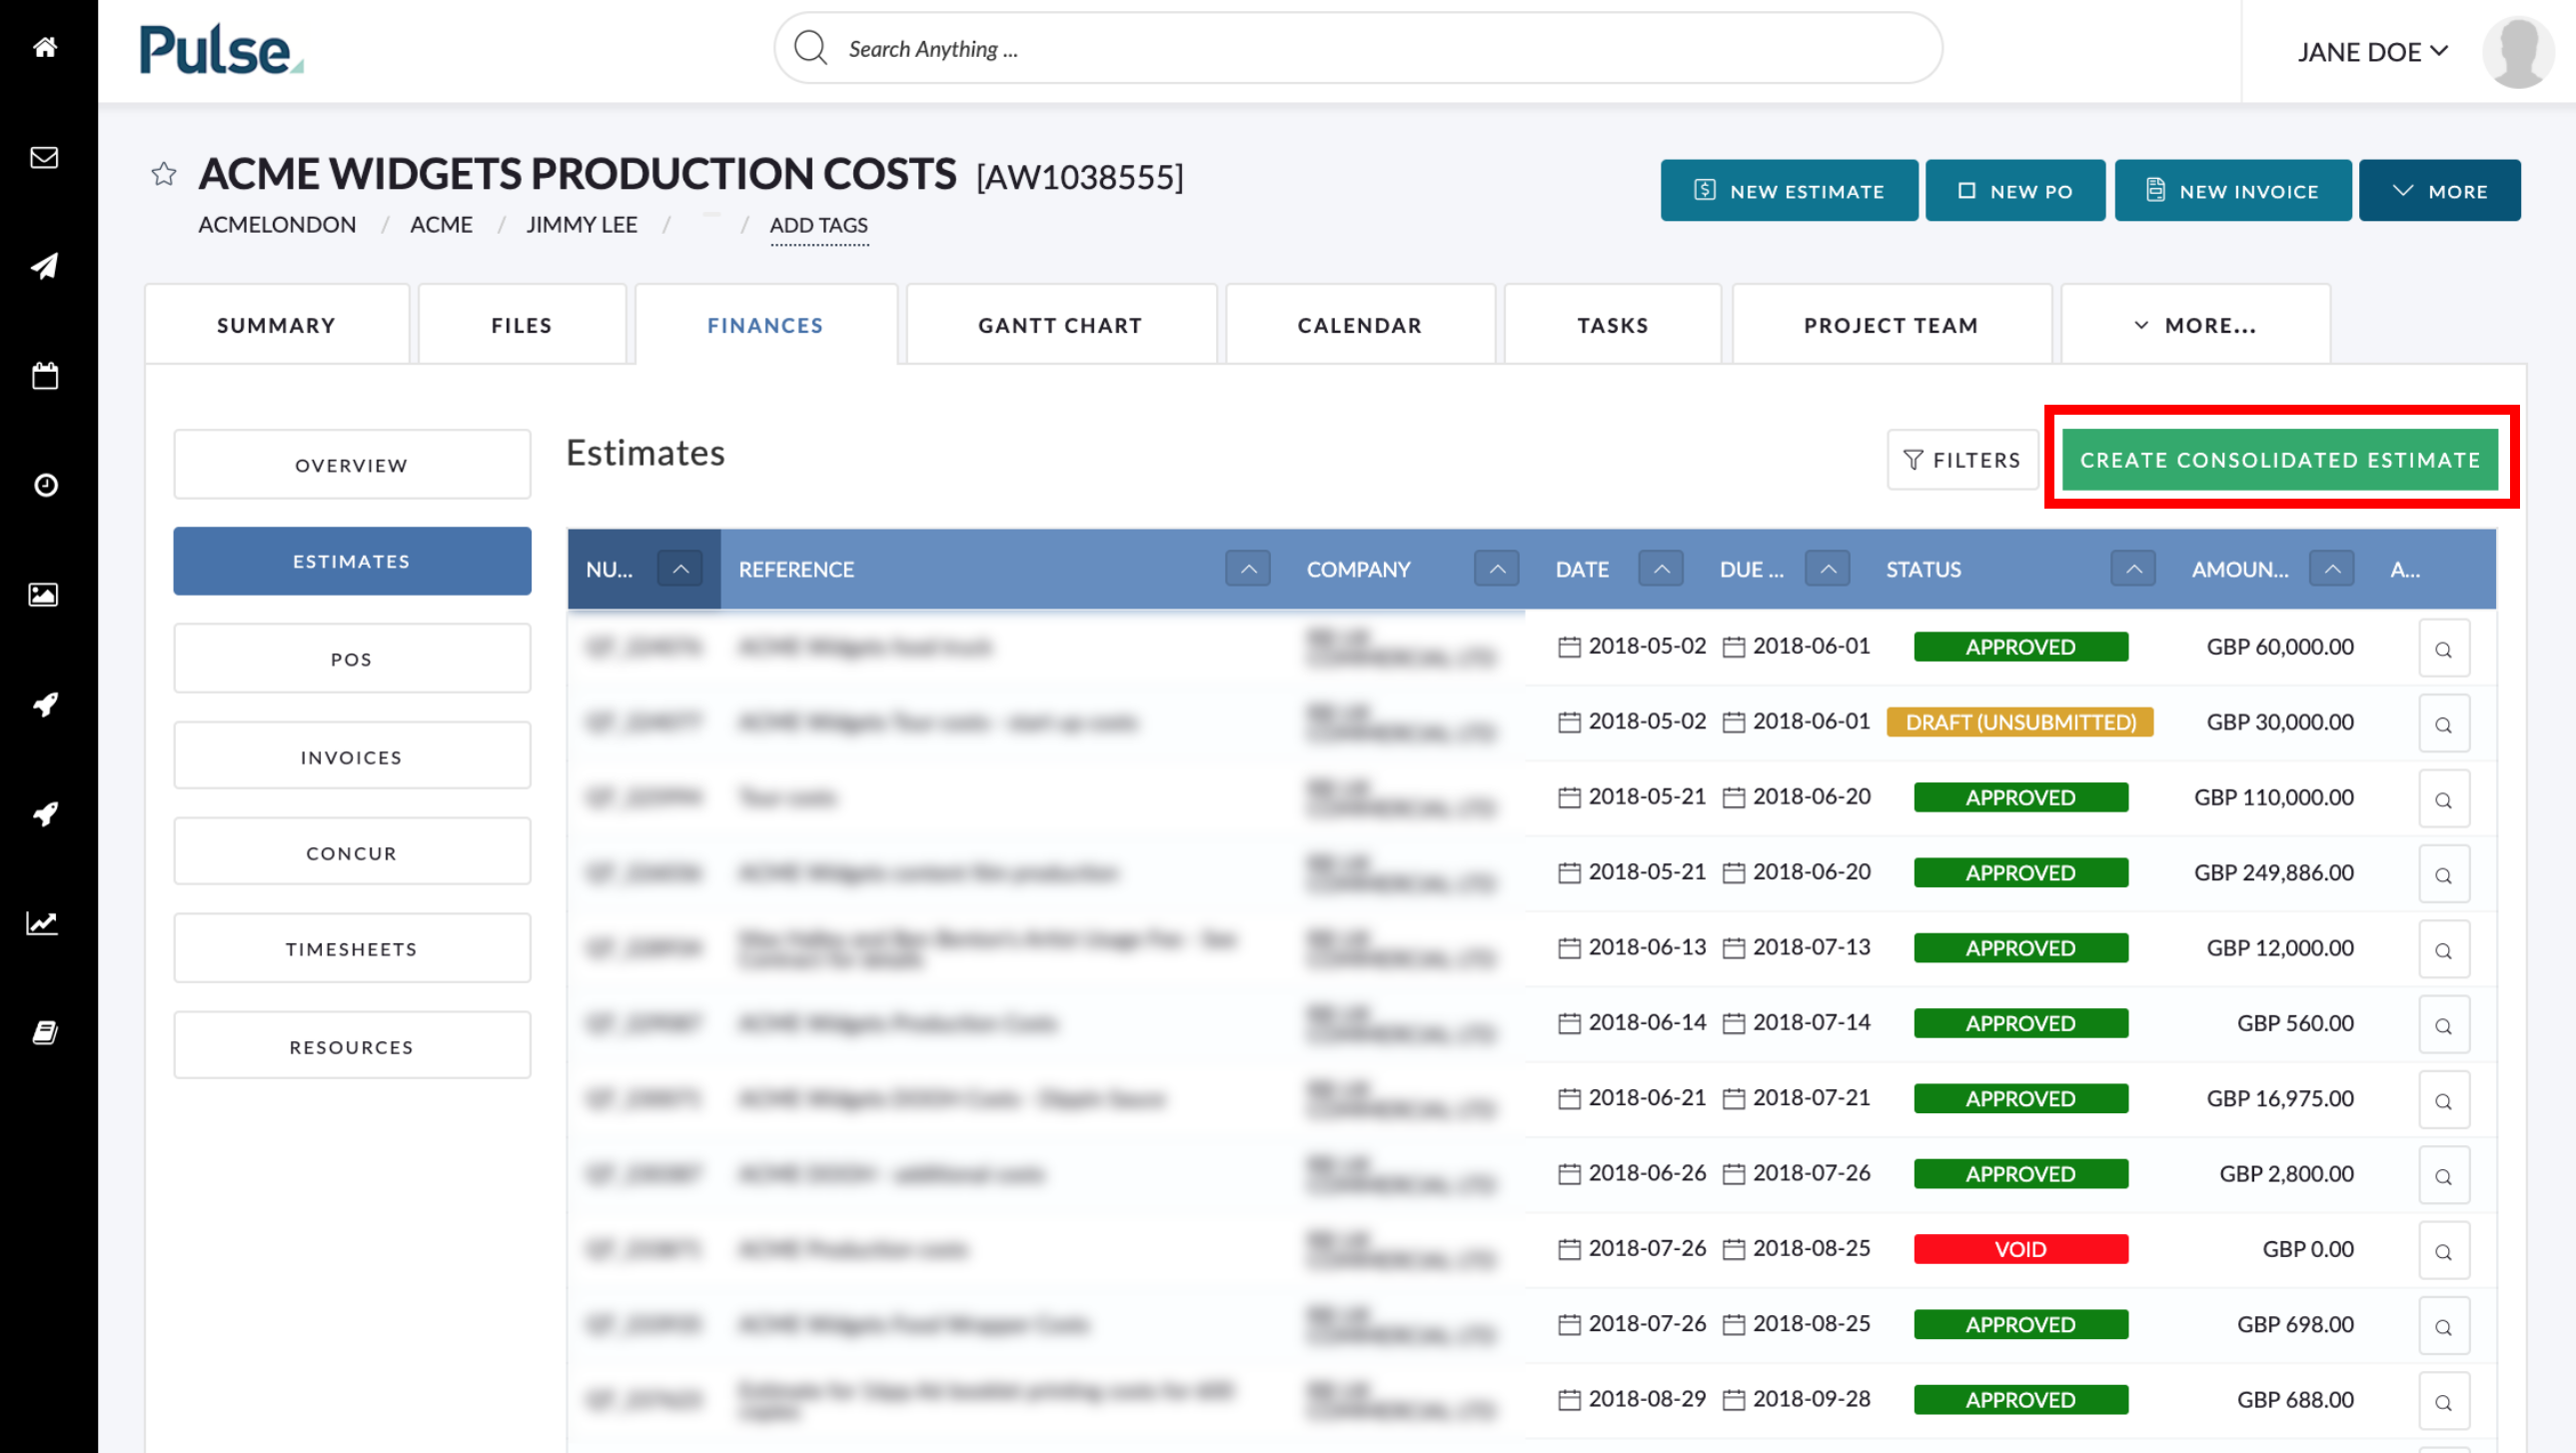
2. Click “Create Report”
Before creating the report you can modify the default options for Report Type and Report Language.
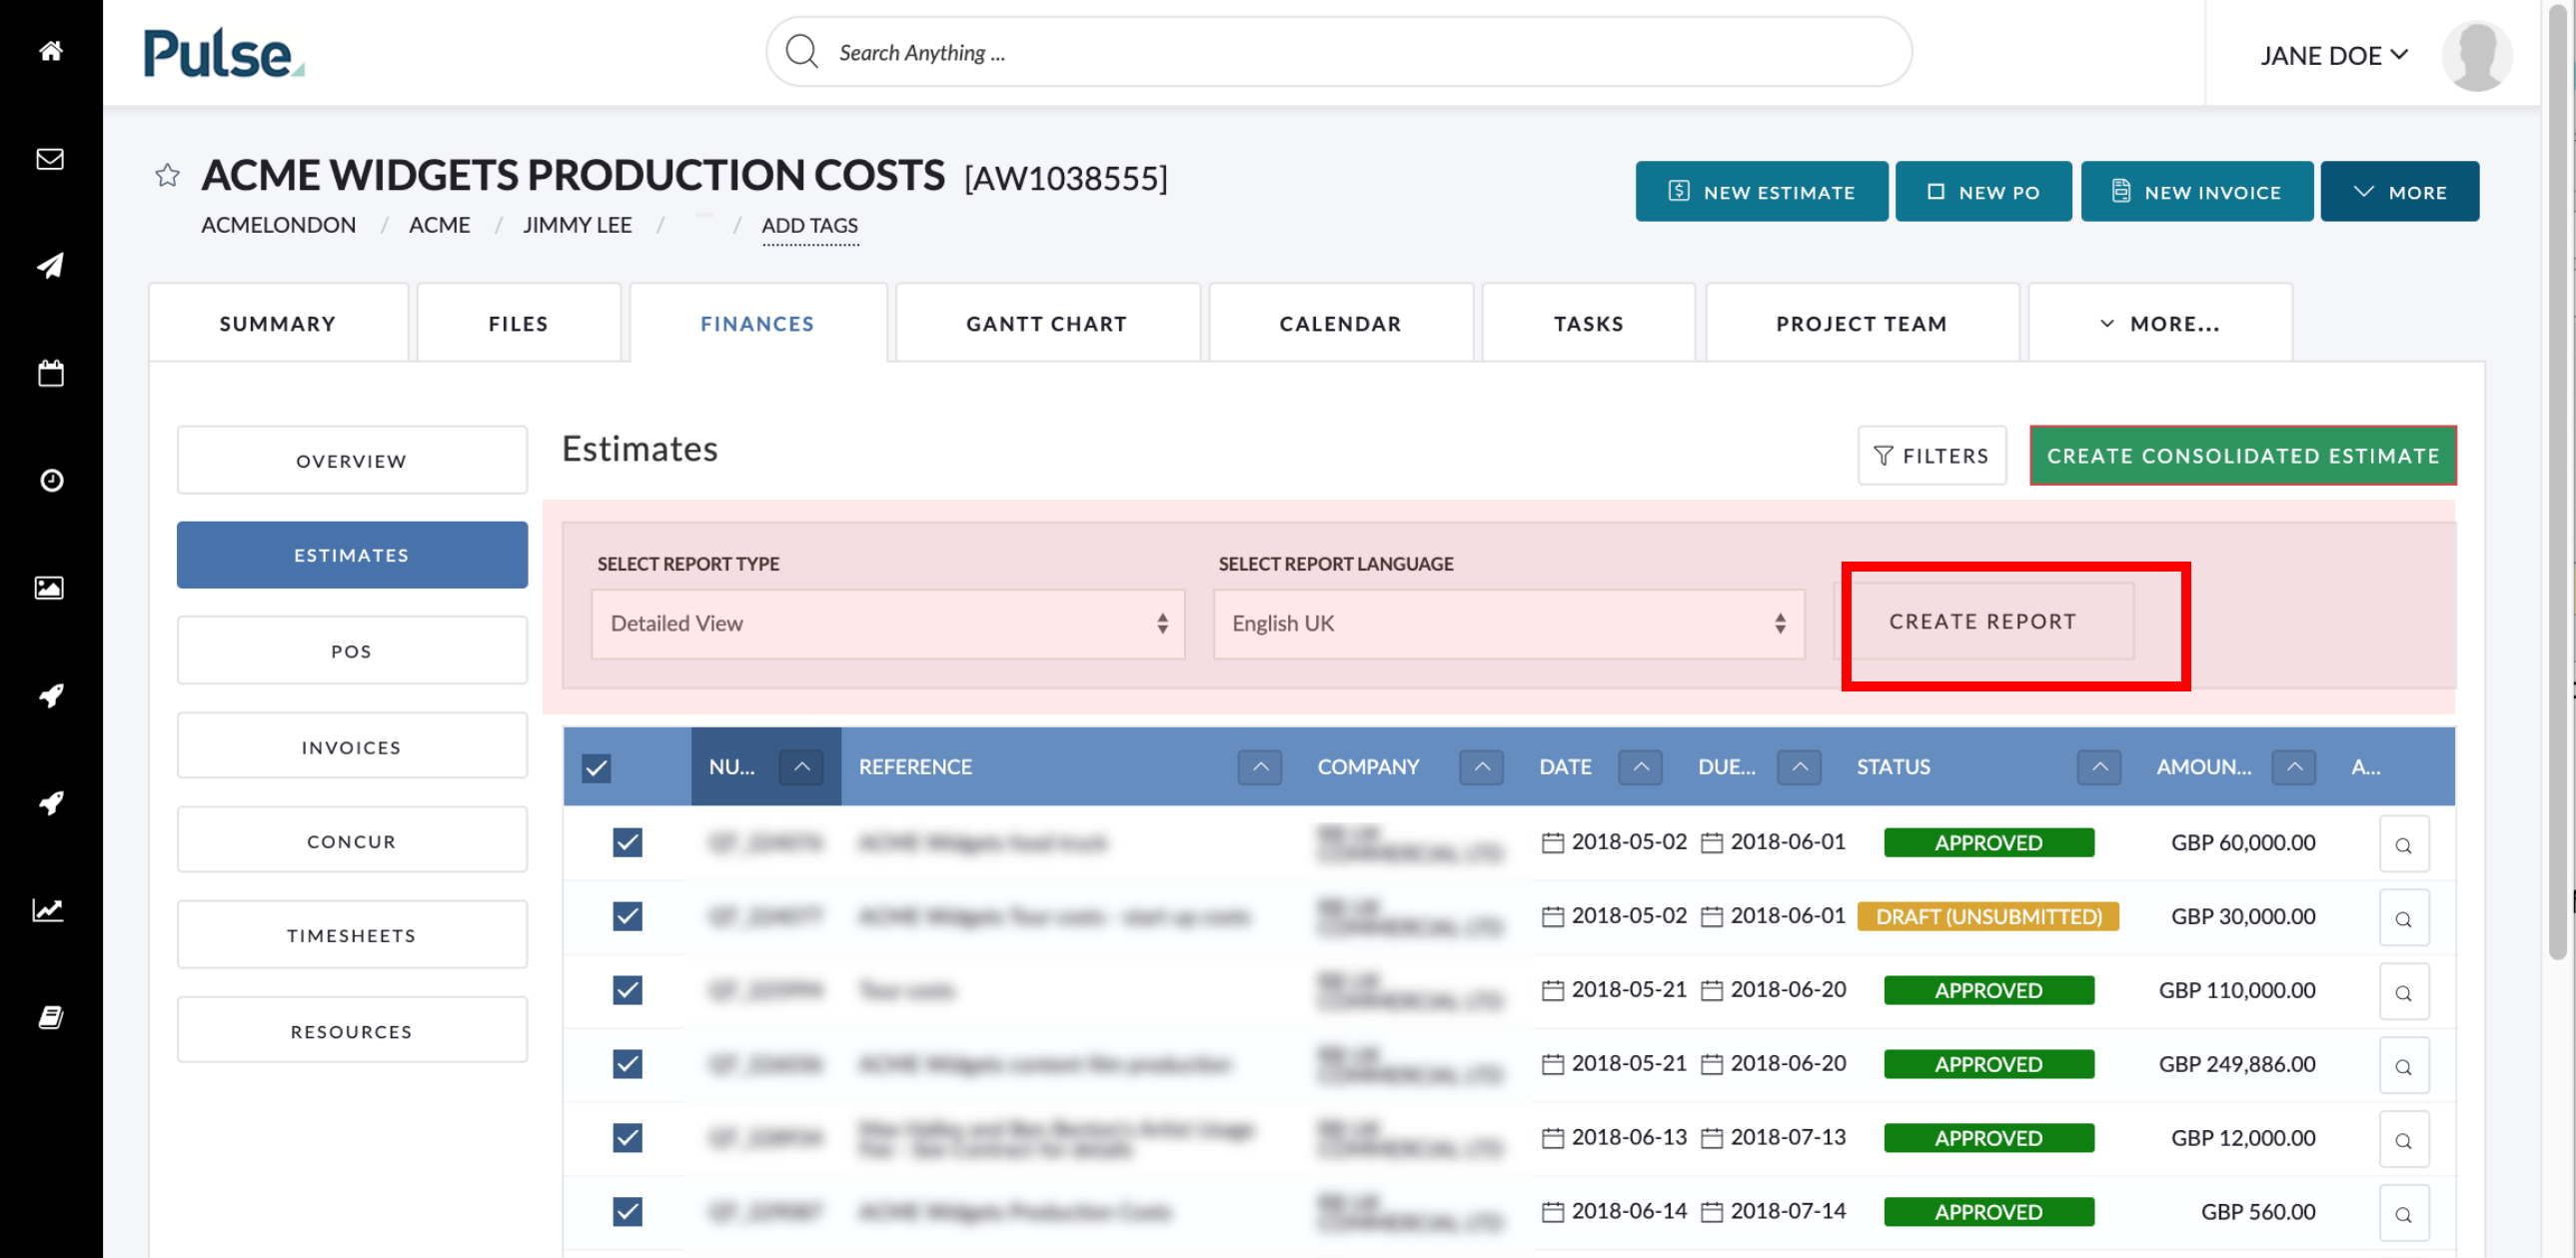
3. After you are redirected to the generated PDF in the Files tab, you can open or download PDF report to view the Consolidated estimate
FIXES
![]()
![]()
Bug: Finance document approval notification link takes to V1
Fix – Finance Document Approval links in notification emails were taking users to V1 instead of V2. Link now correctly open in v2.
Bug: Some assets were displayed in-browser and some downloaded when accessing Public links
Fix – Public links were either downloading if they have been migrated to AWS, or showing a preview in a browser if they had not. This behaviour has been made consistent and all files now download.
Bug: Correct favicon for havasorbit
Fix – Havas Orbit was incorrectly showing the Pulse favicon. It is now showing the correct Havas Orbit Icon.