Why Use a Naming Convention for your Projects?
Formalising the naming of Projects according to a standardised convention is a difficult and extremely important aspect of Project Management. When Projects are named according to a system the right Projects can be identified by quickly scanning project titles, because the name itself can encode important “meta” information about a project such as a Client, Brand or Project Finance Type.
For example, if you are developing several Projects for a Brand campaign, or for the same client – it makes sense to include the name of the Brand and Client in the Project Title. Similarly, it might be useful to be able to identify the financial information about a project by including a Projects finance type or category in the name of the project.
Standardised naming conventions gives team members a common way to refer to projects and re-enforces the underlying system of Project Management in use.
Sometimes strict naming conventions may be required to integrate two separate systems – for example, Pulse and an external finance or production system – to ensure that they can “match” items in each system.
Introducing Automatic Project Naming Conventions
We are introducing the ability to make naming conventions automatic for an Office or Agency because enforcing conventions around the naming of Projects can be difficult.
This new feature will allow Offices(Agencies) to set up an automatic naming convention for Projects created using the Project Wizard. This ensures that all Projects created by the office will be named according to a system that optimal for this office.
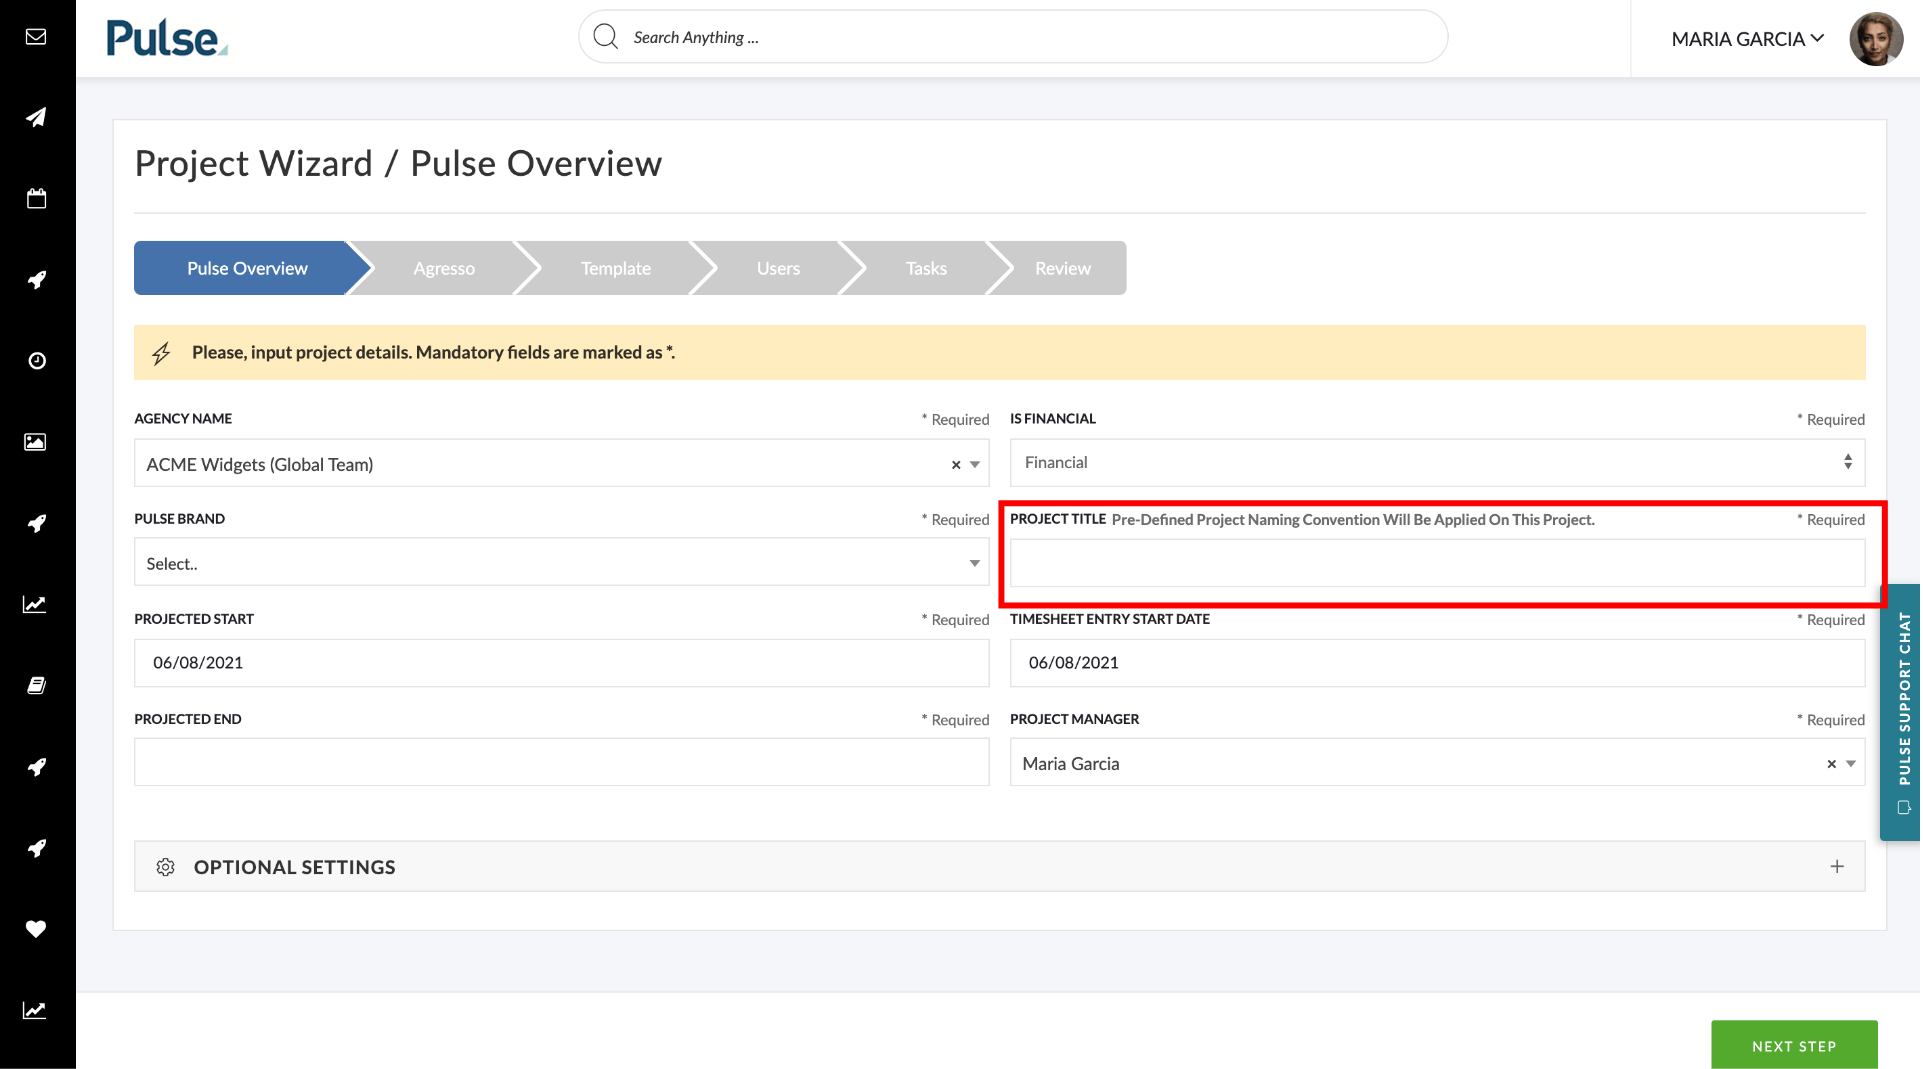
Once you have a Naming Convention enabled for your Office, when you create a new Project in the Project Wizard you will see a tooltip of ‘Pre-Defined Project Naming Convention Will Be Applied On This Project’ above the Project Title field:
How to Design Naming Convention for Your Office
In this first release of this feature, there are 6 fields to choose from:
- Brand
- Client Group
- Project Category (Job Attribute)
- Project Finance Type (Job Attribute)
- Project Title (as entered in the Project Wizard)
- Job Year (which shows as YY)
The available delimiters are:
- space ‘ ‘
- underscore ‘_’
- dash & space ‘ – ‘
- pipe & space ‘ | ‘
You can build the naming convention you want by combining these options, with the particular delimiter you require, in the order you require. For example:
{Brand}-{Project Title}-{Year}
{Project Finance Type}_{Project Category}_{Project Title}
Setting up your Project Naming Convention in the Address Book
You can set up a single naming convention per office (Agency). Setting up the naming convention can be done in the Advanced Settings of your Office in the Address Book, so contact your Customer Success representative to implement it for your office.
Navigate to the Address book and Edit the Office and select the Advanced Settings tab. Scroll the modal until you see the Project Naming Convention Section:
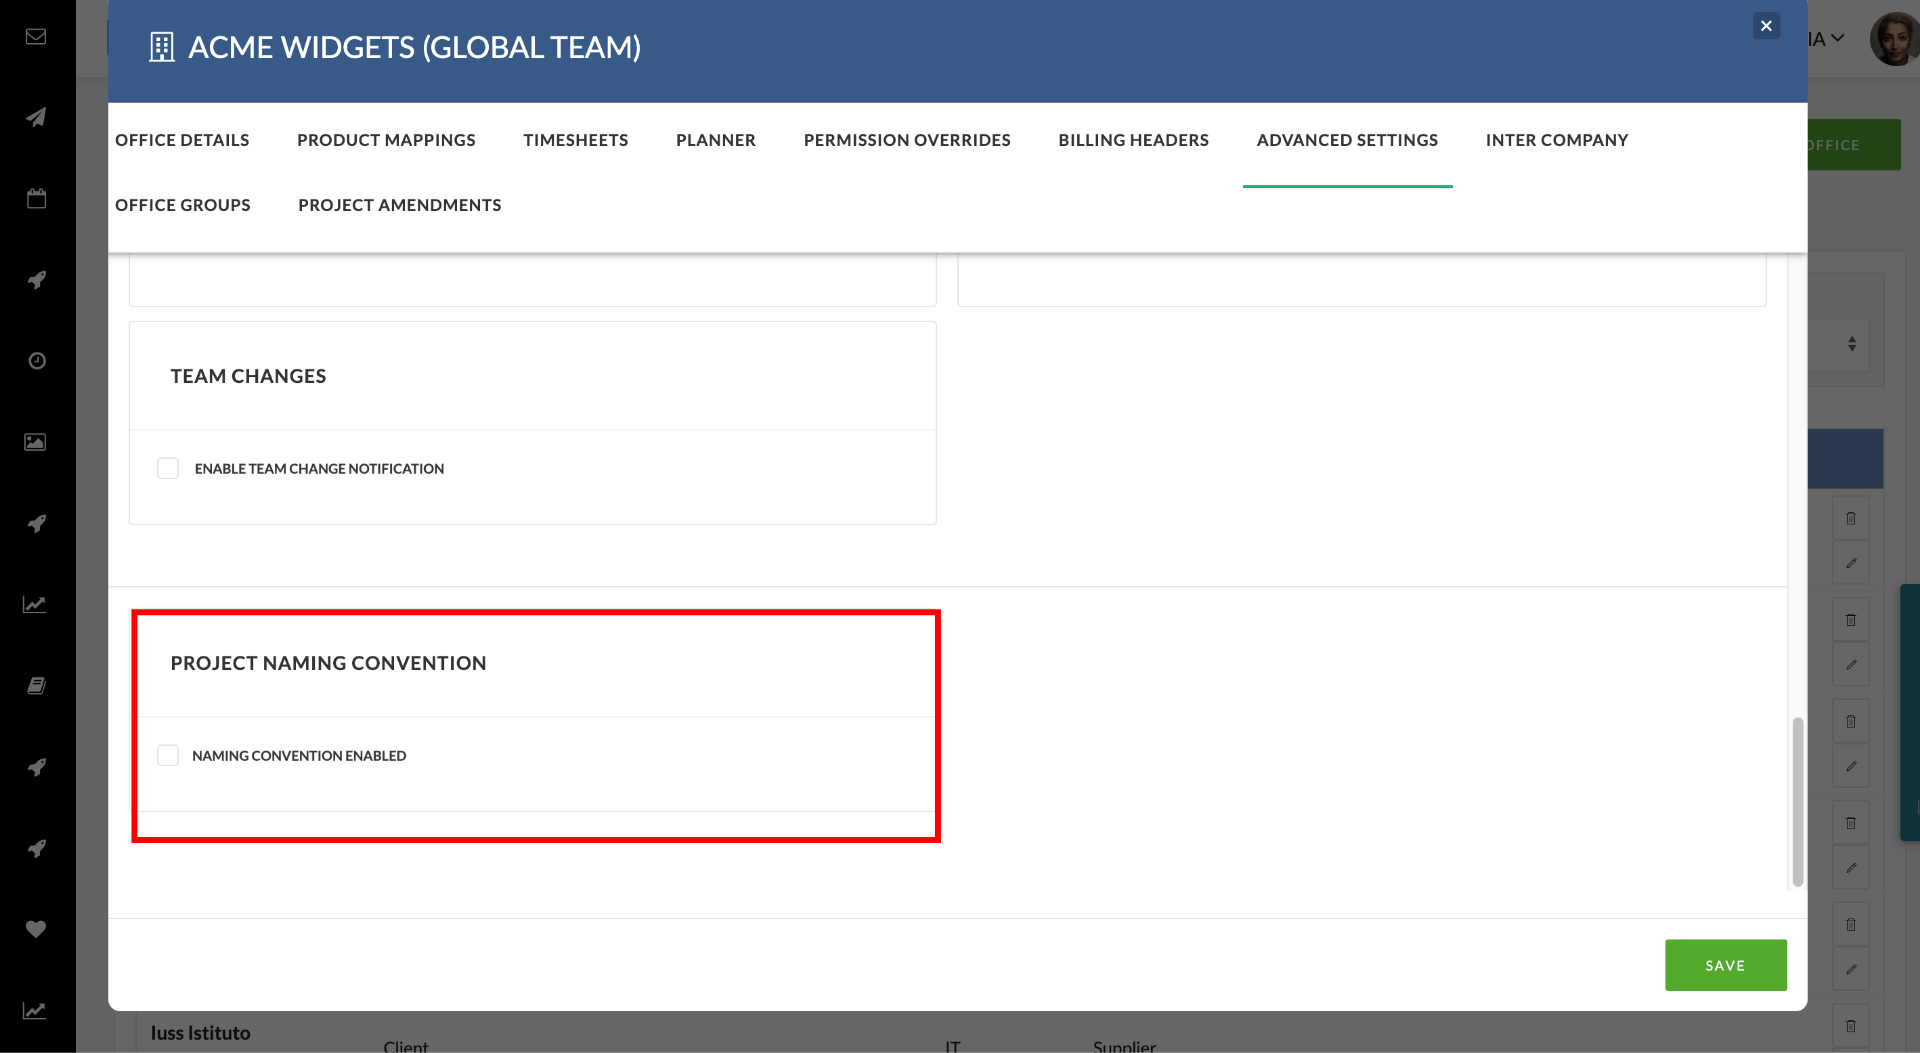
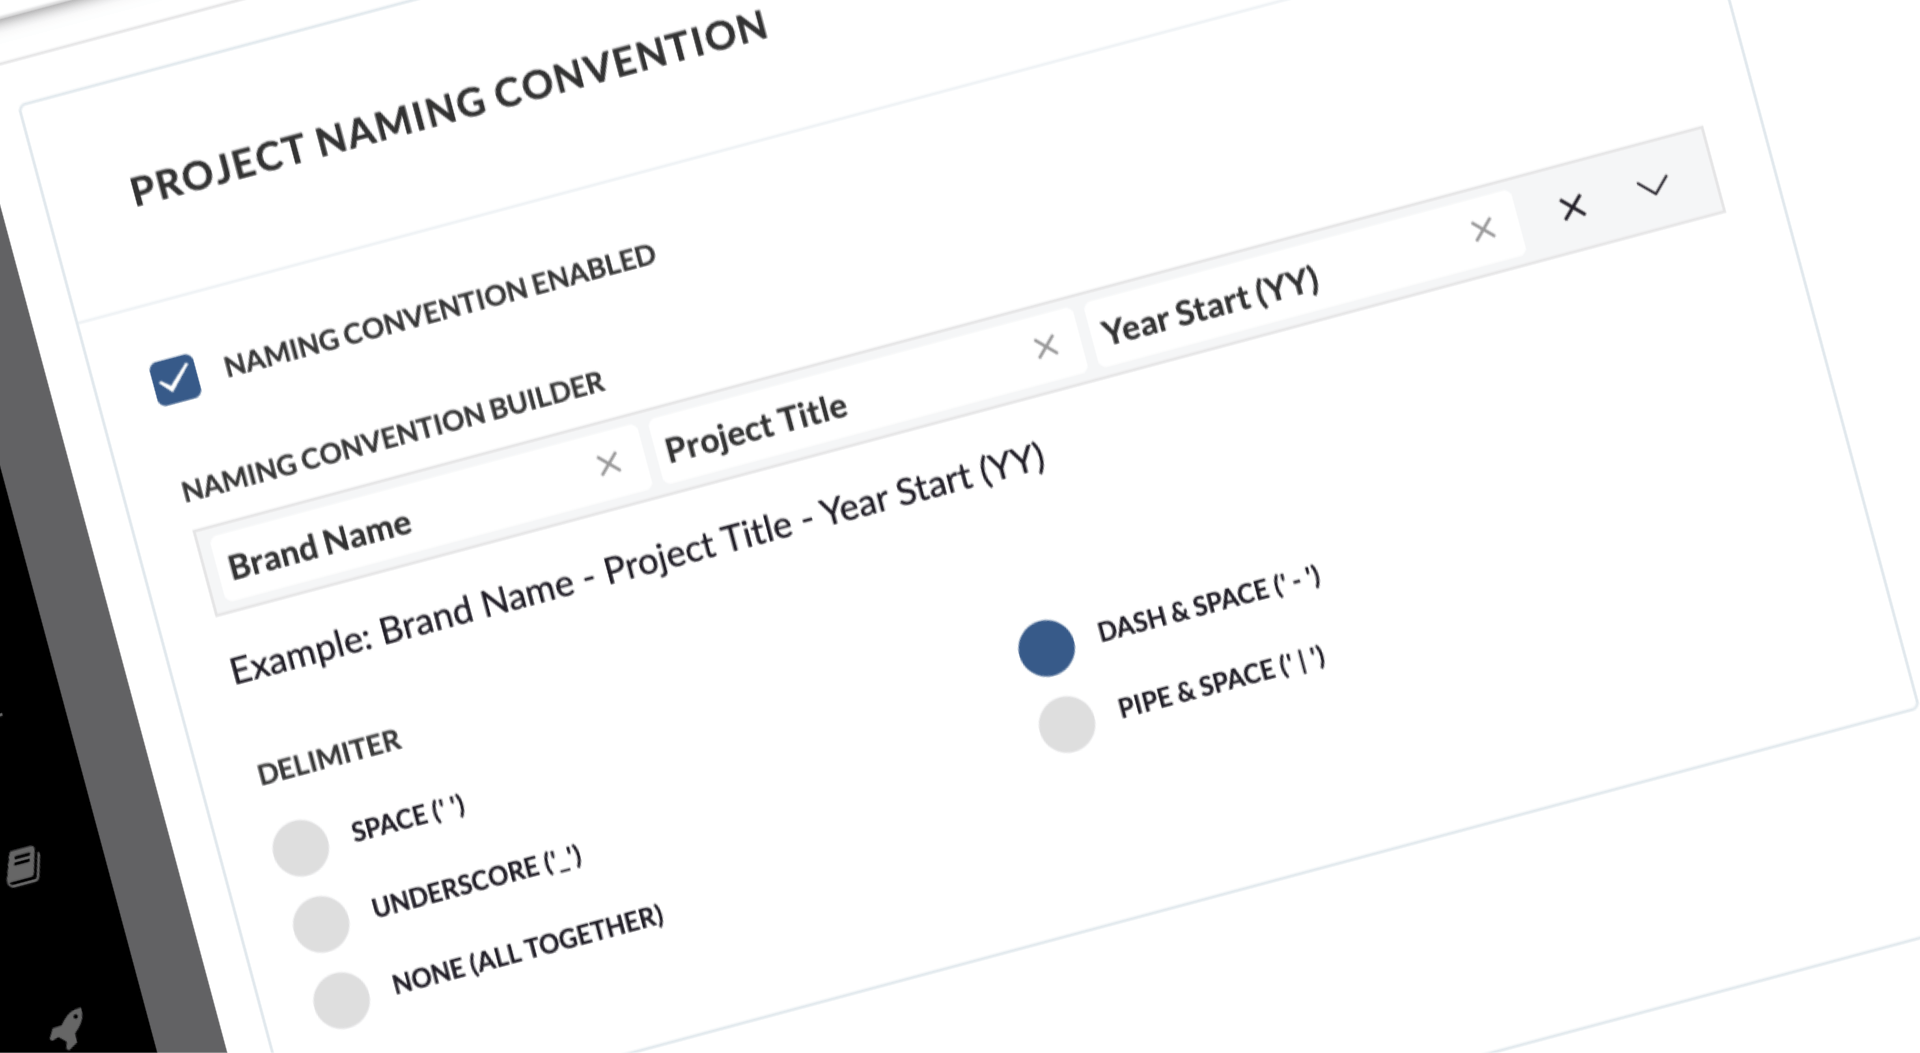
Check the box Naming Convention Enabled -this will reveal further options to build your naming convention:
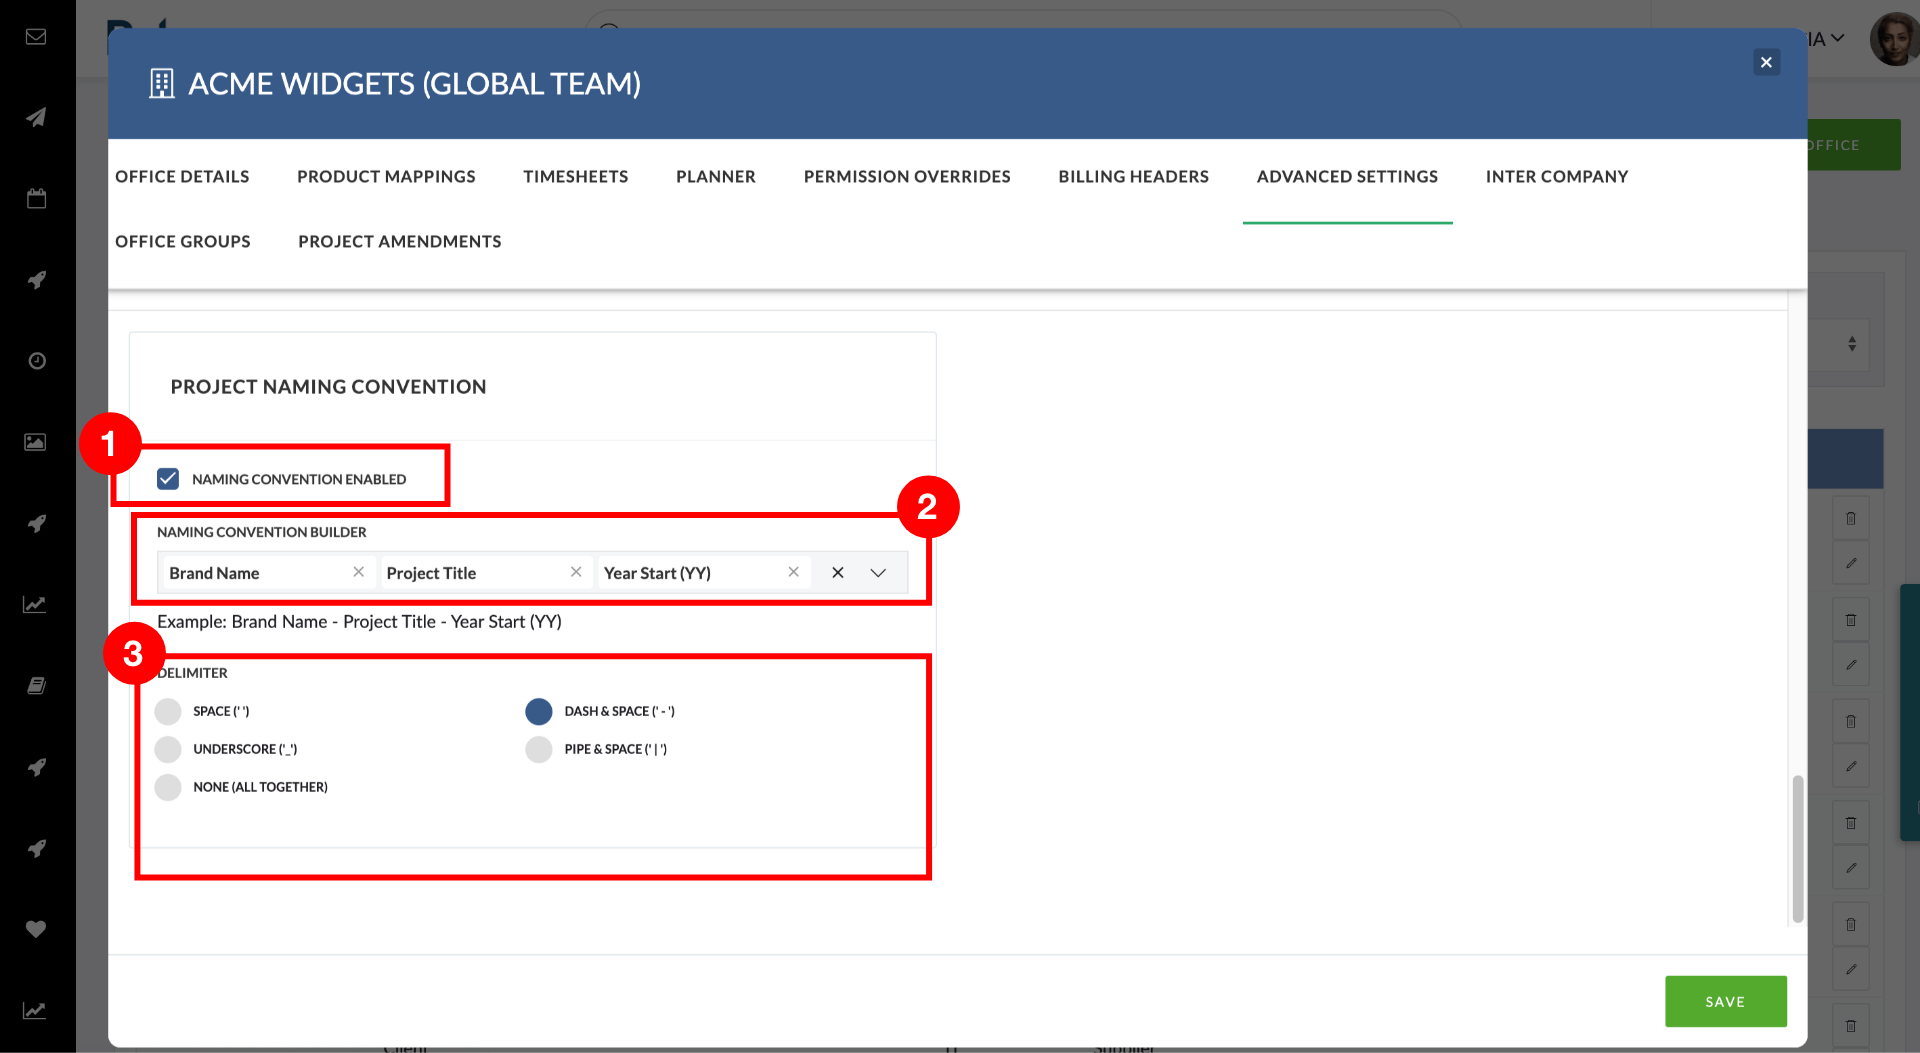
- Naming Convention Enabled Checkbox
Use to disable/enable your naming convention - Naming Convention Builder
Initially, this will appear as a “Search as you type”(SAYT) select box listing the available components of your naming convention. You can add one or more components and use drag-drop to rearrange the order in which the components are assembled into the final name. To remove a component use the small ‘x’ icon. - Delimiter
Select your preferred delimiter – or select none if you would prefer that there is no delimiter.